
10 Man

Sindragosa Strategy Page
saedo — Thu, 10/15/2009 - 11:42
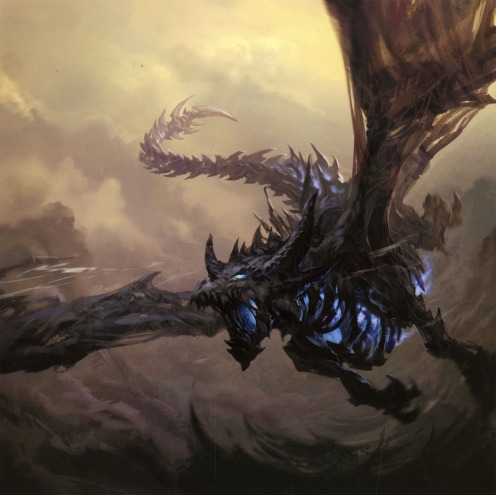
Health:
- 25 Man: 34,900,000
- 10 Man: 9,760,000
- 10 Minute Berserk
Abilities:
- Cleave - Inflicts normal damage plus 50 to an enemy and its nearest allies, affecting up to 10 targets. Melee range. Instant
- Tail Smash - Inflicts 11250 to 18750 damage on enemies in a cone behind the caster, knocking them back. 45 yd range. 1 sec cast
- Frost Aura - Deals 4500 Frost damage to all nearby enemies every 3.0 sec. Instant
- Frost Breath - Inflicts 37000 to 43000 Frost damage to enemies in a 60 yard cone in front of the caster. In addition, the targets' attack speed and chance to dodge are decreased by 50% for 6 sec. Melee range. 1.5 sec cast
- Unchained Magic - Inflicts an arcane malediction on the target, causing any spells cast to result in a backlash of Arcane power after 8 sec. Multiple spellcasts by the afflicted target will intensify the backlash. Unlimited range. Instant
- Instability - Using magic while afflicted with Unchained Magic will build up unstable energy, dealing 2000 Arcane damage to the caster per spell cast, 8 sec after spellcasting ends.
Instant - Permeating Chill - Causes those who attack Sindragosa with physical attacks to be Chilled to the Bone, 1000 frost damage per 2 sec per application, for 8 sec seconds. Instant
- Icy Grip - Extend tendrils of frigid wind to pull all nearby enemies to the caster. 30 yd range. Instant
- Blistering Cold - Deals 35000 Frost damage to enemies within 25 yards. 5 sec cast
- Frost Beacon - Marks a target for imprisonment in an Ice Tomb. 200 yd range. Instant
- Ice Tomb - Conjures spheres of icy energy to entomb enemies in blocks of ice. Entombs the targeted foe and all enemies within 10 yards in ice, Ice Tombs have 786k HP in 25-Man Normal Mode. 200 yd range. Instant. These tombs also block Line of Sight on Mystic Buffet, but anyone inside the tomb has Asphyxiation placed on them
- Frost Bomb - Fires a missile towards a random target. When this missile lands, it deals 5655 to 6345 Shadow damage to all enemies within 10 yards of that location. Unlimited range. 1 sec cast
- Mystic Buffet - Buffets all foes within 200 yards with arcane energy, increasing all magic damage taken by 10% per application for 8 seconds. Stacks 99 times.
Ground Phase: 100%-35%
This is a 3 phase fight, with an alternating Air and Ground phase, with a final Grounded phase at the end. For the most part, it seems like the fight is about learning not to kill yourselves. The raid will receive a fuckton of damage, but a chunk of that can be mitigated by appropriate actions.
We chose to use Frost Resist for the entire raid. This fight can be done with or without it. We went with 300+ FrR (boots and belt) to make the raid healing significantly easier.
Also this phase is your DPS burn down phase, so focus all your dps sometime here. The last phase is more of a control phase.
Cleaves and Tail Smash
As a typical dragon, Sindragosa likes to cleave and Tail Smash. So if you're in front of her, she can cleave up to 10 people. If you're behind her, she'll smack you, knocking you 40 yards away or so.
The raid, well, has to run in avoiding that. Everyone just stay away, pick a side to all group up. The tail smash in particular is an aoe from the point of impact, so you want to be a little more towards the front than the usual hind legs area.
We decided to position her facing 90 degrees from where you enter. Always facing the south (I think, left side when facing in). It's probably not a huge deal and can face any direction as long as the raid is adjusted for it.
Frost Aura
Next thing of note is that she has an aura that hurts the raid throughout the fight. Doing 4500 Frost Damage every 3 seconds, 3000 damage in 10 mans.
So like Sapphiron, Festergut, Blood Queen, and many others, something for the healers to keep busy with.
There isn't any aoe to note of on this phase. So the raid can group up to one side of her to maximize chain heals and other assorted aoe healing.
Frost Breath
Sindragosa also deep breaths, I mean Frost Breaths. It's a 37,000-43,000 frost damage frontal cone attack, which also decreases movement speed by 15%, and attack speeds by 50%.
So, the raid should never be in front of Sindragosa. Except the tank. Even then, healers gotta be prepped for this spike damage. It's a 1.5 second cast, so if you can time CDs to pop with it, go for it. Frost Resist gear will mitigate this significantly.
This is also involved in the Shadowmourne questline. Get hit by this 3 times without dying, and killing Sindragosa. So, if you're not the MT for this fight, you're gonna have to pretty much bribe your healers to save your ass for this. Thrice.
Unchained Magic and Instability
On some timer and going out to several casters in the raid... Unchained Magic is a 30 second debuff that makes each of your spell casts put another debuff on you, Instabiliy.
What Instability does is 8 seconds after your spell cast, it'll do 2000 arcane damage to you. Each additional spell cast you do within that 8 seconds, stacks it. So, 4000, 6000, 8000, etc.
This means, casters, dps, healers alike, can't be just chain casting spells. Stop/slow down dps/healing, or you could wind up killing yourself quite quickly.
Healers likely will have to call out and tag someone else into do their healing spam for them while they slow/stop theirs to wait it out. Either way, likely key to this is to communicate.
On 10 man, it just seems to almost always target 1 healer, and 1 dps. And maybe, the 1 that's doing highest dps/hps in between the debuff periods. This is speculative and seemed to be that way every pull on our kill.
Shadow Priests and Mages can almost ignore this mechanic, but still pay attention to it. Can stack it as high as you want, then use Ice Block / Dispersion to take the backlash damage. So this likely occurs during Air Phases, but still keep an eye on the stacks and your CDs to get through it.
Permeating Chill and Chilled to the Bone
Not to leave the melee and hunters out, they get their own kill themselves mechanic as well. In their version, each physical attack done on Sindragosa has a 20% chance of applying that Chilled to the Bone debuff.
That would be a 1000 Frost Damage per 2 sec DoT, and of course, it stacks.
So, fast attacking melee... Good luck! Watch your debuffs, stop attacking if the DoT gets too high for your healers. Frost Resist does help your survivability, at the cost of dps itself of course.
Tanks, even you might need to stop attacking to let the stacks fall off. So might want to call that off so DPS can "chill" while you're not doing threat. Or maybe they'd be doing that anyways with their own debuffs to worry about.
Icy Grip and Blistering Cold
On some timer, she'll cast Icy Grip, which pulls everyone into melee range. Think a bit like Azuergos, or Cyndragosa.
After accomplishing that, she'll start a 5 second cast for Blistering Cold, 35,000 Frost Damage to anyone within 25 yards.
So raid, run! Run little girls run!
Maybe the tank can stay in, maybe. Might need a CD and fast heals. Otherwise, run out, charge back in.
Warning: You can apparently resist the Icy Grip. One part good that you're not closer to Sindragosa when she starts the cast. One part bad in that you many not notice she started the cast. So pay attention!
Air Phase
Every minute or so, she'll take off into the air.
Frost Beacon
The raid should group up, except those that are marked with those beacons. Sindragosa will mark 5 of them in the 25 man, 2 of them in the 10 man.
We use a "Wall Strat", in which first the entire raid groups up on the stairs. Then, the 5 beacons are to run to the bottom of the stairs and spread out along it. So you'd have 1 in the middle, 1 on either end, and 1 in between each of those. We used the Boss Mod's order of calling out people to position everyone. Example, first one called goes to far left, etc, last one called goes to far right. That pattern.
Icy Tomb and Asphyxiation
Encases each of the Frost Beacon targets in an Ice Block. The Icy Tombs can be attacked, and should be to free them. They have about 786K hp in the 25 man.
These do about 10K damage on impact and chains the Ice Tombs, a bit similar to Hydross bubbles. So they should be spread out, and the raid should get to them after they're formed.
Asphyxiation will start after some time in the blocks, it damages them for 8% of their maximum hp per second, so top them off before it hits and free them before they die.
Frost Bombs
She will be launching 4 of them at us, one at a time. The ground will be glowing and have a small blue-white targeting reticule where the bomb will be hitting. It does 23-27K Frost Damage to everyone within Line of Sight of the point of impact. Well, those Icy Tombs can be used to LoS it.
So as the Frost Bombs comes down, the raid is to shift around the Icy Tombs to always be on the opposite side. While dps'ing them down to free your raid members. But not dps'ing too fast to release all the tombs before the 4th Frost Bomb. Pace yourselves, like only kill half the tombs after a 2nd Frost Bomb is done, then save the last one til the last one is done.
She will land back on the ground after the 4th Frost Bomb hits. Ground Phase begins again for another 1:50.
Grounded Phase
At 30%, she'll be permanently grounded and retains all previous Ground Phase abilities. Plus...
Frost Beacon and Icy Tomb
Just like the Air Phase, she'll probably do this on some timer. The marked raid member should run out of the raid to not chain the Icy Tomb to everyone else.
Set your raid up into 2 ranged camps, both a bit away from Sindragosa. One will be around her midsection, the other will be around her head. Keep the middle/melee area clear. The Ice Tombs are to run into the middle and drop it in front of one of the camps without chaining it. This allows them to use it as a LoS. The ranged/healers are to make sure they stay back to not chain Ice Tombs.
In the meantime, the melee are to DPS the Ice Tombs down. They would be running Tomb to Tomb, and maybe Sindragosa if there's time. But always keep away from where the next Tomb is going to be until it is formed. Do not chain it.
Mystic Buffet
This is a debuff that increases magic damage taken by 15%, per stack, can be LoS'd. So this is why you want to leave an Icy Tomb up. Use it to drop off your stacks when they get high.
You will need your 2nd tank in this phase only. Kinda like how Putricide throws an extra tank in the last phase. This would allow your main tank to go get LoS himself to drop off his stacks.
Anyways, that's all to the fight I believe. Good luck!
Achievements
All You Can Eat - Defeat Sindragosa in 10/25-player mode without any member of your raid receiving more than 4 stacks of Mystic Buffet.
- This sounds like just a raid check. Don't fail at not using Icy Tombs to LoS the debuff off. Quite very likely 2 tanks will be needed for this so they can switch off.
Valithria Dreamwalker Strategy Page
saedo — Thu, 10/15/2009 - 11:38
Health:
- 10 Man: 10M
- 25 Man: 30M
Abilities:
- Summon Nightmare Portal - Nightmare Portals let you phase to alternate version of the room with Valithria and Dream Clouds everywhere in the room, killing one of the clouds will buff anyone within 10 yards of the cloud with Emerald Vigor
- Dreamwalker's Rage - Deals 10000000 Nature damage to all NPCs in the room. This is the spell Valithria casts to end the combat if you manage to bring her back to 100% life.
- Emerald Vigor - Regenerating 200 Mana every 3.0 sec. Increases Damage done by 10%. Increases Healing done by 10%
- Dream Slip - This is the spell used by Valithria to teleport out of the Citadel after you saved her.
Zone Spells:
- Column of Frost - Marks the location under a random player target. After 2 seconds a column of frost errupts from this location, dealing 9425 to 10575 Frost damage to all enemies within 3 yards, knocking them into the air. Instant
Risen Archmage:
- Frostbolt Volley - Inflicts 3770 to 4230 Frost damage to nearby enemies, reducing their movement speed by 50% for 8 sec. Unlimited range. 2 sec cast
- Mana Void - Summons a Mana Void at a random enemies location. This Mana Void burns 1000 mana per second to all enemies within a 6 radius. Lasts 30 seconds. 60 yd range. Instant
Blazing Skeleton:
- Laying Waste - Surrounds the caster in flames for 12 sec, pulsing 5655 to 6345 Fire damage to all enemies every 2.0 sec. Instant
- Fireball - Inflicts 4713 to 5287 Fire damage to an enemy. Unlimited range. 0.5 sec cast
Suppressor:
- Suppression - Reduces healing received by the target by 10%. Unlimited range. Instant
Blistering Zombie:
- Corrosion - Whenever the caster lands a melee swing, the target takes 2500 Nature damage every 3.0 seconds and their armor is reduced by 10%. This effect can stack up to 5 times. Lasts 6 sec. Unlimited range. Instant
- Acid Burst - The caster explodes, dealing 14138 to 15862 Nature damage instantly and 1000 Nature damage per second to all enemies within 15 yards. Lasts 20 sec. 0.75 sec cast
Gluttoneous Abomination:
- Gut Spray - Deals 3000 Nature damage per second and increases Physical damage taken by 25% for 12 sec. Instant
- Rot Worms - Spawns from dead Gluttonous Abominations, they will melee you for ~10k damage
The Fight:
This is yet another Akama style fight in my eyes, that is, for most of the fight, you'll be dealing with adds. But here's the twist in this boss, you don't kill her. Instead, your healers have to heal her up to 100% to beat the encounter. She'll start off at 50% health. Healers get to play the "dps hero" and spam away at her.
Of course, adds will come out making it "difficult" for your raid. They appear to spawn from the gates, on either side of her, split raid accordingly to deal with adds. The soft enrage for this is that the adds will spawn more frequently as the fight goes on so you'll eventually get overwhelmed.
The vid didn't show this happening cause the guy never went in, but it looks like portals can spawn where you go in, kill some clouds which give you a buff, increasing damage/healing and mana regen. We probably want to take turns going in, and get them similar to Loatheb spores, or just send the same group in over and over again. If the same healers are assigned to go in like that, then they can gear for infinite mana and go max Spell Power, since the buff will give all the mana they need.
The portals seem to work like Yogg ones, that is, 1 person per portal, 6 at a time (appear to be 3 in 10 man). Inside the portal, you get to fly around like Kael fight. Look for green clouds to kill to get the buff, and it stacks, so try to get as much as possible. You'll be kicked out after 15 seconds, the debuff lasts 30 seconds. Make the most of it. We'd likely want 2-3 healers in, the rest dps. Healers coming out of it should make the use of the buff and just spam Valithria with heals.
There will be random frost spikes targetted on players, just move away from the targetting circle.
As for the adds...
Blazing Skeleton seem to come 3-4 at a time, appear to just start aoe'ing when they appear. Watch out for their fire shield aoe thing. Kill these asap cause they can do a fuckton of damage.
Risen Archmages seem to come 1-2 at a time from the gates, damage mostly from frostbolt volley, might be interruptable. The other thing he does is summons a void zone of sorts that burns your mana, so don't stand in them. Another source of aoe damage so kill these, mass dispel the slowing effect if that annoys you too much.
Suppressors appear to do nothing but channel into Valithria to suppress heals on her. They're relatively easy to take out. Healers should be aware if they're suppressors on her to not waste heals. Designated 1-2 DPS should be enough to kill them with some maybe splash aoe damage and they can be vocal about when it's good to heal.
Blistering Zombies seem to come 1-2 at time they probably have to be killed fast before the Corrosion stacks. Either that or have it trade tank. But it doesn't seem to be too bad unless the tank is tanking everything else at the same time, last 6 seconds. Maybe it's kitable? It also explodes, not sure when, maybe keep melee away, or just run away at low hp (0.75 sec ast)
Gluttonous Abomination seems to come 1 at time and probably tanked facing away from the raid due to that spray. Their corpses also spawn Rot Worms, which seem to hit decently hard, so tanks be aware to pick those up.
That's about it for the fight. This is a healer fight! Heal the raid and the boss, all up to you to beat this thing!
Gunship Battle Strategy Page
saedo — Thu, 10/15/2009 - 11:22

Abilities:
Muradin Bronzebeard / High Overlord Saurfang:
- Battle Fury - Increases all damage done by 5% (7% in 25). Instant (self buff, stacks with each attack)
- Cleave - Inflicts 110% of normal melee damage to an enemy and its nearest allies, affecting up to 3 targets.
- Rending Throw - Throws your weapon at the enemy causing 8% weapon damage and an additional 2750 Physical damage every 3.0 sec for 15 sec. Unlimited range. Instant
Gunship Cannon:
- Cannon Blast - Launches a cannonball at the target. Inflicts 1000 Siege damage and generates 6 to 10 Heat.
- Incinerating Blast -Consumes all of the cannon's Heat to launch a massive ball of fire at the target. Inflicts 1000 Siege damage plus additional damage per point of Heat.
Sergeants:
- Bladestorm - Instantly Whirlwind up to 4 nearby targets and for the next 6 sec you will perform a whirlwind attack every 1.0 sec. While under the effects of Bladestorm, you can move but cannot perform any other abilities but you do not feel pity or remorse or fear and you cannot be stopped unless killed. Instant
- Experienced - Damage done increased by 30%. Attack and casting speeds increased by 20%. Instant (stacks over time)
- Desperate Resolve - Increases armor and attack speed by 60% (120% armor in 25). Instant (occurs near death)
- Wounding Strike - Inflicts 200% weapon damage and leaves the target wounded, reducing the effectiveness of any healing by 25% (40% in 25) for 10 sec. Melee range. Instant
Reavers:
- Experienced - Damage done increased by 30%. Attack and casting speeds increased by 20%. Instant (stacks over time)
- Desperate Resolve - Increases armor and attack speed by 60% (120% armor in 25). Instant (occurs near death)
Battle Mage:
- Below Zero - Freezes the target in a block of ice by concentrating and freezing moisture in the air. The caster must channel to maintain the ice block. Unlimited range. Instant
Rocketeers:
- Explosion - The rocket explodes, inflicting 6300 to 7700 Fire damage to nearby enemies and Siege damage to the enemy gunship. Unlimited range. Instant
- Rocket Artilery - Launches a rocket that explodes on impact, inflicting Fire damage to nearby enemies and Siege damage to the enemy gunship. Unlimited range. 5 sec cast
- Experienced - Damage done increased by 30%. Attack and casting speeds increased by 20%. Instant (stacks over time)
- Desperate Resolve - Increases armor and attack speed by 60% (120% armor in 25). Instant (occurs near death)
Axethrowers:
- Hurl Axe - Hurl an axe at the target, inflicting 5700-6300 Physical damage. Unlimited range. 2 sec cast
- Experienced - Damage done increased by 30%. Attack and casting speeds increased by 20%. Instant (stacks over time)
- Desperate Resolve - Increases armor and attack speed by 60% (120% armor in 25). Instant (occurs near death)
The Fight:
This is the whole Horde vs Alliance Gunship battle. The goal is it use the ship's Cannons to destroy the other ship before they destroy your ship.
Before you start, everyone should talk to the goblin npc to get yourself a Jetpack, hotkey it, put it on your action bars or something. This is the means to jump from one ship to the other.
Cannons
There'll be 4 (2 in 10 man) of these. They work on an Overheat mechanic. Using "1", the Cannon Blast, will do the attack and fill your bar with "Heat" (your combo point mechanic). When the bar fills up, you overheat and will be immobalized for 5 seconds. Using "2", the Incinerating Blast, will remove all your heat and do extra damage. So the goal is, to get as much Heat as possible without Overheating, and use the Incinerating Blast. Watch the guages and don't mindlessly spam.
Use these to damage the boat and kill adds over there when you can.
Anyone can do this, healers if you normally heavy in them if you want. Preferably your melee dps (lowest) cause they're not as useful on the defending boat, and can always jump to the attacking one when needed.
Meanwhile the rest of the raid will have to deal with adds. Both on the defending ship and the attacking ship, so assign people to jump over (pref melee) when it's time.
Also, every single one of these adds has 2 common "abilities". Experienced, which is a stacking buff that grows over time, try to make sure to kill any long standing add up or they'll start hitting real hard/fast. Desperate Resolve, which makes them hit faster at low health so a bit of spike damage just before they die.
Defenders
Occasionally, a portal will spawn and a group of adds start spawning. You'll need 1 tank, a few healers, and a bunch of dps. Preferably the ranged, as it'll be easier if they can aoe the adds while at range.
Reavers / Marines
These are more like the fodder adds. They're "smaller", greater numbers, no real special abilities, but just hits hard. So the tank has to gather them up, aoe them down.
Sergeants
These are the big guys in the group. They hit harder, have a Mortal Strike (Wounding Strike), and they can Bladestorm. This is why it's preferable to have ranged. Easier to dodge it while keeping up with the aoe than melee would be.
One last note, your ship captain (Muradin/Saurfang) can join the fight and help with these adds. You just need to draw their attention so the tank drags adds over to him if he didn't aggro on to them yet.
Another last note, on this boat you'll also be the target of Rocket Strikes, it'll be a big red/orange targeting reticule under you. Try not to stand under them, it's extra damage to avoid.
Heroic Mode: These Rocket Strikes will have a 7 yard knockback to them when you're hit. So more of an annoyance than before.
Attackers
Using the Jetpacks, send over a tank, and the melee dps (preferably) to attack the other ship. The healers can stay on the Defending boat to heal so long as people stay in range.
You can send over the team right away to start culling the adds. Or you can just wait around til a Battle Mage (Sorcerer) appears. More on those later
Saurfang / Muradin
On the Attacking boat, their ship captain will have to be picked up and tanked. Hits hard and cleaves, so tank should go over first and make sure to tank in range of healers.
The only "trick" he does is Battle Fury which is a self stacking buff that increases his damage done per stack. It stacks with every attack he attempts, with a small internal CD, so eventually it'll start hitting real hard.
The tank is to merely keep his attention for as long as possible, say 10-15, maybe 20 stacks if you got the CDs, and call for an evacuation of the boat. Everyone leaves, wait for the stacks to fall off before returning, then repeat.
There is one more thing he does, Rending Throw, which is a stacking bleed thrown from ranged whenever he's not being tanked. This means people just need to out range him on the boat to force a reset.
Last note, don't kill him, or even bother trying. It's a waste of time, and there's a few reports it either bugs the whole encounter out, or he insta wipes your raid.
The rest of the adds do not really hit back so can be attacked recklessly. They merely target randomly to our boat with their attacks. The cannons can also be used to burn them down.
Rocketeers / Morter
At the back of the ship, these guys are the ones firing rockets at the ship. Killing these would slow them down. They have low hp and can be burned fairly fast.
Axethrowers / Riflemen
At the front of the ship are these guys shooting at the people on your ship. They can be easily reached by the ranged dps from our ship as well as Cannon fire. These have slightly more hp and in greater numbers. Killing these would reduce some raid damage.
Battle Mage / Sorcerer
These will spawn then do nothing but channel a spell that freezes all your cannons. i.e. make them completely inoperable. This is when your dps on the attacking boat must all focus it down. The mage won't be attacking back, so kill fast then the fight with the cannons can resume.
If need be, the ones on the cannon or any other spare dps can jump over to kill the mage to make it all the more faster.
And that's all to the fight, just repeat, jumping back and forth when need be. Collect free loot.
Hard Mode Summary
Besides hitting harder and having more HP... The Rocket Strikes will do a 7 yard knockback. Fun times!
Achievements:
I'm on a Boat - Claim victory in the Gunship Battle in which every raid member visits the enemy gunship only once in 10/25-player mode.
- In the 10 man, we first waited until the first Mage appears before sending the Attackers over. They stay on for a couple of Mages before jumping back. Then the 2nd team waits for a battle mage, and they jump over, kill ship before they all die. One thing of note, brez's or use of rocket pack on the attacking ship will negate the achievement. It appears to try to figure it out by how many times your feet lands on the ship, so don't do any jet pack kiting.
Deathbringer Saurfang Strategy Page
saedo — Thu, 10/15/2009 - 11:19

Health:
- 10 Man - 8.785M
- 10 Man Heroic - 12.3M
- 25 Man - 31.86M
- 25 Man Heroic - 43.93M
Abilities:
- Blood Power - Saurfang grows 1% larger and deals 1% more damage for each point of Blood Power he has. Instant
- Blood Link - Saurfang gains Blood Power from damage he inflicts with abilities and summoned creatures. Instant
- Call Blood Beast - Saurfang calls forth 5 (2 in 10 man) blood beasts every 30 seconds
- Rune of Blood - Saurfang leeches health when he performs melee attacks on targets marked with Rune of Blood. Leeches 5100 to 6900 health from an enemy target and heals Saurfang for 5 times that amount (gains 1 Blood Power per hit)
- Boiling Blood - Boils the blood of an enemy, inflicting 9500 Physical damage every 3 sec for 24 sec, up to 6 players in 25 man (gains 1 Blood Power per tick)
- Blood Nova - Blood explodes outward from a random enemy target, inflicting 10000 Physical damage to nearby enemies. (gains 2 Blood Power per target hit)
- Mark of the Fallen Champion - Deathbringer Saurfang's melee attacks splash to the target, inflicting 3800 to 4200 additional Physical damage. If the target dies while under this effect Saurfang is healed for 5% of his total health. (20% in Heroic) This debuff is casted on a raid member each time Saurfang reaches 100 Blood Power. (gains 1 Blood Power per tick)
- Frenzy - Saurfang goes into a frenzy, increasing his attack speed by 30%. Instant (occurs at 25%)
Blood Beasts
- Resiliant Skin - The thick skin of this creature reduces damage from area effect attacks by 95% and damage from Diseases by 70%
- Scent of Blood - Saurfang's Blood Beasts catch the scent of blood, reducing all nearby enemies movement speed by 80% and increasing their damage by 300% for 10 seconds. (Heroic only)
The Fight:
Blood Power
The basis of the entire fight is Blood Power. Just about everything he does will build up it up, increasing his damage by 1% each time. This builds up to 100 and will be expended to perform...
Mark of the Fallen Champion
Thrown out on some random non-tank player, it does 4K ish damage per attack Saurfang himself does. So, basically a constant hard hitting DoT to deal with. And should they die, Saurfang will heal himself for 5% (Heroic: 20%).
So, keep them alive. Pally beacons work well to keep a constant heal on them. And should they die, do not battle rez them, the debuff persists after death til the fight is over so they'd just instantly die again and healing Saurfang.
Blood Beasts
Throughout the fight, Saurfang summons Blood Beasts, 5 in 25 man, 2 in 10 man. Every time they hit someone, Saurfang gains Blood Power, so ideally, they are not to be tanked but ranged dps'd down.
Also resistant to AoE and Diseases, so single target damage must be applied. Kite them, root them, stun them, snare them etc. Hope the ranged can burn them all down fast enough each round.
Heroic: They gain Scent of Blood which is a short range aoe debuff they put out on the raid, while gaining a 300% damage buff. That basically means they one shot anyone, including tanks, so stay away. The debuff also slows your movement speed, so would be very dangerous to kite if you get caught up in it. Basically all means, kite perfectly or you (and the raid) are probably dead.
Blood Nova
The last tricks he has are these, Blood Nova is a "bomb" type debuff on the raid. Ranged targeted only (with sufficient numbers), but basically the mechanic that makes sure your ranged spread out. They get targetted, they "blow up", hurt people around, and Saurfang gains 2 Blood Power for each additional person it hits.
Boiling Blood
A DoT on random people. Gains blood power through each tick. Heal through it.
Frenzy
And at 30%, increases attack speed by 30%. You gotta deal with more damage, and likely Blood Power gaining more rapidly. So, the final push, pop everything, burn him down and collect loots.
Not a lot of tricksy abilties and mechanics, just can be brutal on damage and healers (pending appropriate gear level).
Hard Mode Summary
The Blood Beasts can one shot anyone, including tanks. Stay away and kite. Also more Blood Power generation so likely looking at 5-6 marks on your first 25 man kill.
Achievements:
I've Gone and Made a Mess - Defeat the Deathbringer before Mark of the Fallen Champion is cast five times in 25-player mode (3 in 10 man).
- Just be good at avoiding gaining Blood Power and or have high enough dps to zerg through it.
Lady Deathwhisper Strategy Page
saedo — Thu, 10/15/2009 - 11:18

Health:
- 10 Man: 3.3M (3.3M Mana)
- 25 Man: 13.4M (14M Mana)
- Berserk: 10 min
Abilities:
- Mana Barrier - Envelops the caster in a powerful barrier that continually replenishes any lost health, at the expense of the caster's mana. Instant
- Dominate Mind - Mind controls the target. Damage increased by 200%. Healing increased by 500%. Lasts 20 sec. Unlimited range. Instant
- Death and Decay - 3000 Shadow damage inflicted every 1.0 sec to all targets in the affected area for 10 sec. 100 yd range. Instant
Phase 1 Only:
- Shadow Bolt - Inflicts 9188 to 11812 Shadow damage to an enemy. 100 yd range. 2 sec cast
- Dark Empowerment - Empowers the recipient, causing them to gain additional abilities.
Phase 2 Only:
- Frost Bolt - Inflicts 44850 to 47150 Frost damage to an enemy and reduces its movement speed by 50% for 4 sec. 40 yd range. 2 sec cast
- Vengeful Spirit - Deathwhisper summons a Vengeful Spirit. Vengeful Spirit persues a player for a short period of time. If caught, they will explode for 17370 to 18630 Shadowfrost damage to the target.
- Touch of Insigificance - Reduces the target's threat generation by 20%. Instant. Stacks to five. Lasts 30 seconds.
Cult Adherant (Reanimated Adherant):
- Frost Fever - A disease dealing Frost damage every 3 sec and reducing the target's melee and ranged attack speed by 14% for 15 sec. Unlimited range. Instant
- Curse of Torpor - Afflicts an enemy target with a curse that increases ability cooldowns by 15 sec. 100 yd range. 1 sec cast
- Deathchill Bolt - Deals 8788 to 10212 Shadowfrost damage to an enemy target. 45 yd range. 2 sec cast
- Dark Empowerment - Empowers the recipient's spells, causing them to deal area damage and making them uninterruptable. 200 yd range. 2 sec cast
- Deathchill Blast - Deals 9250 to 10750 Shadowfrost damage to all enemies within 10 yards of the target. 45 yd range. 2 sec cast (cast under Dark Empowerment)
- Shroud of the Occult - Envelops the caster in a powerful barrier that deflects all harmful magic, prevents cast interruption, and absorbs up to 100000 damage before breaking. Instant (cast under Dark Empowerment)
- Dark Martyrdom - The caster surrenders to dark energies, exploding to deal 18000 Plague damage to all enemies within 15 yards, and leaving only skeletal remains behind. 200 yd range. 4 sec cast
- Adherent's Determination - Nearly impervious to magical damage. 99% reduction. Always active (Only Reanimated)
Cult Fanatic (Reanimated Fanatic):
- Shadow Cleave - Inflicts 15913 to 17587 Shadow damage to enemies in front of the attacker. Melee range. Instant
- Necrotic Strike - Strikes an enemy with a cursed blade, dealing 70% of weapon damage to the target and inflicting a lasting malady that negates the next 15000 healing received. Melee range. Instant
- Vampiric Might - Empowers the caster with dark might, increasing all damage dealt by 25% and heal the caster for 300% of his damage dealt. Instant (cast under Dark Empowerment)
- Dark Martyrdom - The caster surrenders to dark energies, exploding to deal 18000 Plague damage to all enemies within 15 yards, and leaving only skeletal remains behind. 200 yd range. 4 sec cast
- Fanatic's Determination - Nearly impervious to physical damage. 99% reduction. Always active (Only Reanimated)
Phase 1:
This fight is a bit like Akama or M'uru. In which most of the hard part is to deal with adds. Then an easier part burning the boss down.
Positioning
The raid should all stand behind her up on the platform, on top of the stairs. This allows everyone to be relatively close for ease of target switching and healing. Also if you stay above, it forces Line of Sight to get the adds to come to you. The raid can position themselves behind her before the pull if you hug the walls (think Morogrim).
Mana Barrier
When pulled, she'll put up a Mana Barrier. Which means all damage done to her will instead drain her mana. This marks Phase 1. Deplete that mana to start Phase 2. There is no aggro in this phase, your dps can go all out on her inbetween adds.
Shadow Bolts
Meanwhile she just randomly casts Shadow Bolts to people in the raid. Something to heal through. This is only in Phase 1.
Dominate Mind
In 25 man only, she will occasionally mind control people. The usual doing more damage and healing and growing real large. Like Kel'thuzad thing. CC those people. Don't kill them.
Heroic: In 25 man she'll MC 3 people at a time. In 10 man, she will MC 1 person.
Death and Decay
She will be randomly dropping green puddles of do not stand in void zones shit. Obviously, do not stand in them, they can really hurt.
Adds
On either side of the room, in those glowing alcoves, adds will spawn. One from each, so 3 from each side total. Alternating type of adds, that is, it'll be Fanatic, Adherent, Fanatic on one side, and Adherent, Fanatic, Adherent on the other side.
In 10 man, only 1 side will spawn at a time, alternating. In 25 man, both sides spawn at the same time, with an additional one coming from the back (or the entrance where you came).
Use the platform LoS to bottleneck them to your raid. They continue to spawn on a timer throughout all of Phase 1.
Heroic: The waves come in faster and continue to spawn into Phase 2. Except, in 25 man, only 1 side at a time alternating, like how 10 man is. In 10 man, it's the extra add from the back that spawns, like how the 25 man has one.
Dark Empowerment
Deathwhisper will occasionally empower adds, giving them more and dangerous abilities (explained later).
Reanimate
She will also be able to resurrect the skeletal remains of adds. That is only those that died to Dark Martyrdom. This is something all adds can do, they randomly just explode leaving "skeletal remains" behind. These are the targets Deathwhisper can revive.
Cult Adherent
The caster type add that spawns. Does not need to be particularly tanked. Mainly casts Deathchill Bolt, which can be kicked or just healed through.
There's Frost Fever, a disease that slows attack speeds. And the most annoying move to your raid, Curse of Torpor. It's a 15 sec curse in which every ability you perform will be given a 15 sec CD. So if not careful, you'll lock out all your main abilities. Decurse it.
Last major thing is Shroud of the Occult in which he'll reflect all spells back, absorb about 100K of damage, and prevents interrupts. So this is where physical dps is best for this mob. But, if you are caster heavy, you can try to kill these before the Shroud is put up, which happens randomly.
Empowered Adherent
When empowered, he changes from casting Deathchill Bolts into Deathchill Blasts. This means his target receives aoe splash damage, so it's more dangerous. More important to interrupt, or burn through that Shroud so you can interrupt.
Reanimated Adherant
After being resurrected, it's basically the same abilities as a normal Adherent. Except, it is now 99% impervious to magic attacks. So physical dps have to take these down.
Cult Fanatic
These are the melee type mobs and must be tanked. It hits hard and cleaves, so tank and face away. Also does a Necrotic Strike, which negates about 14K of healing, think like Jaraxxus' Incinerate Flesh but without the time limit inferno afterwards and it's on the tanks.
Also does Vampiric Might increasing his damage by 25%, and heals for 300% of the damage it does, so that should be dispelled, or spell stolen, or something. Extra damage is always bad.
Deformed Fanatic
This is what happens when Deathwhisper empowers these adds. They hit really really hard now. But they also move slower. Your best bet is to start kiting these. Hunters or something or other. Ranged will want to switch and finish these ASAP.
Reanimated Fanatic
This time, they're 99% impervious to physical attacks. So your casters' turn to deal with these.
Phase 2:
Phase 2 will start the after you burn off all her mana. Aggro is reset, so have a tank be ready to pick her up. Would be ideal to push her over after adds are cleared inbetween add waves. Otherwise, clean up remaining adds before the raid deals with her.
She continues to have Phase 1 abilities such as Dominate Mind (if applicable) and Death and Decay. Only the Shadow Bolts stop and they change to the below abilities.
Frostbolts
The shadow bolts stop and frost bolts begin. These do about 50K unmitigated, and does not appear to be resistible. They are interruptable though. Set up your kick rotation to save your tank unnecessary damage.
Frostbolt Volley
The other thing he does. Not interruptable, basic raid wide aoe damage to heal through. And snares you too.
Touch of Insignificance
This kind of forces a 2 tank fight in Phase 2. It's a stacking debuff that reduces the tank's threat generation by 20%, stacks to 5.
Well it's not exactly a tank killer debuff, it will eventually make your dps pull aggro. It is one tankable if you have enough Tricks of the Trade, Misdirections, and aggro drops to carry your raid through it. Otherwise, trade taunts.
Heroic: She is not tauntable in heroic mode. This forces a more Gurtogg like tank switches. In that the dps have to stay below the threat of both tanks. Switch your MD's and Tricks to current tanks appropriately.
Vengeful Shades
She will begin summoning these ghosts. Similar to those ghosts you see that spawn after something dies and follows you around doing damage but you can't hurt them back. If you remember those, yea those.
Similar to that, the Shade will follow someone randomly. If it touches you, you get hurt. So run away to avoid damage.
Heroic: The Shades will not just hurt one person, but explode hurting everyone within 20 yards. This makes an emphasis on the target of the Shade to run the hell out of the raid and away from people.
That's it. Burn down her hp this time while dealing with the above abilities and you win.
Hard Mode Summary:
More health and damage obviously. In particular to note Death and Decay will really really hurt if you don't run out of it.
Add waves come in faster. Also they continue in Phase 2, but reduced in numbers. In 25 man, only 1 side will spawn at a time, alternating, similar to 10 man. In 10 man, 1 add continues to spawn from the back, similar to the extra add in 25 man.
In Phase 2 she is not tauntable. Tank switches must be done similar to Gurtogg, with dps staying below both tanks in threat. Using Tricks and MDs will help with that. It can be one tanked with enough of those to throw at your tanks if you're willing to try that.
The Vengeful Shades will do a 20 yard explosion instead of single target blast, so that guy has to run run run.
Achievements:
Full House - Defeat Lady Deathwhisper with at least five different types of Cultists active at the time of her demise in 10/25-player mode.
It does require some RNG and constant CC / kiting. Here's what we did (in 10 man at least):
1. Leave the first wave up. Watch if any of them transforms into what we need. If they do...
- Deformed Fanatic are to be kited the rest of fight
- Reanimated Fanatic are to be chain feared by pallies
- Reanimated Cultist are to be shackled
2. When the 2nd wave appears, kill off any extras you may have accumulated. You only need 1 of each of the above (for now).
3. Meanwhile, burn Deathwhisper's mana to very low, and wait. Wait til you do have all 3 of the above. Continue killing extras, you may wish to kill off the olders ones as newer ones likely have more HP.
4. When you do get all 3, wait for the next wave to spawn and quickly burn down the shield, Heroism and everything. This hopefully prevents Deathwhisper from doing anything to that wave of adds so you'd get your normal Fanatics and Adherents.
5. Kill off extras again if you have them. Kill Deathwhisper.
Videos:
Lord Marrowgar Strategy Page
saedo — Thu, 10/15/2009 - 11:17

Health:
- 25 Man: 23,700,000
- 25 Man Heroic: 31,376,000
- 10 Man: 6,972,500
- 10 Man Heroic: 10,500,000
- 10 Minute Berserk
Abilities:
- Saber Lash - Inflicts 300% weapon damage (200% in 10 man) split evenly between the target and its 2 nearest allies.
- Coldflame - Inflicts 6,000 Frost damage every 1 second to everyone standing in it
- Bone Spike Graveyard - Impales 3 random players (1 in 10 man) in a Bone Spike, which does 9000 physical damage and then 10% of their maximum health every second until destroyed. Bone Spikes have 63,000 health on 25 man, 39,000 health on 10 man.
- Bone Storm - Attacks nearby enemies in a whirlwind of bone. Does more damage the closer you are to him, about 6000 damage every 2 seconds on top of him, 800 damage when far away.
The FIght:
This is a simple fight requiring only 2-3 tanks. There's stuff to not stand in. Things other than the boss to dps down. And things to run away from. Otherwise, simple tank and spank.
Saber Lash
Marrowgar's first trick is that he does often 300% weapon damage (200% in 10 man) to the tank, but split among 2 others nearby him. So it's similar to Mother Shahraz, you'd want 2 other tanks to stand stack with your MT to simply soak. Possible with 2 tanks, just know that there'd be spiked up damage instead of "normal" looking damage.
Let your tanks do the pull, make sure they're the first ones there. And the rest of the raid, don't be anywhere near them.
Coldflame
Marrowgar will spawn these doomfire like things. It's a trail of flame (frost) that you don't want to stand in. But the simple part is that it only goes out in a straight line. So fairly easy to dodge by just strafing to the side if one heads towards you.
The raid itself can avoid most if not all the Coldflames if they stand inside his gigantic hitbox. Hunters are out of luck though. The fires appear to spawn just outside his hitbox and shoots outward, so the inside is never hit.
Bone Spike Graveyard
Marrowgar will impale 3 random non-tank players (1 in 10 man) doing 9000 physical damage to them, then it takes 10% of their hp per sec while they're in them. The only way to free them (no bubbles, no ice blocks) is to kill the Bone Spikes. They have 63,000 hp in the 25 man, 39,000 hp in the 10 man.
The dps should be switching to these and breaking them out asap. If the raid is grouped up together, stacking, it would help minimize any run time melee has to make.
Bone Storm
Marrowgar will start whirlwinding around. Think like Leotheras. Random no aggro targetting flying around the room. He chases about 4 different targets before stopping.
The entire raid will be hit, but the damage is based on proximity to him. If you're on top of him, about 6000 every 2 seconds. Further out in his hitbox, 4000 damage. Just outside even, 2000 damage. And about 800 damage if you're 30 yards out.
Also, Coldflame still occurs during this. As the raid is probably spread out, they'll fly out in more "random" directions. But it'll be 4 at a time from each of his "sides" when he stops a bit on his target of choice during the whirlwind.
Anyways, aggro is reset after this is finished, so dps hold back just a little until tanks reach him. Repeat the above stuff until Bone Storm occurs again.
Heroic: Bone Spikes will occur during this so have to switch to dps this phase too.
Heroic Mode Summary:
More damage, more HP obviously.
Coldflame now is more of a targeted flame. Still goes in a straight line, but not set 4 points from Marrowgar. So a bit harder to dodge, during whirlwind at least, you can still stack up to avoid it otherwise.
Bone Spike Graveyards will still occur during Bone Storms. Raid has to switch to kill them asap in all both phases now.
In 10 man, the increased damage forced us to all take up assigned positions in that inner circle. Keeps everyone close together while spread out. Using 5 points, for example N, NE, E, W, NW, or something. A half circle with 2-3 people in each.
For Bone Spikes, they're mostly ranged priority, the melee won't run into dps Bone Spikes, just handle whatever's near by, worry more about them after Bone Storm. Healers keep those up in the meantime, and BoP anyone spiked and bone stormed at the same time. Priority is survival.
In 25 man, the fight is more forgiving. You have more healers, more ranged, and more people Marrowgar can target to Bone Storm / Spike. Spread out a bit more, make sure healers and ranged are covered around the room. Again clump up as minimal as possible and heal / kill spikes when convenient. Survive!
Achievements
Boned - Defeat Lord Marrowgar without any raid member remaining impaled for more than 8 seconds in 10/25-player mode.
- This is merely a raid target switch check. Easily done if everyone switches. And if done like mentioned with most of the raid stacking up in the hit box, every dps should easily be able to reach a Bone Spike to kill asap.
Icecrown Citadel Strategy Page
saedo — Thu, 10/15/2009 - 11:09
Ripped from Blizzard!
All across the lands of Northrend, many battles have been fought against the vile Scourge. Countless lives have been lost since the Alliance and Horde first reached the frozen wastes, but the champions of Azeroth continue to march forward. Now Icecrown Citadel, the cornerstone of the Scourge's power and the home base of the Lich King, is their final target. Tirion Fordring and the Argent Crusade have forged an alliance with Darion Mograine and the Knights of the Ebon Blade to form the Ashen Verdict. The strongest combatants of this coalition, along with the champions of the Alliance and Horde, will lead the charge against the citadel.
This dungeon reveals the culminating story events and battles of the Wrath of the Lich King expansion pack. Join the legendary heroes Highlord Tirion Fordring, High Overlord Saurfang, Muradin Bronzebeard, Highlord Darion Mograine, and King Varian Wrynn in an epic battle against the Scourge and their master. Icecrown Citadel features 10- and 25-player versions of the raid dungeon, and each version has 12 encounters. Each encounter can be fought in either normal or Heroic mode, and players can use a new user interface feature to toggle easily between difficulties. The rewards in the raid dungeon start at item level 251 in the normal mode with 10-player encounters, increase to item level 264 in the Heroic mode mode with 10 players and the normal mode with 25-player encounters, and then finally reach item level 277 in the Heroic mode with 25 players.
Grand Entrance of the Citadel
After breaching the fortress, players will face a legion of undead guards directed to repel any invaders. Commanding the defenders is Lord Marrowgar, a monstrosity fused together from the bones of the undead. Supreme Overseer of the Cult of the Damned, Lady Deathwhisper is the next opponent. She bolsters the faith of her followers by promising them the opportunity to give eternal service in undeath.
As they continue their ascent, the Alliance and Horde heroes ultimately end up outside of the citadel where their hatred for one another erupts into a battle for dominance over the Rampart of Skulls. Players will join in battle alongside High Overlord Saurfang on the Orgrim's Hammer gunship or Muradin Bronzebeard on The Skybreaker in a unique encounter. Each faction will protect its gunship and try to destroy the other one in a back-and-forth battle to see who is truly worthy of facing the Lich King.
The Lich King's most powerful death knight then stands as the final obstacle for the heroes to enter the upper reaches of the citadel.
The Wings of Icecrown Citadel
After the heroes of the Alliance or Horde defeat the other faction on the gunships and wipe out the creatures near the entrance, players will venture into an area with three separate wings. Here they will face a multitude of terrors that must be vanquished in order to confront the Lich King.
In the Frostwing Halls players will battle alongside the Ashen Verdict and push into the lair of the deadly frost wyrm Sindragosa, who continues to strengthen her brood with the help of Ymirheim's vrykul. Along the way, the heroes will stumble upon Valithria Dreamwalker, a captured green dragon whom the Scourge is using as a test subject for their own ends....
The Plagueworks contains the most twisted experiments ever produced by the Scourge. In this wing players will face two new forms of abomination in Festergut and Rotface, who currently protect their devious creator, Professor Putricide.
The Crimson Hall contains the leaders of the San'layn, undead blood elves who oversee the Scourge's operations throughout Azeroth. The blood-princes Valanar, Keleseth, and Taldaram were raised into undeath by the Lich King to avenge themselves while protecting their blood-queen, Lana'thel.
The Frozen Throne
After clearing all three wings, players will ascend to the Frozen Throne, where the Lich King and his runeblade, Frostmourne, await to deliver them to their deaths....
Random Notes:
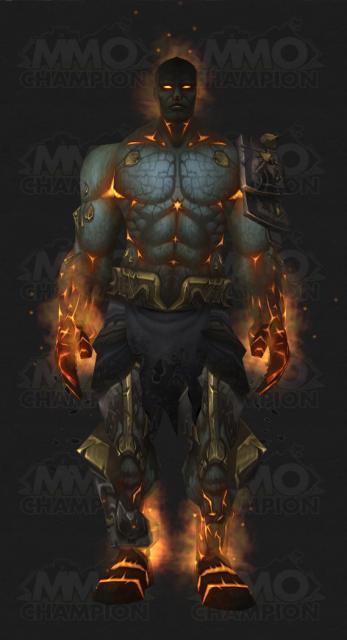
This guy has since been removed from the game files. Suspected to be the Immolated Champion that you see in Yogg's brain so will turn up in the Arthas fight, maybe.
We are going to Ony, then naxx or back to ulduar depending on the group.
Tanks: Gares, lleme
Heals: Fjork, Chalaina
DPS: Sarricon, eluda, Leighann, Holy, monster


Recent comments
7 hours 17 min ago
4 weeks 1 day ago
7 weeks 1 day ago
7 weeks 2 days ago
9 weeks 1 day ago
9 weeks 1 day ago
9 weeks 1 day ago
10 weeks 2 days ago
11 weeks 3 days ago
13 weeks 17 hours ago