
Ulduar

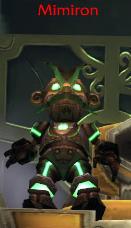
11 - Mimiron Strategy Guide
saedo — Thu, 04/16/2009 - 14:22
 Health:
- Heroic: About 27.75M total
- Normal: About 7.62M total
Abilities:
Leviathan MKII:
- 6.9M Heroic, 1.74M Normal
- Weak melee damage
- Proximity Mines: Drops about 10 mines next to the Leviathan, walking over them will make them explode for 20,000 fire damage. This can be disarmed by Rogues.
- Napalm Shell: Fires a shell filled with napalm at a random enemy target. The shell explodes upon impact, dealing 7540 to 8460 Fire damage instantly and an additional 32000 over 8 sec. This effect attempts to target enemies over 15 yards away if possible.
- Rocket Strike: Launches a rocket towards a random enemy. Once the rocket reaches the destination, it deals 5000000 Fire damage to all enemies within 3 yards
- Plasma Blast: A stream of plasma errupts from the cannon, dealing 30000 Spellfire damage per second for 6 sec. This effect cannot be resisted. 100 yd range, 3 sec cast / Channeled, 7 sec cooldown. Cast about once every 30 seconds
- Shock Blast: Deals 100000 Nature damage to all enemies within 15 yards. 4 sec cast. Cast about once every 30 seconds
- Plasma Blast and Shock Blast alternate
VX-001:
- 6.9M Heroic, 1.74M Normal
- No aggro
- Rapid Burst: Unleashes a series of short plasma bursts towards a random enemy, dealing 1885 to 2115 Spellfire damage per burst for a total of 6 bursts over 3 sec.
- Spinning Up: The VX-001 starts spinning and P3Wx2 Laser Barrage is cast, don't be in front of him
- P3Wx2 Laser Barrage: Spins up the dual cannons for 4 sec before unleashing a spray of lasers in a random direction, dealing 20000 Spellfire damage every 0.25 sec to all enemies caught inside. Lasts 10 sec. (This is a rotating beam using the same mechanics as C'thun Eye Beam or Lurker Below Spout) He always turns clockwise, and it's less than a 180 degree turn.
- Rocket Strike: Launches a rocket towards a random enemy. Once the rocket reaches the destination, it deals 5000000 Fire damage to all enemies within 3 yards.
- Heat Wave: Fires out a blast of heat, dealing 1885 to 2115 Fire damage instantly and an additional 10000 Fire damage over 5 sec to all enemies.
Aerial Command Unit:
- 4.7M Heroic, 1.6M Normal
- Ranged tanked, adds incoming
- Plasma Ball: Builds up a ball of plasma and fires it at a target, dealing 14138 to 15862 Spellfire damage. 30 yd range, 2 sec cast, spammed every 3-4s.
Assault Bot:
- 1M Heroic, 500K Normal
- 30K hits
- Possibly kited in Heroic vs Tanked.
- Magnetic Field: Projects a magnetic field towards the target, locking them in place. In addition, the target will take an extra 30% damage from all sources. Lasts 6 sec. 30 yd range. Can be dispelled
- Drops a Magnetic Core on death
- Summon Magnetic Core: Deploying this magnet under the Aerial Command Unit will temporarily bring it to the ground and disable it. While it remains disabled, it will take an additional 50% damage from all sources, for 1 min.
Bomb Bot:
- These bots will walk through the raid for a moment and eventually explode for 9425 to 10575 fire damage in a 5 yards radius, run away from them!
Junk Bot:
- 110k hp Heroic, 65k hp Normal
- Weak adds to dps down
V0-L7R-0N:
- 3 phases merge, 3 targettable sections, but each start at 50% hp
- All 3 sections have to killed within 5-10 sec of each other.
- Each have seperate aggro and must be "tanked" like before
- Bottom is Leviathan, Middle is VX-001, Head is Aerial Command unit
- Leviathan: Proximity Bombs and Shock Blast
- VX-001: Rocket Strike, P3Wx2 Laser Barrage, and Hand Pulse - Fires a pulse of energy towards a random enemy, causing 6598 to 7402 Spellfire damage to all enemies in a cone facing the target enemy. 50000 yd range, 0.85 sec cast
- Aerial Command Unit: Plasma Ball
The Fight:
So this is one crazy shit face of a fight with essentially 4 phases, lots of stuff going on, damage and adds and things to avoid.
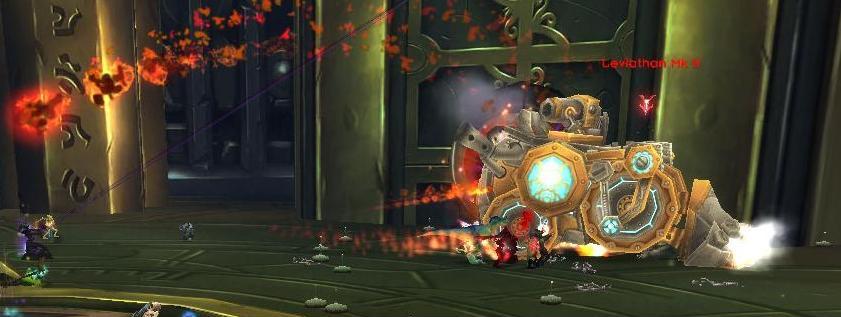 Phase 1: Flame Leviathan MKII
On engage, Mimiron will jump into his personal Flame Leviathan. Tank and spank it for the most part. Melee have to watch for land mines. Melee have to watch for Shock Blast and run the fuck out, 4 sec cast. Ranged have to watch Napalm (fire), think Void Reaver orb shots. Supposedly he hits very weak, most of the damage will be from the shit he spews out.
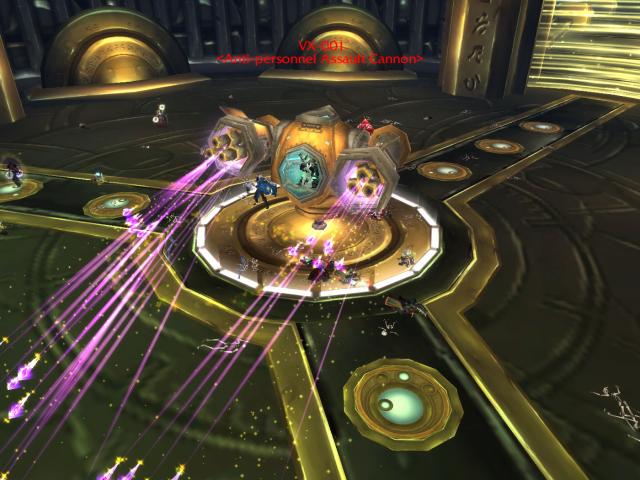 Phase 2: VX-001:
After that's destroyed, he gets into his anti-personal cannon. We would likely just form a circle around him, think Lurker Below.
No real aggro here I believe. So go nuts.
Stay out of fire. Watch for rockets. There's a small red circle which is the target (you).
Then there's the lasers. That's similar to the Lurker Spout or C'Thun eye beam. He'll be spinning up, we gotta stay the fuck away from the front when he does that. Then supposedly run around in a clockwise fashion to avoid it, and he appears to only do it 180 degrees. So half circle, not full like the others.
 Phase 3: Aerial Command Unit
This parts needs a ranged tank. He'll be spamming 9K ish hits to highest on aggro and the melee can't touch him for the most part.
After that tank has aggro, dps away.
Meanwhile, the ground has adds for the others and possibly some of the ranged to help with. It's a way to drop aggro if anything.
Junk bots are shitty little things to kill off quickly, they spawn from Green Beams.
Bomb bots are shitty little things to get the fuck away from. They blow up if you didn't get it yet. Ranged can help clean em up before they reach raid. They spawn from Mimiron.
Next is the real trick, the Assault Bots. They hit hard, really hard. So if we can't tank him, need a ranged to kite em. Someone that can snare preferably. They can snare their target too, and it's dispellable. They spawn from the Red/Orange beams.
After killing one of those, it drops an item we can use. The Magnetic Core, using this would bring the Aerial Command Unit down for 1 min and it takes extra 50% damage during this time. So burst dps CDs for this part.
 Phase 4: V0-L7R-0N
Mimiron combines all 3 of his creations into one. Each piece is targettable. Each piece has it's own aggro (if applicable) table. And they all must die within 5-10 sec of each other. But they each start at 50% of their hp.
Split the dps, with possibly target switching on the fly to even things out.
They have most of the important tricks to them.
Flame Leviathan has his mines and shock blast, so melee must run and avoid those.
VX-001 has the Rocket Strike to avoid. Along with the big laser for the raid to run the fuck away from (clockwise).
Aerial Command Unit still must be ranged tanked.
This is pretty much a dps burn down now while avoiding things that could kill you.
Collect loots.
Hard Mode:
There's a big red button behind him. T he raid should walk around the room to under the button. Hard mode is activated by push it to initiate the fight. Everything does 25% more damage. Also turns it into an 8 minute enrage. Also has new abilitiles.
Doomfires that follow you around in every phase. Frost Bombs in P2 to avoid. Water bots in P3 that do put out fires, but does frost damage to you too if you get in the way.
Phase 1: Before running in, wait til the first Doomfire spawns, that way, it's not right on your ass when you do start. We tanked Leviathan himself along the walls of the room, just kiting him around when needed. The doomfires can be semi-kited by ranged as they seem to proximity aggro. Otherwise, fight is same with more damage, just avoid fires.
Phase 2: During transition, group up at an edge of the room, gather all the fires together and slowly inch away. This is to keep the fires away from the middle in the beginning. Your goal is to keep close to fire without actually getting hit by fire. Anyways, after the doomfire respawns, rush in to attack VX. Same fight basically with more damage, and doomfires approaching you. He does do a flame suppression for the melee but only if he's not Lasering. Another trick to watch for is the Frost Bomb, puts out fires, but also damages you and knocks you back. Look for a bluish orb, stay away from that side of the room until it goes off. Heroism this phase to get it over with, only phase you can really spend full time dps on (mostly).
Phase 3: Same as previous transition, gather up and don't let the fire spread all over the place. Frost bots will show up now, and I believe they don't silence in 10 man anymore, but still do in 25 man. Their water sprays also knock you back, kill em if they're a nuisance to you otherwise let em do their thing. Tanking wise, it'll be similar to Phase 1, you'd have to kite all around the outer edge of the room. However, make use of LoS, when you want to drop the head, forces it into a corner away from Doomfires (for a bit) and go all out dps. You need to pass this phase in about 2 drops, else you might not make the enrage timer.
Phase 4: Like phase 1, just combine all the damage, yadda yadda yadaa. Kite outer edge, watch for doomfires, kill kill.
Achievements:
Set us up the Bomb - Defeat Mimiron without anyone in the raid being hit by the following on Normal/Heroic Difficulty.
Another raid check. Don't get hit by rockets, mines, or bomb bots. This is a progressive achievement so can do it once per week.
Not-So-Friendly-Fire - Force Mimiron to kill a Assault Bot with a Rocket Strike on Normal/Heroic Difficulty
Sounds like we have to OT an Assault Bot into phase 4. Then find a Rocket Strike to drag him in.
Firefighter - Defeat Mimiron after activating his Self-Destruct mechanism on Normal/Heroic Difficulty.
Hard Mode, 25% more damage all around and an 8 min enrage now and new abilities.
Trash Info:
So the trash is hard. Hard enough that people recommend trying to have someone bubble run through them to the otherside and rez the raid, summon the rest. We kind of found a more managable less cowardly solution. ;p
Mechano Packs:
There's a I believe 4 packs of these. The 1st one is the easy one, there are no Sappers, yet. Get to those later.
There's a Arachnopod that if you defeat, you can get on and ride it for about 5 mins.
There's bomb bots.
There's Trash, which seems to be just little do nothing shits. lol
There's these mechognomes that build frost turrets that do 4K a tick all around them. But are killable too.
I recommend the first thing to kill is the Arachnopod, then you can get inside it and use it like a vehicle to help kill the others. It is also immune to the Frost Turret's effects. Here are it's abiltiies:
- Machine Gun - standard dps
- Flamethrower - it believe it's a 10 sec CD for massive frontal aoe fire damage to them
- Leap Stun Thingy - It's a targetted jump, and aoe stuns where it lands, 20 sec CD i think
Anyways, it's probably advisable to treat this a bit like a gauntlet, thought not as hectic Cause you have limited time with the Arachnopods, and they're gonna help with the next pack which have:
Sappers: These fuckers target people and drain 5K mana per second while doing like 7.5K per sec ticks and transfering damage you do to them to someone else. They are stunnable and fearable.
So here's where those Arachnopods come in handy. Use them to help with the stuns and zerg the fuckers down. Afterwards, standard kill the rest.
There's more Arachnopods in each pack, so you can have a few in the raid helping with this.
Videos:
10 Man Firefighter (with fail Shadow Priest)
Sources:
07 - Auriaya Strategy Guide
saedo — Thu, 04/16/2009 - 13:08
 Health:
- Normal: 3.2M
- Heroic: 16.73M
Abilities:
- Sonic Screech: A Sonic Shockwave that deals 231250 to 268750 Physical damage to all enemies in its path. The Shockwave damge is split between all targets in its path. 50000 yd range, 2.5 sec cast, 4 sec cooldown
- Sentinel Blast: Inflicts 6000 Shadow damage and increases Shadow damage taken by 100% for 5 sec. Stacks. Instant
- Terrifying Screech: The screech strikes fear into the hearts of all nearby enemies, causing them to flee in horror for 5 sec. 2 sec cast, 8 sec cooldown
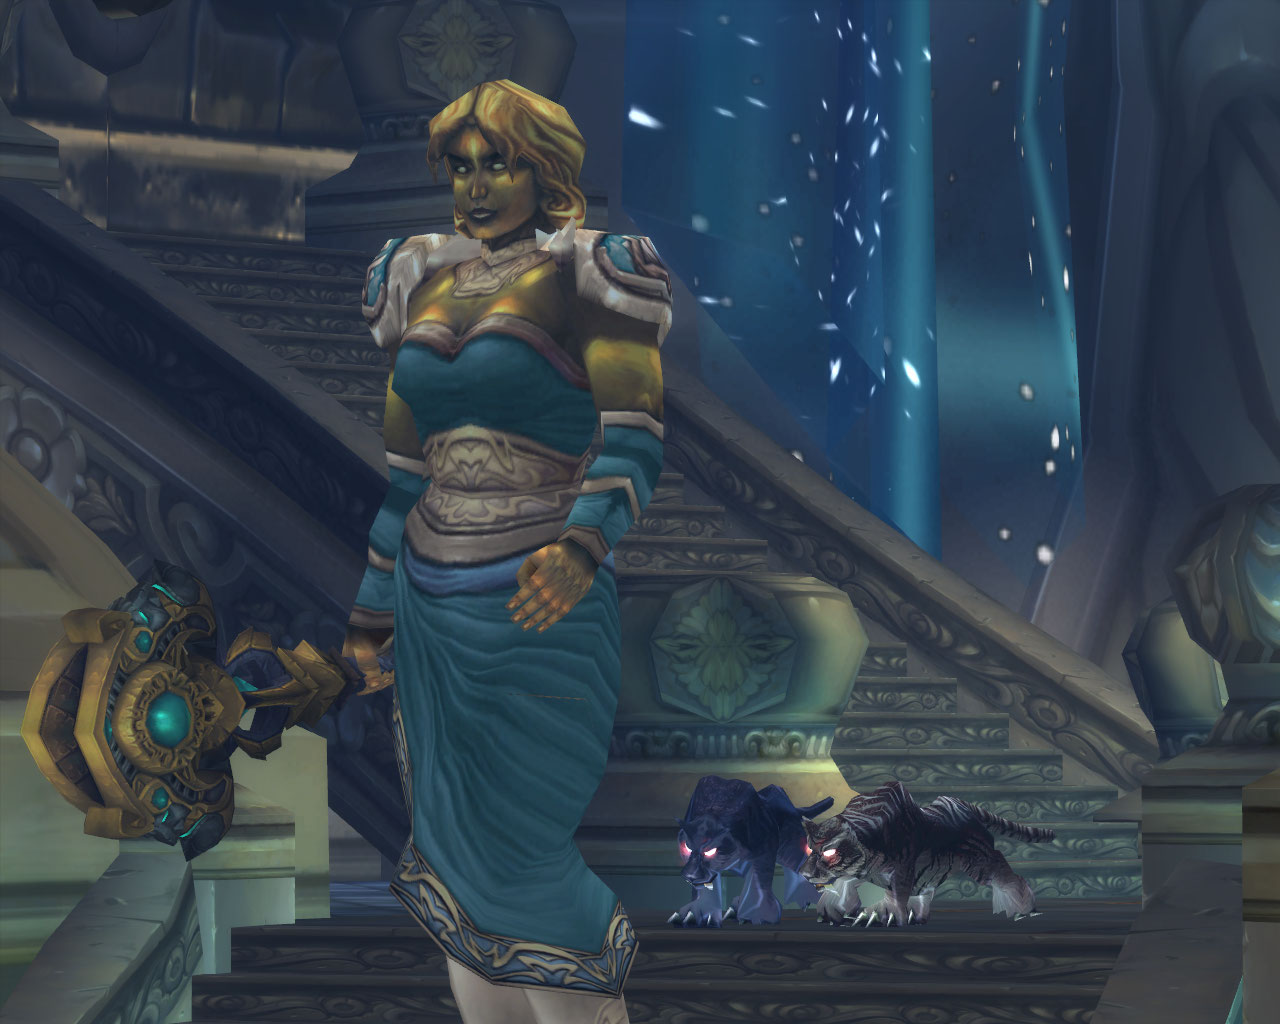
- Summon Swarming Guardian: Auriaya occasionally spawns a wave of panther adds (~20 mobs) with a low amount of health points. You can easily AoE them.
Sanctum Sentry:
- Starts with 4 adds in Heroic, 2 in Normal
- 558K HP in Heroic, 335K HP in Normal
- Savage Pounce: A savage pounce that inflicts 13875 to 16125 Physical damage and an additional 7400 to 8600 Physical damage every second for 5 seconds.
- Strength of the Pack: The presence of other members of the pack increases damage done by 50% to all members of the pack within 20 yards.
Feral Spirit:
- Spawns 1 min into the fight
- 835K HP in Heroic, 200K HP in Normal
- Starts off with 9 Feral Essences (his 9 lives)
- Feral Essence: Each essence increases the damage dealt by the Feral Defender by 50%. The Feral Defender can revive itself at the cost of one of its Feral Essences.
- Feral Rush: Charges an enemy, dealing Shadow damage and interrupting spell cast for 6 sec. 80 yd range
- Feral Pounce: The Feral Defender pounces the target stunning them for 5 sec and inflicting Shadow damage every 1 sec. 5-45 yd range
- Seeping Feral Essence: The Seeping Essence of the Feral Defender Inflicts 9000 Shadow damage every 1 sec. This is a void zone-like effect triggered where the Feral Defender spawns and dies.
The Fight:
First thing of note, the raid must ALWAYS be in the same LINE. Not neccessarily stacked on top of each other, but along to the same line to take the Sonic Screech, damage is split among all hit, and you're fucked if it's not split several times over. I estimate probably at least 15 people in Heroic have to split it to not fatally hit the raid.
This means, the melee have to either spend a the entire time attacking from the front, or be very good at rotating from back to front the whole fight. The thing is a 2.5 sec cast, so there is time to move. I found it quite easy to simply rotate back to front. This is probably more for raid helping to mitigate damage, perhaps we don't need everyone to be hit, just enough.
Second thing of note is fears. Tremor totems should handle it for us. Just get back in position ASAP if you got moved in case of Sonic Screech.
The adds, have a stacking buff where they gain 50% more damage if they're within 20 yards of each other. So for the pull, the OT stands 20 yards away from the MT. The OT takes one add. The MT takes the boss and the other add. The raid itself must be between the 2, so you're all in that same line for Sonic Screech.
In 10 man, we did a zerg the adds thing, everyone just dogpiled in a corner above the stairs where she pats. Used Deatth and Decay to pull them. Zerg'd down both adds. Then her. This may or may not be doable in 25 man. For 1, there's 4 adds, so they're gonna get super buffed and hit hard.
Tank and spank. The whole deal is mostly keep the raid together along the same line with occasion fears and damage here and there. Also small shitty panther adds spawn to be quickly aoe'd down.
About 1 min into the fight, a Feral Defender will spawn. Killable, but takes 9 tries, and each death drops a void zone. OT is to just take it behind raid. He will jump and run all over the place, so have fun with that.
Then the rest of the fight is burn down Auriaya again. If we do kill Feral Spirit, move well away from the void zone, and the raid has to move too keeping the line dance.
For 25 man the pull was done via snake traps. We dogpiled behind the same pillar, and the tanks MUST pop their CDs initially so the cats don't rape them. Kill the cats, kill Auriaya. One added "problem" in 25 man that with the additional aoe, the Feral Spirit was eventually taken down leaving a Void Zone.
Achievements:
Crazy Cat Lady: Defeat Auriaya without destroying her Sanctum Sentries on Normal/Heroic Difficulty.
They have to be tanked away from all the aoe splash damage. Also due to the stacking bleeds, the tanks must trade off in 10 mans. Don't do it during aoe phases. Otherwise, zerg her down.
Might be tricker to do in 25 man due to 4 adds. Might need 1-2 extra tanks (on top of the 3 we bring) to rotate in to take the bleed. Old School 4 Horsemen style?
Nine Lives: Defeat the Feral Defender while defeating Auriaya on Normal/Heroic Difficulty
This involves killing the thing 9 times, each time of course drops a void zone, so better do it well away from the raid. And making sure to not dps Auriaya too fast so the Defender can pop up again.
Trash Info:
Titan Packs: They come in 2s, you only need to take the pair on either side of the walkway. And must be tanked seperately, but not too far apart. After I believe it was 40 yards, they gain "Seperation Anxiety" and fuck us up. Anyways, the trick to this is that randomly, one of them will spawn a big ball of spark. This spark will slowly travel towards the other one, and if it reaches, they get a power boost and starts aoe'ing. The goal is, have the ranged and stuff inbetween, and fuck up those sparks before that happens. Also, it is advisable for both adds to die relatively close to each other, not neccessary though. You see, when one dies, the other gains a buff, hitting harder and faster. You can heal through it if you choose so, or try to get em to die together to mitigate that berserk time.
Sources:
While the 25-man iteration of EP1 gears up in Naxx for a few more weeks, I'd like for some of our already geared raiders to start running Ulduar10 -- learning strats, getting more familiar with each other, gearing up a bit, and just having fun with the new content. I'm thinking right now that we can shoot to make the jump from Naxx25 to Ulduar25 on the Saturday May 9 raid... That gives us 3 more weeks in Naxx25, and (potentially) 3 shots at Ulduar10 before bringing the full herd.
You need not be an EP1 regular to apply, though I would like for those who are looking to do our Saturday 25s to be the first to sign up. It's not just about learning the strats individually, but starting to get more cohesive as a raid group as well. I would like for all 10 members of this raid to be in full 200+ gear... Even better would be full or near-full 213+.
We start at Noon. Invites at 11:30 - same deal as the Saturday 25, be online at 11:30 or let me know you'll be late in advance.
2 Tanks -
3 Heals - Torvo, Aurleas
5 DPS - Xendu
Hey all,
Due to the start of all the new raids it will be important to sign up this week so we can confirm participants. We probably will not be going into Ulduar this week as we need to work on our Co-ordination a little more, but we willbe going in soon.
This is how we are setup as of now.
Tank1: Holynightmar
Tank2: Joshsmom
Heal1: Leighann
Heal2:
DPS1: Jayel
DPS2: Sarricon
DPS3: Eluda
DPS4: Chalaina
DPS5: Ghli
Lets have a good run at Naxx and get it done on Friday night so we can spend monday on Sarth and Maly.
So we are still looking for a Healer for Tonight. If you are interested post here and or talk to myself or Jayel in game. Do be aware that all things being equal posts on the site will take priority over in game conversations. So use the site.
We'll need 3 Healers, and a buncha DPS...or more accurately, 5. Sign up!
i plan on doin this week to week, hopefully with achievements by the 2nd or 3rd week, so itd be awesome if i could get people who are willing to commit week to week.
This isnt a Casual raid, but i dont want to make it feel like a chore, so sign up only if your willing to commit week to week at roughly this time, it may change depending on feedback.
Tanks : Ensidious, (pulgamuerto pending)
Healers:
DPS:
It's time for Salmon to get our hands dirty in Ulduar. We've waited for so long and now it's finally here. Raid invites will start at 6pm. I will be inviting based on past Salmon invites and recommendations from Rogue, Lunch, Alp, and Closer.
Read up on your strats and boss abilities. You can read up here: /Ulduar and here: http://www.wowwiki.com/Ulduar_(instance) and others if you do the research. Come prepared with multiple flasks and buff food. Remember flasks only last an hour now. So bring more!
As a side note. After our Salmon meeting I've changed my views about how I feel about raiding. I just want to make sure that everyone has fun and that everyone gets along. Remember to keep all drama at the door and just have a good time. Thanks again to all the ones that sent me PM's, PST's, emails, and in game mail. You're the reason this raid will live on.
See you guys at 6!!!
06 - Kologarn Strategy Guide
saedo — Sat, 04/04/2009 - 22:52
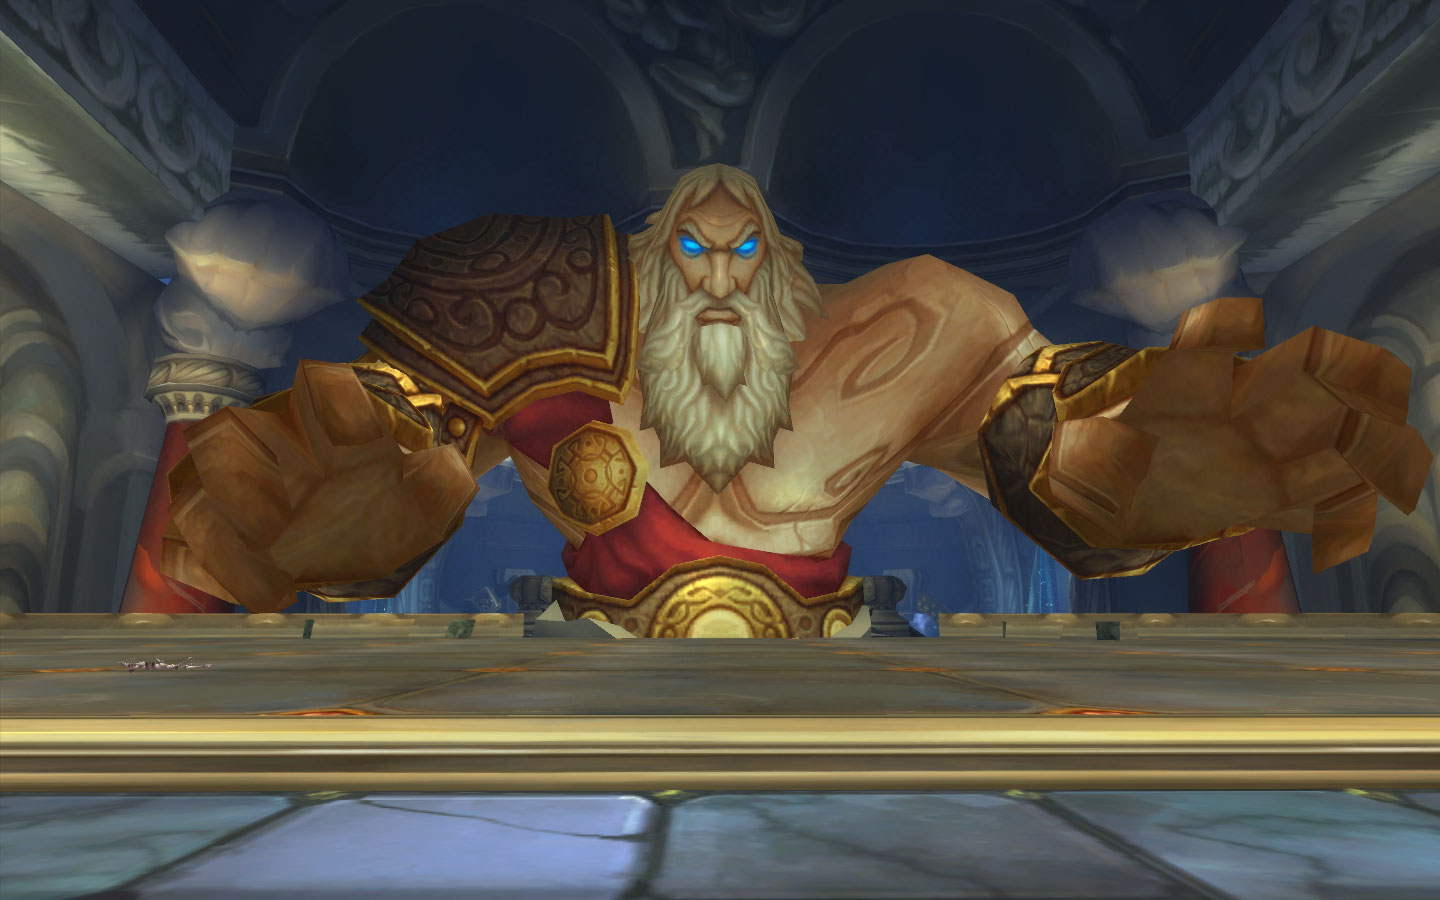 Health:
- Normal: 5.2M (Arms 1.2M each)
- Heroic: 20.9M (Arms 5.2M each)
Abilities:
- Focused Eyebeam: Inflicts 4163 to 4837 Nature damage to enemies within 3 yards.
- Petrifying Breath: Inflicts 18750 to 21250 Nature damage every 1 sec and increases damage taken by 20% for 8 sec. (Brittle Skin - Increases damage taken by 20% for 8 sec.) - Only does this if no one is in melee range
- Overhead Smash: The not so massive attack Inflicts Physical damage and decreases armor by 25% for 45 sec. 5 yd range, Next melee; Stacks to 4, used every 10-15 seconds.
- Overhead Smash Tremor: The massive Overhead Smash causes a tremor which Inflicts 6338 to 6662 Physical damage and interupts casting for 8 sec.
- One-Armed Overhead Smash: Same as overhead smash but less power, used when 1 of the arms is destroyed
- Stone Shout: Unleashes a hail of jagged rock, striking target enemy every 0 sec for 2 sec, and damaging any additional enemies within 50000 of the target. Does about 3K damage per tick, only used if both arms are destroyed
Left Arm (our right):
-
Shockwave: The shockwave from the massive arm sweep inflicts 13875 to 16125 Nature damage.
Right Arm (our left):
-
Stone Grip: Squeezes the life out of the target, stunning it and inflicting 5363 to 5637 Physical damage every 1 sec until Kologarn's Arm sustains 480,000 damage; Targets 1-3 people. Less damage in 10m, and needs 150K damage.
The Fight:
Firstly, the boss is just stuck on the ground, won't move, can't get behind him, so melee will suffer from parries and such. There must always be someone in melee range or he wipes the raid. He does slow hits, so optimal tanks appear to be druids or DKs.
He has 2 arms as seperate entities to target and kill if you wish so. Killing one will knock off 15% of his HP, but each arm has more HP than that. They respawn 60 seconds later. Also killing one will spawn 5 adds, must be tanked and they aoe us, but can be stunned. Best done with a warrior's Shockwave.
The Left Arm will Shockwave us every 25 or so seconds.
The Right Arm will Stone Grip 1-3 non-MT raid members, and they must be healed. Here there are 3 methods of thoughts of dealing with it:
Leave the Arm up, heal through it the rest of the fight or...
Attack the Arm to release the trapped ones, but be ready to tank/stun adds when the arm dies.
Or kill the right arm at all times, deal with adds, then kill the boss, which is what we did.
For the main boss himself, with the Crunch Armor debuff, you'd want 2 tanks trade taunting off. Though in 10 man, it appears to apply less frequently and fails to stack often.
There's a laser beam for the raid to avoid as well.
Note for Melee: If you're attacking arms, you may notice sometimes you can't hit him. With auto-attacks or whatever, and you have to reposition and stuff. What's known now is that Kologarn is one giant hit box for both him and his arms. So what you should be doing is facing him at all times, just retarget arms when attacking those, do not turn. You don't have to run from arm to arm, you are able to target him and any of the arms simply standing anywhere in front of him, facing the main body.
Trash Info:
Dwarf Packs (10 man): 3 mobs, a Mender, a Charger, and a Construct. We killed the Mender cause we didn't like his name. The charger appears to just do a weak chain lightning. Killed him next. Construct was just debuffing Nuitbear with a slowing thing.
Dwarf Packs (25 man): The packs are doubled in size (2 of each of the above), and are more lethal. The Charger does a thunder ball that does a lot of damage to the area it hits. The Constructs root themselves but do 100% more damage. The tank can run out but there better not be other people in range he can smack. The Menders are CC'able, maybe all of them all. Adjusted tactic was to sheep the Menders, burn down the Chargers first. Then the rest, I think menders after.
Big Construct Packs: 2 Constructs, they have flamethrowers, so don't be in front of him. They also "throw" out runes on the ground underneath people. Whoever stands under em turns into bombs. Don't blow the raid up.
Big Titan Packs: Single pulls, they have a front cone aoe shout that's physical damage, physical avoidance works. They summon spark things that do minimal damage in 10 mans.
Achievements:
With Open Arms: Defeat Kologarn without destroying either of his arms on Normal/Heroic Difficulty
Simple enough to try to do. Only means we employ the tactic of screw the guy in the Stone Grip, and heal through it. Or, hit it just enough to release him, and hope you got enough dps to finish off Kologarn before requiring you to kill the arm. Or combine the two a bit, when arm is low, screw the guy in Stone Grip and focus on Kologarn. Definitely see several possiblities to try.
Disarmed: Destroy both of Kologarn's arms within 10 seconds and then defeat Kologarn on Normal/Heroic Difficulty.
There's a possible bug where if you use the arms to kill Kologarn, it will not count (they take off 15% hp each). We did the Right Arm zerg strat til Kologarn was 40% ish, make sure Kologarn is above 30%. Then got some dps on the Left Arm. Went back on the right arm, while switching sometimes to keep left arm low too. Then kill right, kill left, kill Kologarn.
If Looks Can Kill: Defeat Kologarn without any raid member being hit by Focused Eyebeams on Normal/Heroic Difficulty.
Simple enough, don't get hit. Nobody gets hit.
Rumble and Roll: Defeat Kologarn with 25 Rubble creatures alive on Normal/Heroic Difficulty.
This might be deceptively tricky. First thing is, someone OT'ing the Rubble to the side of course. But each arm only seems to spawn 5 rubble. So to do this, we need 5 arm deaths in the fight. But, we killed Kologarn with only 3 arm deaths.
This could mean, we cannot dps Kologarn himself at all. We must only deal with the arms. And since we can't have both arms dead at the same time, it could mean we only kill 1 arm the entire fight. So kill an arm, wait 60 sec, kill right arm again, etc.
Well but arms only take off 15% of Kologarn's HP each, so that's 5x15% = 75%. That's still 25% of his hp we can afford to dps. Though, that means at most 5% after each arm. 5% of hp in 60 sec. That's nothing, there'll probably have to be forced downtime if we do this.
Perhaps just more tanks dealing with the adds without killing them be the way to go.
Sources:
- http://www.mmo-champion.com/index.php?page=843
- http://www.stratfu.com/strats/Kologarn
- http://www.wowwiki.com/Kologarn
05 - The Iron Council Strategy Guide
saedo — Sat, 04/04/2009 - 17:55
 Health:
- Normal: 3.3M each
- Heroic: 10M each
Abilities:
- Supercharge: Unleashes one last burst of energy as the caster dies, increasing all allies damage by 25% and granting them an additional ability
Steelbreaker (the Giant):
- High Voltage: Inflicts 3000 Nature damage every 3 sec. Instant
- Fusion Punch: An attack infused with energy that inflicts 18850 to 21150 Nature damage and an additional 15000 Nature damage per second. 3 sec cast (dispellable)
- Static Disruption (1st Bonus): Deals 7000 Nature damage to enemies in an area and increases Nature damage taken by 75% for 20 sec. 50000 yd range, Instant
- Overwhelming Power (2nd Bonus): The target becomes overwhelmed with power increasing damage done by 200% and causes a Meltdown after 1 min - The target melts down killing themself and dealing 29250 to 30750 Nature damage to friendly units within 15 yards.
- Electrical Charge (2nd Bonus): Every time a player dies, Steelbreaker's damage increases by 25% permanently.
Stormcaller Brundir (the Dwarf):
- Can be taunted / stunned, becomes immune to stun when he is the last boss alive.
- Chain Lightning: Strikes an enemy with a blast of lightning that inflicts 7400 to 8600 Nature damage. The bolt will arc to additional nearby enemies, inflicting 20% more Nature damage to each successive target. 1 sec cast (5 targets, interruptable + cast slowable)
- Overload: Focuses all the caster's energy into a single ball of lightning. This ball grows for 6 sec until it finally explodes, dealing 25000 Nature damage to all enemies within 30 yards and knocking them down. (not interruptable!) (not cloak of shadows resistable!)
- Lightning Whirl (1st Bonus): Spins around throwing off bolts of lightning at random enemy targets. Each bolt deals 7069 to 7931 Nature damage. Lasts 5 sec. Channeled
- Lightning Tendrils (2nd Bonus): Tendrils of lightning shoot out of the caster's chest, lifting them into the air. These lightning tendrils deal 5000 Nature damage to all enemies around the caster every second. (He will follow a player as he flies over the raid, aggro resets)
- Stormshield (2nd Bonus): deals 250 damage to attackers and makes him immune to stuns.
Runemaster Molgeim (the Vykrul):
- Runic Barrier: A shield of runic power surrounds the caster, reducing all damage taken by 50% and inflicting 2000 Arcane damage to attackers. Instant
- Rune of Power: Summons a Rune of Power under a random friendly target. This rune increases damage by 50% of all friendly and enemy targets within 5 yards. Lasts 1 min.
- Rune of Death (1st Bonus): Summons a Rune of Death at a random enemy target's location. This rune deals 5000 Shadow damage every half-second to anyone within 13 yards of that location. 50000 yd range, Instant
- Rune of Summoning (2nd Bonus): Creates a Rune of Summoning near a random enemy. This rune will periodically summon Lightning Elementals, which will rush towards random enemies and explode. (Lightning Blast: Unleashes a large blast of lightning, dealing 14138 to 15862 Nature damage to all enemies within 30 yards of the caster but killing the caster in the process. Instant)
Hard Mode:
Hard mode here is just leaving Steelbreaker for last.
The Fight:
This will likely be the first real challenge in Ulduar. A 3 in 1 boss, each with their own HP and abilities, and similar to Karathress fight, they gain abilties as each one dies. Unlike Karathress, it's a brand new abiltity rather than taking one from the dead ones. The above ability list indicates the 1st bonus as the 1st ability they get after any of the others die. The 2nd bonus would be their 2nd ability when the 2nd dies, or in other words, when we save him for last.
I will list probably the 3 orders to kill this boss, based on achievements and hard modes. Yes, technically more are possible, but only the last boss alive counts, so easiest route for each.
Note: We've found that using a Pally tank to tank Steelbreaker is quite nice. Ability to self cleanse takes the whole healer must help cleanse at the right moment or the tank dies to Fusion Punch ticks out of the equation.
Steelbreaker (Big) -> Runemaster (Medium) -> Stormcaller (Small):
This is likely the easiest route to kill. Each one will basically just tanked away from each other while dividing the raid a bit to handle each boss.
Steelbreaker: Due to the nature aura, everyone should be clumped up to benefit from group healing. He can hit very hard on the tank, and CDs are recommended, thus DKs are recommended as a result. For us, it's likely have to be Nuitbear, probably. This guy does do a lot of nature damage, so maybe nature resist set time! Well when hard mode arrives. Everyone else burn him.
Stormcaller: Probable tank should be Orky, this boss is stunnable, interruptable, cast slowable. So with him, and maybe 1 or 2 others to help out, this guy should be locked down most of the fight. A DK has an advantage with a "short" CD, ranged interrupt incase of rune placements.
Runemaster: Last one left to tank is Pudo. No real tricks at this point, except maybe the ranged can watch to see if a convenient Rune of Power spawns to sit in for extra dps. Definitely don't take risks or go out of your way for it.
STEELBREAKER DIES!
Now the 2 other bosses gain new abilities.
Stormcaller: Does a whirlwind lightning too now, but still stunnable / interruptable, so the guys in his corner should still keep it under lockdown.
Runemaster: Everyone else move on to this guy. The new trick he has is a Rune of Death, basically new variation on the Void Zone. The problem is, it's friggin huge area, it ticks every 0.5 sec, very fast, so you're likely gonna take 6-12K damage before moving out of it. And with lack of Unholy Aura in 3.1 for the raid, run speed enchants might be in style again.
RUNEMASTER DIES!
Stormcaller left, but no longer stunnable, so spread out to avoid chaining the lightning, and the melee run out of the whirlwinds. The new ability he has is floating in the air, chasing some random guy down while firing off lighting aoe all around under him. Think of it as a fancy new whirlwind to run from. It's like Sartura in AQ40, run away! Aggro resets so wait for a tank.
Steelbreaker (Big) -> Stormcaller (Small) -> Runemaster (Medium):
Everything's the same up to Steelbreaker dying, so take that part of the above and throw it down here, then kill Stormcaller while avoiding the Rune of Deaths and don't stop the interrupt/stuns on him.
STORMCALLER DIES!
Runemaster left, and his new trick is summoning a rune, that summons 10ish kamikaze lightning elemental adds. They come out, chase someone down, and blow up for 15K damage (10K in normal) to everyone 30 yards around.
The adds can be slowed and should be killed before they reach anyone. They have 12K hp in normal. Frost Novas, earthbinds, frost traps should all be used to help with that. They kind of have and aggro table but seems to be a bit random, perhaps global threat sometimes.
That's the new trick, bunch of bomb bots to kill/survive from.
What we did is use a Frost Mage to blizzard em down. Definitely far easier and just one shot the thing with one.
Stormcaller (Small) -> Runemaster (Medium) -> Steelbreaker (Hard Mode):
This is the hard mode order we went with The nature aura will be with us the whole fight, so likely keep clumped up for group healing the entire time. If you have a Pally tanking Steelbreaker, he can self cleanse taking the Fusion Punch cleasning for the healers out of the equation for most of the fight. If you have a DK tank, the Anti-Magic Shield can prevent a magic effect, which means the dot, from applying, so that is able to take every 3rd (?) cleanse out of the equation.
Stormcaller should go down easy, should be locked down the entire fight (since he won't go interrupt/stun immune this version). Then kill Runemaster watch for Runes of Death.
Anyways, first ability to watch for after Stormcaller dies would be a Static Disruption, he targets a person to hit with it and the debuff spread around who he hits. So try to stay spread out a bit if possible to avoid chaining it.
After Stormcaller dies, the 2nd ability would be Overwhelming Power, it actually buffs your tank's damage by 100% for 1 min, before you explode. Think Vael, your tank will blow up and you have to change it. The death will heal him for 15% so got to just have enough dps to burn though all that before all your tanks die. Brez tanks to rotate back in if necessary.
Runemaster (Medium) -> Stormcaller (Small) -> Steelbreaker (Hard Mode):
This might be easier for some raids. Similar to above, but kill the Runemaster to eliminate the need to run around the Death Runes. The second guy then has to be locked down with kicks and stuns so the Lightning doesn't kill you. Do the rest like above.
Achievements:
I Choose You, Runemaster Molgeim: Defeat the Assembly of Iron with Runemaster Molgeim as the last member alive on Normal/Heroic Difficulty.
The medium difficulty kill
I Choose You, Stormcaller Brundir: Defeat the Assembly of Iron with Stormcaller Brundir as the last member alive on Normal/Heroic Difficulty.
The easy mode kill
I Choose You, Stormbreaker: Defeat the Assembly of Iron with Steelbreaker as the last member alive on Normal/Heroic Difficulty.
The hard mode kill
But I'm on Your Side: Defeat the Assembly of Iron while under the effect of an Iron Boot Flask on Normal/Heroic Difficulty
Personal achivement, get your boot flask from Frosthold. Use it, don't die, kill boss. Don't be a druid either. Well, can use it at the last seconds of the fight to get this.
You Can't Do That While Stunned: Defeat the Assembly of Iron without allowing Stormcaller Brundir to damage anyone with Chain Lightning or Lightning Whirl on Normal/Heroic Difficulty.
We did this while doing our Hard Mode order. The problem is that on pull he starts shooting lightning, so you have to have ranged interrupts quickly and on the ball. Or a rogue stealthed up near by and get that first kick off before he finishes casting. The hard part is the pull interrupt, after that you should be able to lock it down.
Trash Info:
See /Kologarn trash info.
Videos:
10 Man Hard Mode:
25 Man Runemaster Last:
Sources:


Recent comments
7 hours 17 min ago
4 weeks 1 day ago
7 weeks 1 day ago
7 weeks 2 days ago
9 weeks 1 day ago
9 weeks 1 day ago
9 weeks 1 day ago
10 weeks 2 days ago
11 weeks 3 days ago
13 weeks 17 hours ago