
25 Man
Lets get together and have some fun! Naxx 25 fun times with friends! Sign up if you would like to just hang out and have a good time.

06 - Kologarn Strategy Guide
saedo — Sat, 04/04/2009 - 22:52
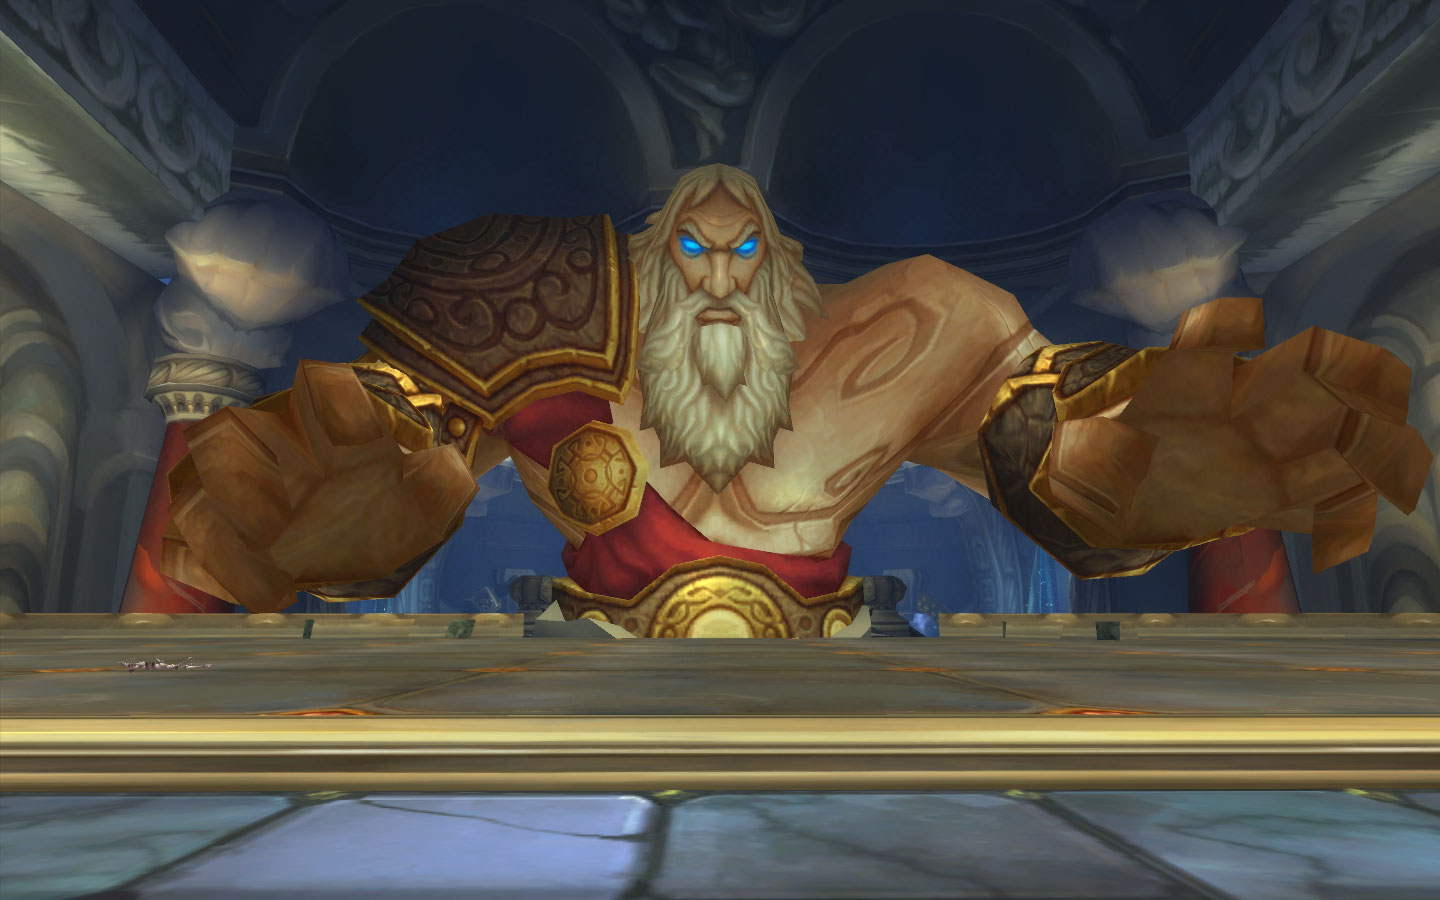 Health:
- Normal: 5.2M (Arms 1.2M each)
- Heroic: 20.9M (Arms 5.2M each)
Abilities:
- Focused Eyebeam: Inflicts 4163 to 4837 Nature damage to enemies within 3 yards.
- Petrifying Breath: Inflicts 18750 to 21250 Nature damage every 1 sec and increases damage taken by 20% for 8 sec. (Brittle Skin - Increases damage taken by 20% for 8 sec.) - Only does this if no one is in melee range
- Overhead Smash: The not so massive attack Inflicts Physical damage and decreases armor by 25% for 45 sec. 5 yd range, Next melee; Stacks to 4, used every 10-15 seconds.
- Overhead Smash Tremor: The massive Overhead Smash causes a tremor which Inflicts 6338 to 6662 Physical damage and interupts casting for 8 sec.
- One-Armed Overhead Smash: Same as overhead smash but less power, used when 1 of the arms is destroyed
- Stone Shout: Unleashes a hail of jagged rock, striking target enemy every 0 sec for 2 sec, and damaging any additional enemies within 50000 of the target. Does about 3K damage per tick, only used if both arms are destroyed
Left Arm (our right):
-
Shockwave: The shockwave from the massive arm sweep inflicts 13875 to 16125 Nature damage.
Right Arm (our left):
-
Stone Grip: Squeezes the life out of the target, stunning it and inflicting 5363 to 5637 Physical damage every 1 sec until Kologarn's Arm sustains 480,000 damage; Targets 1-3 people. Less damage in 10m, and needs 150K damage.
The Fight:
Firstly, the boss is just stuck on the ground, won't move, can't get behind him, so melee will suffer from parries and such. There must always be someone in melee range or he wipes the raid. He does slow hits, so optimal tanks appear to be druids or DKs.
He has 2 arms as seperate entities to target and kill if you wish so. Killing one will knock off 15% of his HP, but each arm has more HP than that. They respawn 60 seconds later. Also killing one will spawn 5 adds, must be tanked and they aoe us, but can be stunned. Best done with a warrior's Shockwave.
The Left Arm will Shockwave us every 25 or so seconds.
The Right Arm will Stone Grip 1-3 non-MT raid members, and they must be healed. Here there are 3 methods of thoughts of dealing with it:
Leave the Arm up, heal through it the rest of the fight or...
Attack the Arm to release the trapped ones, but be ready to tank/stun adds when the arm dies.
Or kill the right arm at all times, deal with adds, then kill the boss, which is what we did.
For the main boss himself, with the Crunch Armor debuff, you'd want 2 tanks trade taunting off. Though in 10 man, it appears to apply less frequently and fails to stack often.
There's a laser beam for the raid to avoid as well.
Note for Melee: If you're attacking arms, you may notice sometimes you can't hit him. With auto-attacks or whatever, and you have to reposition and stuff. What's known now is that Kologarn is one giant hit box for both him and his arms. So what you should be doing is facing him at all times, just retarget arms when attacking those, do not turn. You don't have to run from arm to arm, you are able to target him and any of the arms simply standing anywhere in front of him, facing the main body.
Trash Info:
Dwarf Packs (10 man): 3 mobs, a Mender, a Charger, and a Construct. We killed the Mender cause we didn't like his name. The charger appears to just do a weak chain lightning. Killed him next. Construct was just debuffing Nuitbear with a slowing thing.
Dwarf Packs (25 man): The packs are doubled in size (2 of each of the above), and are more lethal. The Charger does a thunder ball that does a lot of damage to the area it hits. The Constructs root themselves but do 100% more damage. The tank can run out but there better not be other people in range he can smack. The Menders are CC'able, maybe all of them all. Adjusted tactic was to sheep the Menders, burn down the Chargers first. Then the rest, I think menders after.
Big Construct Packs: 2 Constructs, they have flamethrowers, so don't be in front of him. They also "throw" out runes on the ground underneath people. Whoever stands under em turns into bombs. Don't blow the raid up.
Big Titan Packs: Single pulls, they have a front cone aoe shout that's physical damage, physical avoidance works. They summon spark things that do minimal damage in 10 mans.
Achievements:
With Open Arms: Defeat Kologarn without destroying either of his arms on Normal/Heroic Difficulty
Simple enough to try to do. Only means we employ the tactic of screw the guy in the Stone Grip, and heal through it. Or, hit it just enough to release him, and hope you got enough dps to finish off Kologarn before requiring you to kill the arm. Or combine the two a bit, when arm is low, screw the guy in Stone Grip and focus on Kologarn. Definitely see several possiblities to try.
Disarmed: Destroy both of Kologarn's arms within 10 seconds and then defeat Kologarn on Normal/Heroic Difficulty.
There's a possible bug where if you use the arms to kill Kologarn, it will not count (they take off 15% hp each). We did the Right Arm zerg strat til Kologarn was 40% ish, make sure Kologarn is above 30%. Then got some dps on the Left Arm. Went back on the right arm, while switching sometimes to keep left arm low too. Then kill right, kill left, kill Kologarn.
If Looks Can Kill: Defeat Kologarn without any raid member being hit by Focused Eyebeams on Normal/Heroic Difficulty.
Simple enough, don't get hit. Nobody gets hit.
Rumble and Roll: Defeat Kologarn with 25 Rubble creatures alive on Normal/Heroic Difficulty.
This might be deceptively tricky. First thing is, someone OT'ing the Rubble to the side of course. But each arm only seems to spawn 5 rubble. So to do this, we need 5 arm deaths in the fight. But, we killed Kologarn with only 3 arm deaths.
This could mean, we cannot dps Kologarn himself at all. We must only deal with the arms. And since we can't have both arms dead at the same time, it could mean we only kill 1 arm the entire fight. So kill an arm, wait 60 sec, kill right arm again, etc.
Well but arms only take off 15% of Kologarn's HP each, so that's 5x15% = 75%. That's still 25% of his hp we can afford to dps. Though, that means at most 5% after each arm. 5% of hp in 60 sec. That's nothing, there'll probably have to be forced downtime if we do this.
Perhaps just more tanks dealing with the adds without killing them be the way to go.
Sources:
- http://www.mmo-champion.com/index.php?page=843
- http://www.stratfu.com/strats/Kologarn
- http://www.wowwiki.com/Kologarn
Grats to raid !!1 on a successful full clear on our first weekly Naxx25. Let's make it two in a row - and go a little faster this week ;-)
Our goal: To establish a third best-in-game-content quality 25 man raid to complement Salmons and Kitties. We run on weekends, one day a week to better accomodate differing lifestyles and IRL schedules.
Sign up if you are... Anyone who wants to come! Mains - if you're not in Salmon or Kitten (or just missed out on those runs that week), we'd love to have you. Alts - Come level your gear with us! We'd love to have your experience. Guild Apps - EP1 has been the launchpad to get apps into the guild in the past. This is a great chance for you to get to know us (and vice versa).
What we're running: Naxx25. We did great last week, but I still expect some learning curve, so come prepared to take a lump or two. Some of us have run it a lot, some of us will likely be running it for one of the first times. That's fine either way - I only care that you're willing to listen and learn, and that you are open to adjusting when we screw up. There's no reason we can't aim for achievement runs once we get familiar and geared, but let's focus on clearing content for now.
Rule #1: Have Vent. No vent, no loot.
Time: The raid will START at Noon server. Invites go out at 11:30. If you sign up, try and be on by 11:30 - if you know you'll be late, let me know in the comments so I don't give your spot away. This gives us time to find pugs if we need to. It took us 5 hours for a full clear last week - I know we can do better :)
Other stuff: Loot will be done on a standard roll system, with mainspec first and offspec second. No preference, seniority, point systems, etc.
Makeup: 3 tanks. 7 healers. 15 DPS. As the raid fills out I will specify more clearly what we are missing, and/or ask for people with alternative toons/specs to take one for the team. I don't want any clothies, for example, feeling cheated because we have 10-12 cloth wearers for them to roll against in a 25 man raid.
Signups: When you sign up, let me know what toon you want to bring (or if you can bring more than one, even better). If you are able to come as multiple specs, that'd be good to know too :) I'll do my best to accomodate your preference.
Most importantly: This is going to be fun! It is a game after all...
05 - The Iron Council Strategy Guide
saedo — Sat, 04/04/2009 - 17:55
 Health:
- Normal: 3.3M each
- Heroic: 10M each
Abilities:
- Supercharge: Unleashes one last burst of energy as the caster dies, increasing all allies damage by 25% and granting them an additional ability
Steelbreaker (the Giant):
- High Voltage: Inflicts 3000 Nature damage every 3 sec. Instant
- Fusion Punch: An attack infused with energy that inflicts 18850 to 21150 Nature damage and an additional 15000 Nature damage per second. 3 sec cast (dispellable)
- Static Disruption (1st Bonus): Deals 7000 Nature damage to enemies in an area and increases Nature damage taken by 75% for 20 sec. 50000 yd range, Instant
- Overwhelming Power (2nd Bonus): The target becomes overwhelmed with power increasing damage done by 200% and causes a Meltdown after 1 min - The target melts down killing themself and dealing 29250 to 30750 Nature damage to friendly units within 15 yards.
- Electrical Charge (2nd Bonus): Every time a player dies, Steelbreaker's damage increases by 25% permanently.
Stormcaller Brundir (the Dwarf):
- Can be taunted / stunned, becomes immune to stun when he is the last boss alive.
- Chain Lightning: Strikes an enemy with a blast of lightning that inflicts 7400 to 8600 Nature damage. The bolt will arc to additional nearby enemies, inflicting 20% more Nature damage to each successive target. 1 sec cast (5 targets, interruptable + cast slowable)
- Overload: Focuses all the caster's energy into a single ball of lightning. This ball grows for 6 sec until it finally explodes, dealing 25000 Nature damage to all enemies within 30 yards and knocking them down. (not interruptable!) (not cloak of shadows resistable!)
- Lightning Whirl (1st Bonus): Spins around throwing off bolts of lightning at random enemy targets. Each bolt deals 7069 to 7931 Nature damage. Lasts 5 sec. Channeled
- Lightning Tendrils (2nd Bonus): Tendrils of lightning shoot out of the caster's chest, lifting them into the air. These lightning tendrils deal 5000 Nature damage to all enemies around the caster every second. (He will follow a player as he flies over the raid, aggro resets)
- Stormshield (2nd Bonus): deals 250 damage to attackers and makes him immune to stuns.
Runemaster Molgeim (the Vykrul):
- Runic Barrier: A shield of runic power surrounds the caster, reducing all damage taken by 50% and inflicting 2000 Arcane damage to attackers. Instant
- Rune of Power: Summons a Rune of Power under a random friendly target. This rune increases damage by 50% of all friendly and enemy targets within 5 yards. Lasts 1 min.
- Rune of Death (1st Bonus): Summons a Rune of Death at a random enemy target's location. This rune deals 5000 Shadow damage every half-second to anyone within 13 yards of that location. 50000 yd range, Instant
- Rune of Summoning (2nd Bonus): Creates a Rune of Summoning near a random enemy. This rune will periodically summon Lightning Elementals, which will rush towards random enemies and explode. (Lightning Blast: Unleashes a large blast of lightning, dealing 14138 to 15862 Nature damage to all enemies within 30 yards of the caster but killing the caster in the process. Instant)
Hard Mode:
Hard mode here is just leaving Steelbreaker for last.
The Fight:
This will likely be the first real challenge in Ulduar. A 3 in 1 boss, each with their own HP and abilities, and similar to Karathress fight, they gain abilties as each one dies. Unlike Karathress, it's a brand new abiltity rather than taking one from the dead ones. The above ability list indicates the 1st bonus as the 1st ability they get after any of the others die. The 2nd bonus would be their 2nd ability when the 2nd dies, or in other words, when we save him for last.
I will list probably the 3 orders to kill this boss, based on achievements and hard modes. Yes, technically more are possible, but only the last boss alive counts, so easiest route for each.
Note: We've found that using a Pally tank to tank Steelbreaker is quite nice. Ability to self cleanse takes the whole healer must help cleanse at the right moment or the tank dies to Fusion Punch ticks out of the equation.
Steelbreaker (Big) -> Runemaster (Medium) -> Stormcaller (Small):
This is likely the easiest route to kill. Each one will basically just tanked away from each other while dividing the raid a bit to handle each boss.
Steelbreaker: Due to the nature aura, everyone should be clumped up to benefit from group healing. He can hit very hard on the tank, and CDs are recommended, thus DKs are recommended as a result. For us, it's likely have to be Nuitbear, probably. This guy does do a lot of nature damage, so maybe nature resist set time! Well when hard mode arrives. Everyone else burn him.
Stormcaller: Probable tank should be Orky, this boss is stunnable, interruptable, cast slowable. So with him, and maybe 1 or 2 others to help out, this guy should be locked down most of the fight. A DK has an advantage with a "short" CD, ranged interrupt incase of rune placements.
Runemaster: Last one left to tank is Pudo. No real tricks at this point, except maybe the ranged can watch to see if a convenient Rune of Power spawns to sit in for extra dps. Definitely don't take risks or go out of your way for it.
STEELBREAKER DIES!
Now the 2 other bosses gain new abilities.
Stormcaller: Does a whirlwind lightning too now, but still stunnable / interruptable, so the guys in his corner should still keep it under lockdown.
Runemaster: Everyone else move on to this guy. The new trick he has is a Rune of Death, basically new variation on the Void Zone. The problem is, it's friggin huge area, it ticks every 0.5 sec, very fast, so you're likely gonna take 6-12K damage before moving out of it. And with lack of Unholy Aura in 3.1 for the raid, run speed enchants might be in style again.
RUNEMASTER DIES!
Stormcaller left, but no longer stunnable, so spread out to avoid chaining the lightning, and the melee run out of the whirlwinds. The new ability he has is floating in the air, chasing some random guy down while firing off lighting aoe all around under him. Think of it as a fancy new whirlwind to run from. It's like Sartura in AQ40, run away! Aggro resets so wait for a tank.
Steelbreaker (Big) -> Stormcaller (Small) -> Runemaster (Medium):
Everything's the same up to Steelbreaker dying, so take that part of the above and throw it down here, then kill Stormcaller while avoiding the Rune of Deaths and don't stop the interrupt/stuns on him.
STORMCALLER DIES!
Runemaster left, and his new trick is summoning a rune, that summons 10ish kamikaze lightning elemental adds. They come out, chase someone down, and blow up for 15K damage (10K in normal) to everyone 30 yards around.
The adds can be slowed and should be killed before they reach anyone. They have 12K hp in normal. Frost Novas, earthbinds, frost traps should all be used to help with that. They kind of have and aggro table but seems to be a bit random, perhaps global threat sometimes.
That's the new trick, bunch of bomb bots to kill/survive from.
What we did is use a Frost Mage to blizzard em down. Definitely far easier and just one shot the thing with one.
Stormcaller (Small) -> Runemaster (Medium) -> Steelbreaker (Hard Mode):
This is the hard mode order we went with The nature aura will be with us the whole fight, so likely keep clumped up for group healing the entire time. If you have a Pally tanking Steelbreaker, he can self cleanse taking the Fusion Punch cleasning for the healers out of the equation for most of the fight. If you have a DK tank, the Anti-Magic Shield can prevent a magic effect, which means the dot, from applying, so that is able to take every 3rd (?) cleanse out of the equation.
Stormcaller should go down easy, should be locked down the entire fight (since he won't go interrupt/stun immune this version). Then kill Runemaster watch for Runes of Death.
Anyways, first ability to watch for after Stormcaller dies would be a Static Disruption, he targets a person to hit with it and the debuff spread around who he hits. So try to stay spread out a bit if possible to avoid chaining it.
After Stormcaller dies, the 2nd ability would be Overwhelming Power, it actually buffs your tank's damage by 100% for 1 min, before you explode. Think Vael, your tank will blow up and you have to change it. The death will heal him for 15% so got to just have enough dps to burn though all that before all your tanks die. Brez tanks to rotate back in if necessary.
Runemaster (Medium) -> Stormcaller (Small) -> Steelbreaker (Hard Mode):
This might be easier for some raids. Similar to above, but kill the Runemaster to eliminate the need to run around the Death Runes. The second guy then has to be locked down with kicks and stuns so the Lightning doesn't kill you. Do the rest like above.
Achievements:
I Choose You, Runemaster Molgeim: Defeat the Assembly of Iron with Runemaster Molgeim as the last member alive on Normal/Heroic Difficulty.
The medium difficulty kill
I Choose You, Stormcaller Brundir: Defeat the Assembly of Iron with Stormcaller Brundir as the last member alive on Normal/Heroic Difficulty.
The easy mode kill
I Choose You, Stormbreaker: Defeat the Assembly of Iron with Steelbreaker as the last member alive on Normal/Heroic Difficulty.
The hard mode kill
But I'm on Your Side: Defeat the Assembly of Iron while under the effect of an Iron Boot Flask on Normal/Heroic Difficulty
Personal achivement, get your boot flask from Frosthold. Use it, don't die, kill boss. Don't be a druid either. Well, can use it at the last seconds of the fight to get this.
You Can't Do That While Stunned: Defeat the Assembly of Iron without allowing Stormcaller Brundir to damage anyone with Chain Lightning or Lightning Whirl on Normal/Heroic Difficulty.
We did this while doing our Hard Mode order. The problem is that on pull he starts shooting lightning, so you have to have ranged interrupts quickly and on the ball. Or a rogue stealthed up near by and get that first kick off before he finishes casting. The hard part is the pull interrupt, after that you should be able to lock it down.
Trash Info:
See /Kologarn trash info.
Videos:
10 Man Hard Mode:
25 Man Runemaster Last:
Sources:
04 - XT-002 Deconstructor Strategy Guide
saedo — Sat, 04/04/2009 - 13:26
 Health:
- Normal: 5,250,000
- Heroic: 25,000,000
- 10 Minute Enrage
Abilities:
- Tympanic Tantrum: Deals 10% damage every 1 sec for 12 sec. Nearby enemies are also dazed for the duration. 2 sec cast / Channeled
- Light Bomb: Charges the target with divine energy, causing them to sear nearby allies for 9 sec.
- Gravity Bomb: Charges the target with dark energy, causing them to explode and pull in nearby allies after 9 sec. (Pulls enemies within 10 yards into a gravity well, dealing 19000 to 21000 damage. Instant)
Adds:
- XM-024 Pummellers: melee fighter adds and use Arcing Smash, Uppercut, and Trample
- The XS-013 Scrapbots: runs to XT-002 Deconstructor to repair it. If they manage to reach it XT-002 will consume them and regain health.
- XE-321 Boombots: explode and deal damage to anyone within 20 yards, including NPCs.
Hard Mode:
To activate hard mode, destroy the exposed heart during a phase change and he restores to max health and gains the following abilities:
- Heartbreak: The heart of the XT-002 Deconstructor has been severed, removing the combat limitations of the XT-002 Deconstructor. Damage increased by 30%. Health increased by 40%.
- Void Zone: Summon a Void Zone that deals 7500 Shadow damage to enemies that stand within it. This is spawned by Gravity Bomb.
- Life Spark: Light Bomb also spawns an add called Life Spark. This add will repeatedly cast Static Charge - Deals Nature damage to all enemies within 500 yards every 3 sec.
The Fight:
A mostly tank and spank with adds coming out type of fight. He does Tympanic Tantrum which is like a thunderclap or Void Reaver's pound. He makes people into bombs, so the ranged would be best be stacked together so the bomb guy can run out before killing the raid.
Every 25% (75%, 50%, 25% of total hp), he stops and adds come out. Scrapbots will heal him if they reach him, so kill those asap. Boombots blow up at 50% health damaging everything around them including other adds, so they can be used to help. Pummellers must be offtanked, and taken care of after all the Scrapbots are dealt with.
Repeat.
Ok more details. The boss is tanked in the back near the stairs. The raid should spread out. AoE healing is less effective, but AoE damage is also reduced.
During add phase, the Heart is exposed for 30 seconds. Every damage done to it will transfer to XT-002, and it is also vulnerable taking double damage. This is significant in helping with the enrage timer. The adds have a little lag time before they appear from the scrap piles from the 4 corners of the room. Just make sure not to kill the heart, stop at 10-20% or so.
After the heart phase, be sure to kill the remaining Scrapbots, utilizing the Bomb bots when you can. Also for the Pummelers, we just let splash damage finish them off. Though be careful they do cleave around melee, not lethal one-shot cleaves, but still hits hard.
For hard mode, during the add phase, destroy his heart. This will reset his health, well actually increasing it too, along with damage. You can do it in any of the add phase, but since it's the same hard mode loot in any of them too, it's best to do it early.
Added lethal abilties are Void Zones and a Life Spark add from the bombs for more aoe damage all around.
After destroying the heart, clean up the adds, there will be no more heart phases so no more bots coming, just straight dps. Work out a system for the Gravity Bomb and Light Bombs. We had Gravity Bombs go left, dropping off Void Zones there. Light Bombs go right, and towards the tank, so the Life Spark can be closer to him to be pulled off. Ranged will switch to dps it down. Rinse and Repeat.
Achievements:
Nerf Engineering: Defeat XT-002 Deconstructor without him recovering any health from XS-013 Scrapbots on Normal/Heroic Difficulty.
Simple task to do. Just need to make sure of it.
Nerf Scrapbots: Defeat 20 XS-013 Scrapbots within 12 seconds using XE-321 Boombots on Normal/Heroic Difficulty.
This may need a bit of a trick since these bots aren't tankable and only move towards the boss I believe. So I'd imagine we'd have to tank in the middle, furthest from all 4 piles. And simultaneously work on 4 boombots on each pile and get em to blow up the scrapbots within those 12 seconds.
Nerf Gravity Bombs: Defeat XT-002 Deconstructor without any raid member dying from a Gravity Bomb on Normal/Heroic Difficulty.
Raid check, another simple one.
Must Deconstruct Faster: Defeat XT-002 Deconstructor in 205 seconds on Normal/Heroic Difficulty.
Simple again in theory. Probably just more gear, less healers, etc, etc.
Heartbreaker: Defeat XT-002 Deconstructor after destroying his heart on Normal/Heroic Difficulty.
Hard Mode. Well the fight resets with more damage more health, but not the timer though. Most part the fight is the same, cept Gravity Bombs leave Void Zones to not stand in. Light Bombs leaves a Spark add that does more damage.
Trash Info:
The 2 packs on either side have been brought back. They were gone for a week due to a bug making them both linked. Anyways, you'll find 3 tech gnomes, and a bunch of bots. They bots themselves cleave and stuff, can hit hard, also one of them throws Sawblades up which are killable (14K hp) or they can rape the raid.
The tech gnomes are what to focus on first. They can cast a shield that will heal them while in it, and reduces damage done to them by 90%. So gotta interrupt those casts. Or if they get it off, drag them out of the shields, they're big and yellow, can't miss them.
After that, most of the threat is gone, and the rest can be burned down.
Sources:
02 - Razorscale Strategy Guide
saedo — Sat, 04/04/2009 - 12:29
 Health:
- Normal: 3,900,000
- Heroic: 12,000,000
Abilities:
Both Phases:
- Devouring Flame: Spits a Lava Bomb at an enemy, inflicting 8788 to 10212 Fire damage and deals 8788 to 10212 fire damage every 1 second to anyone staying within 6 yards of the impact, lasts 25 seconds. 1.5 sec cast
Air Phase Only:
- Fireball: Inflicts 12025 to 13975 Fire damage to an enemy.
Ground Phase Only:
- Flame Buffet: Increases the Fire damage an enemy takes by 1500 for 1 min. Stacks up to 99 times.
- Wing Buffet: Knocks back enemies in a radius around the caster. 1.5 sec cast
- Flame Breath: Inflicts 17500 to 22500 Fire damage to enemies in a cone in front of the caster. 50 yd range, 2.5 sec cast
The Fight:
This is a fairly straightfoward fight. Razorscale starts in the air, merely bombarding us with fire we avoid. Don't stand in BLUE FIRE.
On the ground, there will be NPCs we have to defend from adds, as they will be repairing harpoon turrets. DPS should take care of the adds as priority. Adds will spawn from randomly appearing mole drills.
Sentinels are the vyrkuls and should be killed asap, whirlwinds are most lethal. Watchers are the slightly smaller dwarves that shoot out chain lightning, another significnt source of damage, and should be handled next. Guardians are the weaklings to be taken care of.
After a turret is repaired, we can click on em and fire at Razorscale, dragging her to the ground a bit. After 4 harpoons are hit (2 in normal), she is stunned on the ground for a minute. This is where dps goes all out on her. The raid should be ready before the last harpoon is fired, i.e. adds mostly cleared. After the stun wears off, she'll take off again, and we'd have to repeat this.
It should only take 2-3 ground phases before we force her to the ground. Heroism would be best used the 2nd time she's on the ground to avoid the 3rd phase. If she does take off, do not push her over in the air, she retains aggro, so if a tank is handling adds and not prepared to taunt, you may be fucked.
When we get her to 50% health, she'll stay on the ground, and it becomes a standard tank and spank fight. Stay away from the front, avoid the fires, collect loot. The Flame Buffet serves as a soft enrage so go all out.
Achievements:
A Quick Shave: Defeat Razorscale without allowing her to fly into the air more than once on Normal/Heroic Difficulty.
This is easy with the dps. Heroism on 2nd ground phase to better ensure it.
Iron Dwarf, Medium Rare: Defeat 25/50 Dark Rune Guardian Dwarves with Razorscale's Flame Breath on Normal/Heroic Difficulty.
This is a progressive achievement. Meaning we don't have to do it in one sitting. Can slowly accumulate it over 4 years if you want.
Anyways, the goal is to get the Guardians into the Ground Phase, and have Razorscale's Flame Breath finish them off.
Because of all the damage, you might not want to bring all that spawned into Ground Phase, just what you can. Basically means don't aoe those, drag em in front of her, ???, profit.
Anyways, repeat as many weeks as it takes til you get this.
Sources:
03 - Ignis the Furnace Master Strategy Guide
saedo — Fri, 04/03/2009 - 16:07
 Health:
- Heroic: 24M
- Normal: 6.9M
Abilities:
- Flame Jets: Stomps the ground causing geysers of flame to errupt under all enemies. These geysers deal 8483 to 9517 Fire damage, knocking the targets into the air and interrupting any spells being cast for 8 sec. In addition, the targets take 2000 Fire damage per second for 8 sec. 2.7 sec cast
- Scorch: Fires a jet of flame, burning all enemies in front of the caster within 30 yards, dealing 3770 to 4230 Fire damage every half-second for 3 sec. Additionally, the ground is scorched by this effect causing it to catch on fire, dealing 7540 to 8460 Fire damage every second to all enemies within 13 yards. Iron Constructs within this radius will begin to heat up, eventually becoming molten.
- Slag Pot: Charges and grabs a random enemy target, tossing them into the caster's slag pot. The target is unable to attack the caster and takes 7500 Fire damage every second for 10 sec. If the target survives, they are imbued with the magical slag, increasing their haste by 150% for until cancelled.
- Strength of the Creator: Increases Ignis' damage by 15% each time an Iron Construct spawns. Stacks up to 99 times.
Iron Contructs:
- Heat: Blasts all nearby Iron Constructs with intense heat, increasing their movement speed by 5% and haste by 5%. This effect stacks up to 20 times. If this effect stacks to 20, the affected Iron Construct will become Molten
- Molten: The Iron Construct becomes Molten, increasing haste by 100%. In addition, Flames errupt out from the caster every second, dealing 4713 to 5287 Fire damage to enemies within 7 yards. Drag the Construct in the water and it will become Brittle.
- Brittle: The cold water causes molten Iron Constructs to rapidly solidify, rendering them unable to act. In addition, if they are dealt more than 5000 damage during this state, they will shatter, dealing 18850 to 21150 damage to all enemies in a 10 yard radius.
- Shatter: Deals 18850 to 21150 Physical damage to all enemies within 10 yards. Damage from this effect ignores armor.
The Fight:
This is mostly a tank and spank fight, but can hit the tank hard, upwards of 30K. He will occasionally scorch the ground in front of him, so just move away.
Casters need to pay attention to Flame Jets timer, when it goes off it'll interrupt any spell casting for 8 seconds. They are spells that are resistable or whatever spell avoidance immunity you got. So use em to help mitigate damage.
Randomly charges and throws someone in the slag pot dealing 5000 damage per second, so heal him. Should he live, he'll get a haste buff. You can cast in it still, and use spells that make you immune, however if you do anything to remove the debuff, you will not get the buff afterwards (haste), and will not get the personal achievement.
There are constructs in the room he'll activate. Each one active increases his damage by 15%, off tank em.
The way to kill those is to drag em into the scorched ground til they become Molten (stack to 20), then drag them to the pools of water. They'll be rendered unable to act for 15 sec, so run away and ranged blow em up, a single 5K hit will kill it. Not collective damage, a single hit.
We settled on more of a 3 point drop off locations for the scorch. Left, Center, Right sides of the pool of water, both sides, and dropping it about 3 times between each pool on either side. This keeps the scorches relatively close so the OTs can drag Constructs into them before they wear off. The raid mostly stands in the middle, with only some healers and DPS to move in range for shattering Constructs.
The Trash:
There's a pair of fire giants, and a few pairs of golems, and pairs of elementals. Here's the quick and dirty versions...
Fire Giants: Tank em apart, they do a damaging fire aura to everyone in range. Even after death so stay away from their corpses.
Golems: Charged people and put a slowing attack speed debuff on tank. Nothing huge.
Elementals: These have a trick we remember. They spawn out 2 fire cyclones that knock you around and do I believe 7K damage per tick. Run away run away. Melee could run away, but I kind of found when they spawn, they aren't really that lethal, they knock you way back. So as long as the cyclones aren't chasing you down in particular to get hit again, just run back.
Achievements:
Shattered: Defeat Ignis the Furnace Master after shattering 2 Iron Constructs within 5 seconds on Normal/Heroic Difficulty.
This does not require you to kill Ignis within that timeframe either. It's only asking you to shatter 2 within 5 seconds. Then don't wipe. So easiest thing is to gather 2, drag em to fire, then blow em up. Then continue the rest of the fight normally.
Hot Pocket: Survive being thrown into Ignis the Furnace Master's Slag Pot on Normal/Heroic Difficulty
This would be a personal achievement. Part luck to be chosen, part healers to heal you through it. Do not use bubbles (or equivalent) to escape it if you want this achievement.
Stokin' the Furnace: Defeat Ignis the Furnace Master in 4 minutes on Normal/Heroic Difficulty
Just a straight dps it down in time thing. Quite easy once this fight is on farm, don't really even need special stacking if you got decent dps.
Sources:
- http://www.wowwiki.com/Ignis_the_Furnace_Master
- http://www.stratfu.com/strats/Ignis
- http://www.mmo-champion.com/index.php?page=839
01 - Flame Leviathan Strategy Guide
saedo — Fri, 04/03/2009 - 13:15
 Health:
- Normal: 15,550,000
- Heroic: 62,766,000
Abilities:
- Flame Jets: Inflicts 3000 Fire damage each second to enemies around the caster. Lasts 10 seconds. 50 yd range (interruptable)
- Battering Ram: Rams the target, dealing damage and knocking it forward. Deals 100% Weapon damage and causes the target to take 50% more damage for 20 seconds.
- Gathering Speed: Rams the target, dealing damage and knocking it forward. Deals 100% Weapon damage and causes the target to take 50% more damage for 20 seconds.
- Missile Barrage: All machines and players not in one will take 700 damage every 1-2 seconds.
- Turrets: The Flame Leviathan has 4 turrets. Passengers in the demolisher can be launched at him where they can destroy the turrets and then hit the Overload Circuit: stuns Flame Leviathan and causes him to take 50% more damage for 10 seconds.
Vehicles:
- The health points and attacks of your vehicle depends on the ilvl of your gear.
- Shirt, tabard, offhand, and ranged/relic slots do not affect vehicle scaling.
- Take the average ilvl of your gear (subtract 13 for each blue, 26 for each green) and dividing by 15 (total number of applicable slots), then subtracting 170 will give you the percent increase of the health points of your vehicle compared to base - it cannot be decreased though (naked is a 0% increase).
Salvaged Siege Engine:
- "Tanks/Kiters" of the encounter
- 1 driver + 1 turret controller + 2 passengers
- Ram: Rams any enemies in front of the demolisher, dealing 22501 to 27501 Damage and knocking them back. Also deals 2850 to 3150 siege damage to buildings. 40 Energy.
- Electoshock: Shocks all targets within a 25 yard cone in front of the caster. It also interrupts spellcasting and prevents any spell in that school from being cast for 4 sec. 20 Energy, Instant cast, 10 sec cooldown
- Steam Rush: Put the steam engine into overdrive for a short duration, rushing forward, dealing siege damage and knocking back enemies. 40 Energy, 70 yd range, Instant, 15 sec cooldown (Do not steam rush on ramps, you will fall through the world atm)
Passenger Abilities:
- Anti-Air Rockets: Fires an explosive missile directly forward, detonating when it has travelled 100 yards, hitting any enemies within 10 yards. 0.25 sec cooldown
- Fire Cannon: Fires a cannon blast. 20 Energy, 10-70 yd range, Instant
- Shield Generator: Activates the shield generator on the Siege Engine, absorbing a limited amount of Physical, Fire, Frost and Arcane damage taken for 5 sec. 1 min cooldown
Salavaged Demolisher:
- Slow ranged dps
- 1 driver + 2 passenger, passengers help grab ammo from the ground and can be launched onto the Flame Leviathan
- Hurl Boulder: Hurls a massive boulder into the distance, dealing 27000 to 33000 damage to enemies within 8 yards of the explosion. 10-70 yd range
- Hurl Pyrite Barrel: Hurls an orb of blue pyrite into the distance, dealing damage, but consumes ammo. 10-70 yd range
- Ram: Rams any enemies in front of the demolisher, dealing 19000 to 21000 Damage and knocking them back. Also deals 2160 to 2640 siege damage to buildings. 4 sec cooldown
- Launch Passenger: Launches the Demolisher's passenger into the air
Passenger Abilities:
- Mortar: Fires a miniature explosive blast, dealing Fire damage to all enemies in the target area. 1 sec cooldown
- Anti-Air Rocket: Fires an explosive missile directly forward, detonating when it has travelled 90 yards, hitting any enemies within 10 yards.
- Grab Crate: Use your hook and chain to grab the targetted crate.
- Increased Speed: Injects liquid pyrite into the engines, increasing movement speed by 100%. Lasts 20 sec.
- Load into Catapult: Load yourself into the catapult arm, using yourself as ammunition. 30 sec cooldown
Salvaged Chopper:
- Speedy support type vehicle, "debuffs" and heals passengers
- 1 driver + 1 passenger
- Speed Boost: Fires the fuel injectors on the bike, increasing its speed by 100% for 5 sec.
- Sonic Horn: Sends a wave of force in front of the motorcycle, causing 6300 to 7700 damage to all enemy targets within 35 yards in a frontal cone.
- Tar: Drops a pool of tar for 45 sec that slows the movement speed of enemies within 10 yards. Tar can be ignited. Lasts for 45 sec. 15 sec cooldown
- First Aid Kit: Heals your passenger fully over 4 sec. 1 min cooldown
Encounter:
Gauntlet:
The encounter is activated by talking to the npcs, though the mobs won't aggro til we move out. Trash is easy, should be able to aoe everything down with the vehicles. Iron Colossus' Ground Slam should be avoided or interrupted by the Seige Engines.
Towers should be destroyed along the way if Hard Mode is not the goal. No need to clear everything though, they should not add during the boss.
If Brann is the one to activate it, the towers are automatically off, so can go straight to ez mode.
We can repair at the end of the Gauntlet, do so if not going for that achievement, and stock up on all the pyrite (ammo) you can before the last packs of the boss.
Boss:
Every vehicle must stay out of melee range of Flame Leviathan.
Seige Engines: Flame Leviathan will immediately target somone close to him, the best option is the Seige Engine so make sure they're closest. The goal is to kite him around, coordinate a path for the raid to follow. The trick is that Flame Leviathan will get faster as the fight goes on, a system shutdown will reset his speed. Also use its Electroshock to interrupt flame wave
Demolishers: Besides being the ranged dps and tar igniter, this one can also launch passengers onto Flame Leviathan to take out its Turrets. This might not be needed at all in easy mode.
Coordinate a dps and a healer to be launched simultaneously to take them out. Also coordinate choppers to pick them up quickly and take them to safety (or demonlisher to be launched again).
Note: A healer is not necessary on 10 man. It appears Flame Leviathan only shoots you to death on the 25 man.
In 10 man, 2 turrets (4 in 25 man) must be destroyed before a System Shutdown occurs. This stuns Flame Leviathan and launches the people on him off of it, parachute style. This is when they need to be picked up, look to the sky.
Note: Turrets instantly respawn after the Shutdown is over, so passengers can be launched yet again. Only issue is that means Demolishers are without turret passengers to help dps or pick up pyrite.
Choppers: They will be used to shit tar all in front of Flame Leviathan. It'll slow him down and it can be ignited by Demolishers for more damage. They will also be used to pick up stranded people and take em to where they need to go.
Hard Mode:
To access hard mode, along the way before Flame Leviathan, we don't destroy the towers. Here's what each tower does:
- Thorim's Hammer (purple, back left): Deals Stormstrike damage to all enemies nearby. Additional damage is taken if directly under the impact location. Flame Leviathan gains 25% more HP and does 25% more Physical damage.
- Mimiron's Inferno (red, front left): Deals 150000 Fire damage to all nearby enemies and leaves a flaming blaze behind. Flame Leviathan gains 25% more HP and does 50% more Fire damage.
- Hodir's Fury (blue, back right): Deals 150000 Frost damage to all nearby enemies, entombing them in ice. (only freeable via tar fire) Flame Leviathan gains 25% more HP and slows vehicle movement by 20%
- Freya's Ward (green, front right): Deals 13500 to 16500 Natures damage to all nearby enemies and summons guardians of nature to surround the enemy. Flame Leviathan gains 25% more HP and decreases his fire damage taken by 10%.
In 10 mans, we made a slight adjustment to the above strat for hard(er) modes. We send 1 ranged dps up, to handle both turrets, non hunters. Also, one of the choppers is abandoned at the beginning to ride with the launcher Demolisher, that way both Demolishers will always have passengers, doing the Pyrite thing and dps.
Read /flame-leviathan#comment-38620 for details
Achievements:
Dwarfegeddon: Destroy 100/200 Steelforged Defenders in 10 seconds on the Ulduar gauntlet on Normal/Heroic Difficulty.
What we did was just make a b-line towards the repair pads. Avoid killing towers, take out the big buys mainly, which does splash down the small guys. But anyways, clearing the path of any major threat, then use the repairs. Then we went back towards the front pulling along all the small guys we can find, when we saw enough, on cue, blow em up. Easy shit.
Unbroken: Defeat Flame Leviathan on the first try without anyone repairing their vehicle on Normal/Heroic Difficulty.
Likely easiest on Easy Mode of course. Just don't repair don't wipe. Though, I could see this being "easy" on Hard Mode too, since we'd skip the towers, skipping chunks of trash, our vehicles should be less damaged. Though that means only after we have Hard Mode on farm to kill it the first try.
Three Car Garage: Defeat Flame Leviathan while in each of the following vehicles on Normal/Heroic Difficulty.
Personal achievement, just ride something different each week. It only counts if you're in the vehicle upon Flame Leviathan's death. Not dead, not on the turret, not anywhere else.
Take Out Those Turrets: Destroy a Flame Leviathan Defense Turret on Normal/Heroic Difficulty.
Personal achievement, the new Denyin the Scion. So guess after farm mode starts up we'd have to launch specific people. (after we learned to launch people ;p)
Shutout: Defeat Flame Leviathan without causing a System Shutdown on Normal/Heroic Difficulty.
Well we stumbled upon this in our zerg the boss fashion. lol Probably only possible on Easy Mode for now. Simply, don't launch anyone, zerg away.
Orbital Bombardment: Defeat Flame Leviathan with 1 Orbital Defense System active on Normal/Heroic Difficulty.
We chose Thorim's tower to leave up (purple). It's quite simple really, avoid the big blue beams coming from the sky. We liberally launched 2 dps on to the Turrets everytime to cause the System Shutdown as much as possible. This mode currently makes him drop 2 [Emblem of Conquest] instead of 1 emblem in either mode.
Orbital Devastation: Defeat Flame Leviathan with 2 Orbital Defense Systems active on Normal/Heroic Difficulty.
We chose to leave Mimiron's tower along with Thorim. Mimiron leaves a big red moving laser and leaves a pile of fire (like Ignis scorch) that you don't want to stand in. The trick is that the moving laser can cut you off while kiting and stuff around the room. But if you can stay away and a little luck, this isn't so bad. This mode drops a [Runed Orb] in addition to the above. In 25 man, an extra stack of 2 orbs are dropped.
Nuked From Orbit: Defeat Flame Leviathan with 3 Orbital Defense Systems active on Normal/Heroic Difficulty.
Hodir is a next possibility, he ice blocks people which can be melted by fire attacks (pyrite, flame jets, chopper tar fire, Mimiron's laser). The beams are pretty fast moving light blue beams that follow people. It's dangerous when it stops, then a few seconds later you get entombed in ice. Avoid that at all costs, you take heavy damage and require quick fire attention to release you, so it'd likely hurt your vehicle way badly. Make use of quick manuevering and Steam Rush to avoid those.
Orbit-uary: Defeat Flame Leviathan with 4 Orbital Defense Systems active on NormalHeroic Difficulty.
Freya is likely next hardest to deal with. Her beam will be at the 4 corners and spawn adds that the Demolishers should be able to take care of. It's an added complication to constantly shift dps from FL to adds, to stocking pyrite.
Videos:
25 Man EZ Mode
Sources:
- http://www.mmo-champion.com/?page=838
- http://www.stratfu.com/strats/FlameLeviathan
- http://www.wowwiki.com/Flame_Leviathan
Ulduar Strategy Guide
saedo — Fri, 04/03/2009 - 11:46
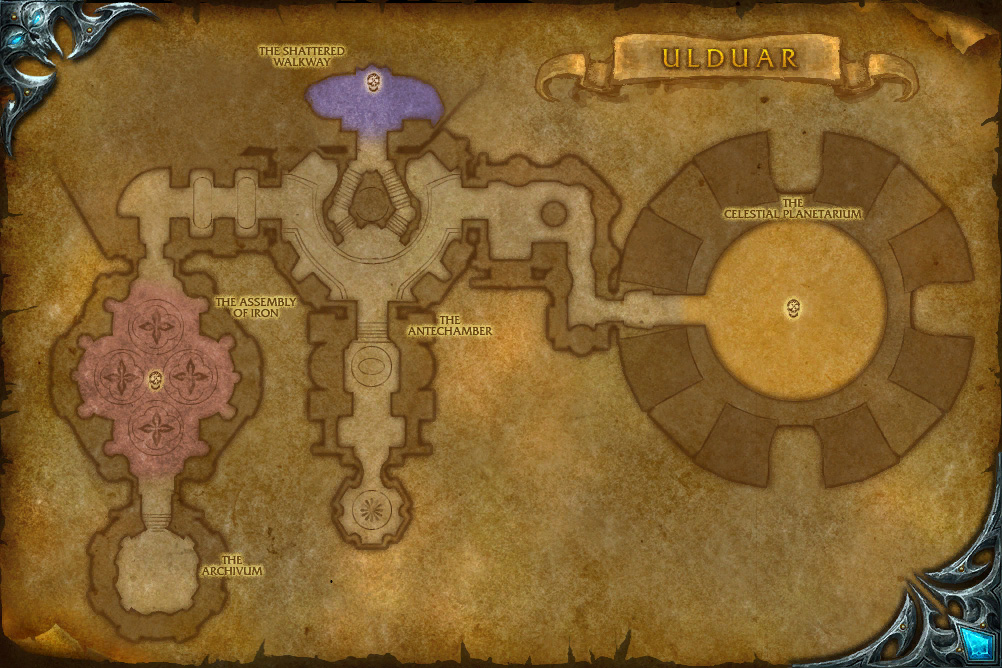
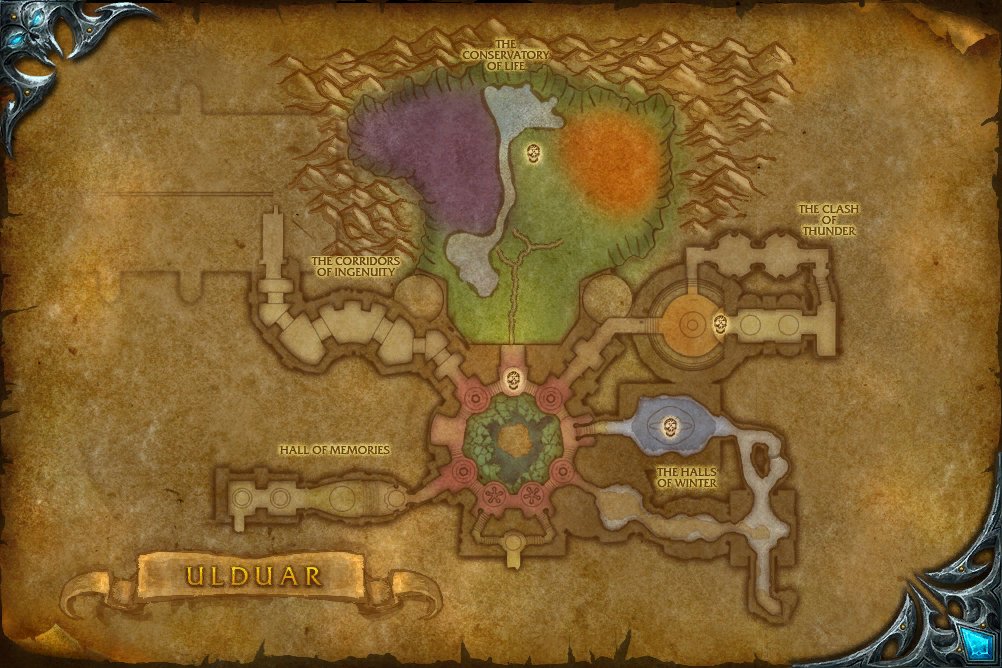
With 3.1 and Ulduar rapidly approaching, I thought I'd put up pages for each boss for us. Abilities, maybe strats, maybe we'll just add to it ourselves as we chug along. This will be the framework for it.
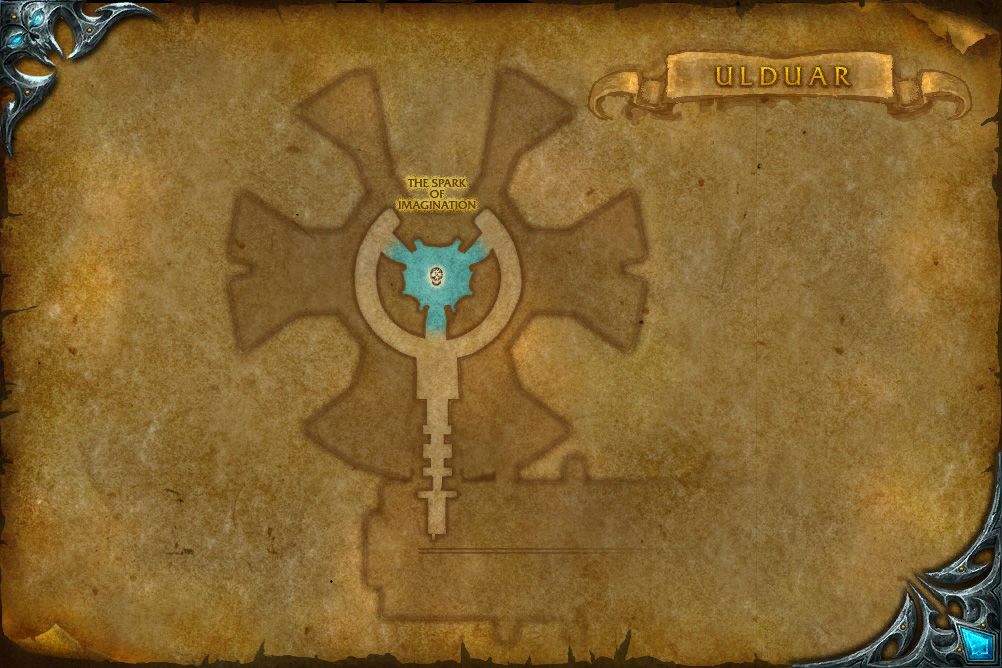
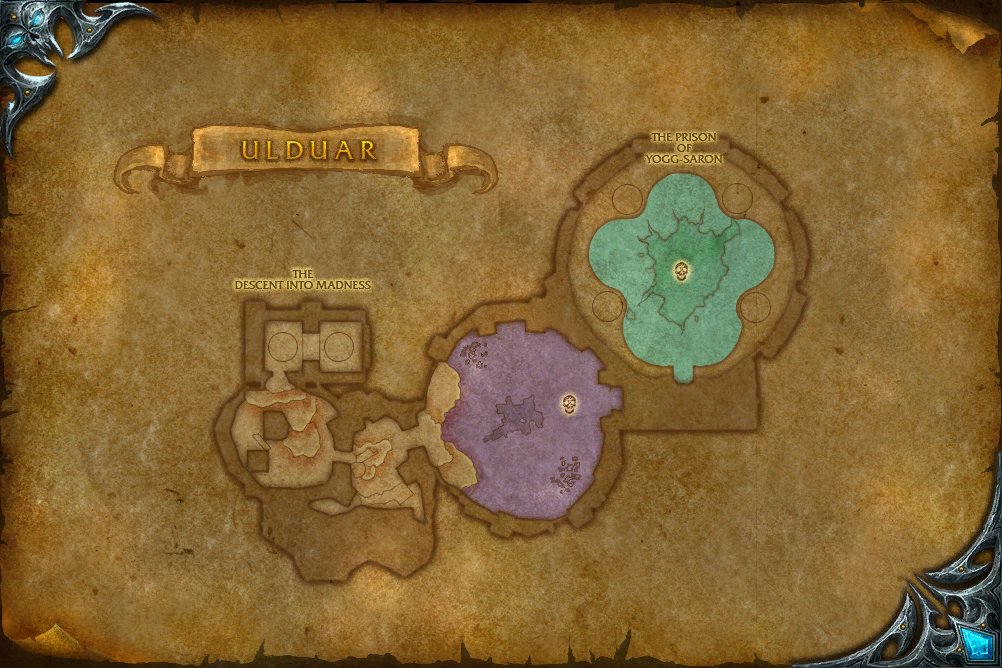
Maps:
Ulduar

The Siege:

The Antechamber:
The Keepers:
The Spark of Imagination:
The Decent into Madness:


Recent comments
7 hours 17 min ago
4 weeks 1 day ago
7 weeks 1 day ago
7 weeks 2 days ago
9 weeks 1 day ago
9 weeks 1 day ago
9 weeks 1 day ago
10 weeks 2 days ago
11 weeks 3 days ago
13 weeks 17 hours ago