
Raid

Downfall Video Archive
saedo — Fri, 10/31/2014 - 18:21
Until we have a better way, I'd like to put every Downfall video we have into these pages. Easy to find and watch, let no video be lost forever in the site.

Warlords of Draenor Raid Guides
Mehguy — Thu, 10/30/2014 - 21:57

WELCOME DOWNFALLERS!
The Raid Guide for Highmaul is complete, and I will begin working on Blackrock Foundry in the coming week(s). Since Blackrock Foundry is not being released for a while, there is time to get a little more up-to-date information on it before we get our hands on it anyways.
Please utilize the below guides to better assist you and get you prepared for the upcoming raid encounters in Warlords of Draenor.
This information will be primarily based off of the BETA HEROIC difficulty until everything starts getting cleared on live. If I find differences listed between Heroic and Mythic, I will post them as well.
The information posted will be very generalized. If you want greater detail on abilities (dmg numbers, etc) please click the link that will be provided in each guide to view the dungeon journal at WOWHEAD, or you can look at the in-game dungeon journal.
There will be BETA videos embedded in each guide from Fatboss (yes we all know our healers, dps and tanks are complete shit), Icy-Veins, and whatever other source I can pull material from.
Do NOT expect these guides to give you a "sure-fire" strategy to guarantee you a kill.
These guides are meant to give you a brief overview as to what to expect, and possibly how to handle certain mechanics before you experience them for yourself.
If anyone has done these encounters in BETA, please feel free to leave your comments on your experience on the specific fight. Please also list what difficulty you did it in.
07 - Imperator Mar'gok
Mehguy — Sun, 08/24/2014 - 14:38
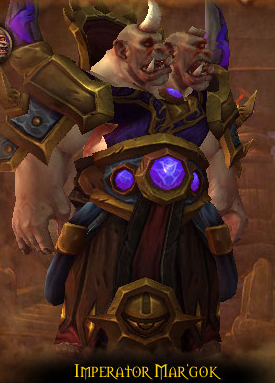
FML and here we go....
Imperator Mar'gok is the last encounter in the Higmaul raid.
For a more detailed view of his abilities PLEASE PLEASE PLEASE view the Dungeon Journal in-game, or FUCKING CLICK HERE to view them at WOWHEAD.
Imperator Mar'gok is a 4-phase encounter with 2 intermissions between phase 2/3 and 3/4.
The phases have "repetative" abilities from phase-to-phase, meaning they will have their normal effects (mostly) but each ability will be augmented with additional effects from phase-to-phase.
Abilities
Phase 1 (100 to 85%)
- Mark of Chaos - Tank debuff, lasts 8 sec. After this expires, deals massive dmg to all nearby players (not the affected tank) within 35 yards. Tank run away from raid.
- Accelerated Assault - Each consecutive melee attack against the same target will increase the bosses attack speed by 8% (stacks). Tank swap, likely just swap around the same time as the MoC debuff gets applied.
- Arcane Wrath - targets a random player and "brands" them for 4 sec. When this expires, it will deal moderate arcane dmg and will jump to the closest person within 200 yards. Each time this jumps, the dmg will increase by 25% and the range will decrease by 50%. You need to get this to jump a few times(probably 3 times), then have the 4th affected player run over 25 yards (200->100->50->25) away so the debuff has no one to jump to and it just falls off.
- Destructive Resonance - An arcane mine that lasts for 1 minute. If triggered, will deal moderate/high dmg to all players and massive dmg to the player that triggered it. Will also increase that persons arcane dmg taken by 45% for 1 min and stunning them for 1.5 secs each time they take arcane dmg.
- Arcane Aberration - Summons an add that pulses mild AoE dmg to the raid.
- Force Nova - Releases a large arcane energy wave that deals mild arcane dmg every 0.3 sec to all players within the effect.
Phase 2 (85% to 55%) - Rune of Displacement Phase, primary abilities are augmented with "Displacement" effects.
- Arcane Wrath: Displacement - Same effects as normal, but players cannot move 10 yards from the spot they were marked. If they do, they will be teleported BACK to their original spot
- Destructive Resonance: Displacement - Same effects as normal, but now it grows to twice its original size over 30 secs.
- Displacing Arcane Abberation - Same add as normal, but when it dies, it will knock back ALL players (or so says the DJ)
- Mark of Chaos: Displacement - Normal effects, but the target (tank) is teleported to a random location
- Force Nova: Displacement - Normal effects, but now also pushes players away (with the wave) as it expands
Intermission 1 (55%) (lasts 1 minute)
During this intermission, the boss will begin channeling a new rune to augment his abilities. He will be immune during this time. He will also summon 2 Gorian Warmages, and Volatile Anomalies will spawn from the rune stone every 12 sec.
Gorian Warmage - These will fixate on random players, attacking only them for 15 seconds before swapping. They also have a Dominance Aura, which empowers all enemies within 25 yards. Increasing dmg done, as well as melee, ranged and spell casting speed by 50%. Will cast Nether Blast, dealing moderate dmg to any player within 5 yards of the target. Will Slow (dispellable) random players, reducing movement, attack/spell cast speed by 50% for 45 sec.
Volatile Anomaly - Tankable. When killed, explode for moderate arcane dmg to ALL players.
Phase 3 (55% to 25%) - Rune of Fortification phase, primary abilities lose "Displacement", but are now augmented with "Fortification" effects.
- Arcane Wrath: Fortification - Normal effects, but the range reduction drops from 50% to 25% with each jump.
- Destructive Resonance: Fortification - Normal effects, lasts for 2 minutes instead of 1.
- Fortified Arcane Aberration - Adds are now immune to all CC and have 75% more health
- Mark of Chaos: Fortification - Normal effects, target (tank) is now rooted in place
- Force Nova: Fortification - Normal effects, however an additional Nova wave is released every 8 sec for 16 sec (so 2 extra waves)
Intermission 2 (25%) (lasts 1 minute)
During this intermission, the boss will begin channeling a new rune to augment his abilities. He will be immune during this time. He will also summon 1 Gorian Reaver, 2 Gorian Warmages, and Volatile Anomalies will spawn from the rune stone every 12 sec.
Gorian Reaver - Casts frontal/conal Devestating Shockwave, dealing massive dmg to all players in front of him. Also applies a stacking tank debuff Crush Armor, increasing phys dmg taken by 25% for 25 sec. Will also Kick to the Face (not joking), dealing massive dmg to the target, clears all threat and knocks the player back.
Gorian Warmages and Volatile Anomalies are the same as the first Intermission.
Phase 4 (25% to 0%) - Rune of Replication phase, primary abilities lose "Fortification" but are now augmented with "Replication" effects.
- Arcane Wrath: Replication - Normal effects, however a 2nd player will be affected the FIRST time this jumps, so there will be 2 "wraths" out for the duration.
- Destructive Resonance: Replication - Normal effects, however when the mine either explodes on its own or is triggered, 2 additional mines will spawn nearby. Unknown if this only occurs once or if this serves as a soft enrage (ie, getting overwhelmed with mines)
- Replicating Arcane Aberration - Normal effects, once the add dies, will spawn into 7 "Remnant" adds.
- Mark of Chaos: Replication - Normal effects, when this expires, 8 Orbs of Chaos spawn around the target(tank), these will fly outward from the player and deal massive arcane dmg to anyone they hit.
- Force Nova: Replication - Normal effects, but anyone hit by this will also deal mild/moderate dmg to players within 4 yards of one another.
Summary
Fuck this fight... no seriously, FUCK this fight.... But I'll do my best.
Phase 1 - Let the Arcane Wrath jump a few times and have the 4th affected player run from group to lose the debuff. As for the "Mine" from Resonance, you can either trigger it, or let it run its course. Unsure what the preferred method is currently. Nuke the Aberration add(s) that spawn. Try to get through the Force Nova wave as fast as you can to negate as much of the dmg as you can. Tanks run the Mark of Chaos debuff away from raid, and swap when appropriate due to Accelerated Assault stacks.
Phase 2 - Raid will have to move from the player affected by Wrath after its jumped so many times in order to get it to drop. Probably once 1 person is affected, have it jump between 2 (maybe 3) designated people while the rest of the raid moves away to get it to drop. The Resonance mine might need to be triggered due to the activation radius growing in size. Again kill the Aberration add(s), but be wary of the knockback so you dont get thrown into a mine, etc. For the Nova wave, if you are going to blink/leap through the wave, be sure you do it with accuracy so you dont land at the back edge of the effect and get stuck in it from the pushback for the entire duration. Tanks be wary of being teleported near the raid with the Mark of Chaos debuff and still tank swap when appropriate.
Intermission 1 - Cleanse slowed players, and try to keep the Warmages separated (remember they fixate randomly). Stay spread for their Nether Blast attack. Kill the Volatile Anomalies, but try to stagger them a bit so you dont take raid-wide AoE from all 3 dying at once. Perhaps use raid def/healing CDs when they die.
Phase 3 - Either deal with the Wrath longer, or get some designated people onthe other side of the room to make it jump a few times, then range it from farther away. Resonance mines last twice as long, so you might have to detonate them to get rid of them. from taking up space in the room. Focus the Aberrations as they have more health and you can't cc them. Melee and Ranged will have to run away from the tank(s) when they get affected with Mark of Chaos. May have to use some healing/def CDs on the last wave or 2 since there will be multiple waves that spawn instead of just the one.
Intermission 2 - Tanks tank the new Reaver add, tank swap and face it away from the raid (duh). Might need to tank against/near a wall for the Kick to the Face. Otherwise deal with the Warmages and Anomalies the same.
Phase 4 - Probably need to split the raid up in 1/2 to deal with the duplicate Wrath. For the replicated Resonance mines, I would probably recommend letting them set. They last a minute and you dont want to spawn multiples too early. Probably nuke the Aberration and cleave down the Remnant adds that spawn... unless they deal massive dmg, in which case you may want to chain CC the Aberration(s). Tanks run away from raid (like normal) but raid needs to be wary of the Orbs of Chaos that will spawn/fly out from the tank when the debuff falls off. For the Nova wave, try to stay spread 4 yards from others when dealing with the wave so you don't splash damage on everyone.
Mythic Differences
In Mythic, the fight changes to a 3-phase fight, still with 2 intermission phases.
Phase 1 (100% to 66%) - The fight STARTS with the bosses abilities augmented by BOTH "Displacement" AND "Replication" effects... YAY 2 TIMES THE FUCKING FUN!!!....
Intermission 1 (1 minute duration) - The only change is each time one of the Warmages successfully casts their Nether Blast it increases all damage done by 25% for 6 secs (stacks).
Phase 2 (66% to 33%) - The "Replication" effect fades, and the boss will now use both "Displacement" AND "Fortification" effects.... 'YAY' to 2 times the fucking fun AGAIN!!...
Intermission 2 (1 minute duration) - Same change as Intermission 1. Nothing new in regards to the Reaver add.
Phase 3 (33% to 0%) - The "Displacement" effect fades, and the boss will now use both "Fortification" AND "Replication" effects. You know the drill... I'm just going to go cry in a corner now.
The following vid is NORMAL difficulty
04 - Brackenspore
Mehguy — Sun, 08/24/2014 - 14:37
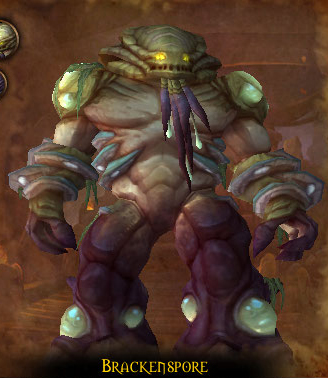
Brackenspore is the 4th encounter of the Highmaul raid.
For a more detailed view of his abilities, please view the dungeon journal in-game, or click HERE to view it at WOWHEAD.
Brackenspore is a fight that, to me, takes parts of Freya, along with an aspect of H Ragnaros to make it very interesting.
You begin this fight next to the Zangar Sea. And the primary "mechanic" of this fight is called Creeping Moss. This is moss that grows in moderate sized patches from the sea, the walls, pretty much everywhere and works its way to the middle of the room. This will deal dmg to any player who touches it, and reduce their movement speed by 50%. In addition, this will heal all fungal creatures (including the boss) for 2% of their max health every 2 seconds. To counter this, there will be Flamethrowers at the entrance to the zone that selected players can pick up and use to run around and burn the Moss away by hitting your extra action bar. While using the flamethrower, you cannot heal, dps, or anything else besides move. The Flamthrower can "overheat", and when it does, you cannot use it for 10 seconds. Its a crucial aspect to the fight to ensure the Moss is contained as much as possible. Players may consider this a DPS loss to have to do this, but you will also gain a Burning Infusion buff that will increase your dmg/healing done that lasts for a short time. So after spending time burning the Moss, you can get a little buff to help yourself keep up with the rest of the raid.
Overall, Brackenspore himself doesnt have a lot of abilities, but there are various forms of Fungus that spawn throughout the fight. Some are "Harmful", some are "Helpful".
Brackenspore abilities
- Rot - Nature dmg dot applied to tanks. Stacks, requires tank swapping after so many stacks (ie however high the tank/healers are comfortable with, or base off when the debuff falls off, etc)
- Necrotic Breath - Frontal conal breath, deals moderate nature dmg every sec. Also reduces all healing done to the affected player (should only be the tank) by 99% for the duration of the breath. Tank should be topped off before this hits, and utilize a personal defensives to stay alive.
- Infesting Spores - raid-wide aoe. 4k nature dmg per sec for 3 secs, stacks up to 10 (so it will end up at 40k per sec for 3 secs at the end). So use raid-wide CDs or utilize the Living Mushroom to heal through the dmg.
- Spore Shooter - a random spawning fungus that targets players and shoots an exploding spore at them, dealing moderate dmg to all players within 8 yards. Damage can be intercepted, so best to ahve a ranged stand in front of them to take the dmg so it doesnt splash on a stacked raid. DoT to kill.
- Mind Fungus - Fungus that when spawned, will reduced casting speed by 75%. Should spawn on a player, and since raid should be stacked during most of the fight, have melee switch to burn it quickly
- Fungal Flesh-Eater - This is a large add that should take priority over everything (except the Mind Fungus). He needs to be tanked as he gains a stacking buff which will increase dmg dealt, cast speed, and attack speed by 10%. This is important because he will cast (almost spam) Decay, which deals 100k raid-wide dmg. It can be interrupted, but require several dedicated interrupters to counter. With the stacking cast speed, if interrupts are not done, he can wipe the raid.
- Living Mushroom - when fully healed, will initiate Living Spores, which will heal all players within 20 yards for 20k+ every second. Use this to counteract Infesting Spore from the boss. The mushroom will wither away and despawn over time.
- Rejuvenating Mushroom - when fully healed will increase haste of all nearby players by 30% and give massive mana regeneration (essentially you cannot go OOM). Should be stacked upon and healed immediately. Also withers away over time.
03 - Tectus
Mehguy — Sun, 08/24/2014 - 14:37
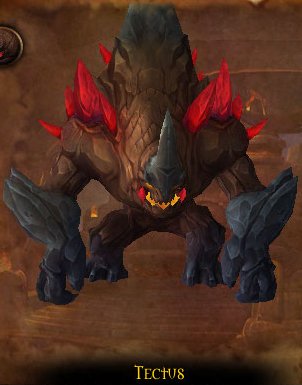
Tectus is the 3rd encounter in the Highmaul area.
For a more detailed view of his abilities, please view the dungeon journal in-game, or click HERE to view it on WOWHEAD.
This fight will be a cluster-fuck early on until everyone gets used to the fight, movements and dealing with all the crap the boss throws out.
Tectus is what I would call a multiplication boss. You start off with 1 boss, who will summon in additional adds. Once you kill him initially he will split into 2 bosses, and adds will stop spawning from this point on. Then once you kill one of those 2 it will split even further into 4 bosses. Worst case scenario if you don't manage the boss properly, you can end up with 8 miniature Tectus running around making your life living hell. Each time the boss splits, the next bosses that spawn will have reduced health. So once you get to the smaller Tectus bosses, you should be able to kill them quicker.
The boss splits as follows.
- Tectus, The Living Mountain (1 boss, will continuously spawn 2 adds), when killed, splits to...
- Shard of Tectus (2 bosses), when killed, splits to...
- Mote of Tectus (4 bosses, possibly 8 if both Shard are killed)
Tectus has several abilities to take note of. Each time he splits into more mobs, these mini-Tectus will have every ability that the original boss had, except for 1.
- The Living Mountain - This buff stays on both Tectus and Shard (Mote do not gain this buff). This buff makes the boss invulnerable to be killed/split until they reach 100 energy and are channeling Tectonic Upheaval
- Tectonic Upheaval - When Tectus reaches 100 energy, he will channel this ability dealing raid-wide nature dmg. Tectus and Shard can be killed/split at this time.
- Accretion - Tectus will absorb nearby earth and increase his dmg by 5%. This stacks. You simply need to continue to dmg him to remove stacks.
- Earthen Pillar - Will use at 25 energy. A large circle/zone will form under players (ranged preferred) and after a short time will spawn a huge pillar. Will instantly kill any player hit by it when the pillar spawns.
- Fracture - These are smaller earth pillars that will spawn under random players, deal moderate dmg and knock the player back. Try to run out if you see it spawning under you.
- Faultline - Will target 1+ player(s) and a red mist will form at Tectus and will follow the targeted player until the debuff wears off. Kite away from the raid.
- NTB - Tanks pick up. Will drop focus on tank, and charge a random player, dealing dmg to anyone in his path to his target. Tanks re-pick up.
- NTE - Casts Gift of Earth which creates a vortex that moves towards Tectus. if it reaches him, it will buf him with 10 stacks of Accretion (50% dmg increase). Players should intercept this vortex, but will take moderate dmg doing so. This will also apply a debuff to whoever intercepts it, slowing their movement speed and healing Tectus if he melee's them. So DO NOT let tanks intercept the vortex. The also do a frontal conal ability, so tanks face them away from the raid also.
06 - Ko'ragh
Mehguy — Sun, 08/24/2014 - 14:37
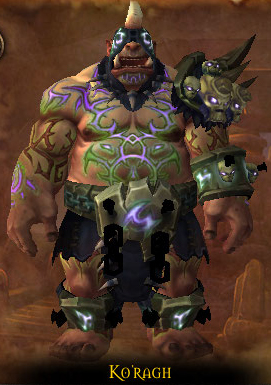
Ko'ragh is the 6th encounter in the Highmaul raid.
For a more detailed view of his abilities please view the Dungeon Journal in-game, or click HERE to view it at WOWHEAD.
The primary mechanic of note in his encounter is an energy barrier that Ko'ragh surrounds himself with. It absorbs all magic dmg, and the only way to remove it is to deal magic dmg to him. So be sure to bring plenty of magic casters.
Abilities
- Nullification Barrier - Energy barrier that absorbs all magic dmg (amount varies based on difficulty). While surrounded by the barrier, he also gains Breaker's Strength, which increases his strength by 6% every 10 seconds. Stacks, but once the NB is removed, the stacks of BS are also removed.
- Charging - When the NB is removed, Ko'ragh will run to the middle of the room and re-charge his Barrier for 20 seconds. Players (5 in LFR, 1 in Normal/Heroic, 2 in Mythic) who stand in the Charging rune effect will gain Caustic Energy.
- Caustic Energy - The Player(s) that stand on the charging run with Ko'ragh will take moderate dmg every second and will received 35% reduced healing while standing in the rune. This will bypass ALL immunities. Caustic Energy will give the affected player their own Nullification Barrier absorbing up to 15 million magic dmg. This will be required for another mechanic in the fight.
- Volatile Anomalies - While Ko'ragh is re-charging his NB, 3 of these adds will spawn every 8 seconds. When they are killed they will explode and deal moderate dmg. Kill these in the Suppression Field to negate all dmg.
- Suppression Field - Ko'ragh will charge a random player and smash the ground, dealing moderate/hight arcane dmg in an 8 yard radius. This will leave a supression circle on the ground that silences all players in it and deals ticking arcane dmg. Use this to silence Volatile Anomalies.
Now onto his primary attacks. He will randomly "Expel" some form of magic... ie. Fire, Arcane, Frost, Shadow.
- Expel Magic: Fire - places a fire DoT for 10 sec. When this expires, this will explode dealing ~100k to all players within 5 yards. SHOULD be able to be dispelled (should do so on melee).
- Expel Magic: Arcane - Tank debuff - Targets current tank and marks their currently location every 0.5 secs for 10 seconds. These locations will begin exploding after 1.5 seconds dealing MASSIVE dmg to all players within 5 yards. Tank swap and the tank affected needs to run this out of the raid and along the wall until it falls off. This will also place a debuff increasing phys dmg taken by 100%.
- Expel Magic: Frost - Summons a Frost Orb that deals moderate/heavy dmg to all players. Lasts 20 secs and slows movement of all players within 30 yards by 35%. The 35% speed reduction decreases the further away you are from the orb. If you are outside the 30 yard range you will not be slowed.
- Expel Magic: Shadow - HEALER WARNING - Places a healing absorption on ALL players (amount varies per difficulty), blow healing CDs for this one.
Overflowing Energy - This is what you need the "player" Suppression Field for. This will be a green orb that falls from the ceiling. If it lands on a player, it will deal 1.5 million dmg to them. If it is not absorbed, it will deal ~70k dmg to the entire raid. There will ALWAYS be AT LEAST 1 more orb than is shields available. So you need to ensure you get his barrier down, and have players get personal barriers to absorb the energies so the raid doesnt take too much raid-wide dmg and wipes. If they get a full barrier they should be able to take 10 orbs. This effect also ignores ALL immunities, so no deterrence or bubbles will work for this.
Summary
This fight is about burning down the Null Barrier fast, then having the required number (1 in Heroic) of player(s) stand with the boss to gain their own NB. After that, their primary purpose is to ensure those player(s) always stand in an orb falling from the ceiling. When the boss is re-charging, raid stand behind the Suppression Field on the ground so the adds funnel into it and burn them down ASAP in there to avoid raid dmg. Stay spread for Fire, dispel off of the melee. Tanks kite the Arcane debuff out. Stay away from the Frost orb and healers blow healing CDs on Shadow.
Mythic Differences
In Mythic, 2 people can get the NB each time. The boss will have a new ability called Expel: Fel, this will mark 3 random players for 12 secs. This will create a line of fel energy between where the affecter player received the effect and where they effect expired. This will last for 1 1/2 mins and deals 100k fire dmg to all players in it. Think of it like the shadow shit on Blood Queen that you had to kite around. He will summon the Overflowing Energy orbs at a faster rate. He will also use Dominating Power, this will cause players who are absorb the Overflowing Energy orbs to become mind-controlled. Thats not the only fun part... They become immune to magic, and can only be broken out once they are below 20% health. So physical dmg is key here. They will also spam cast Forfeit Power on the boss, which will take 5% of their shield and give it back to the boss. So interrupt this.
05 - Twin Ogron
Mehguy — Sun, 08/24/2014 - 14:36
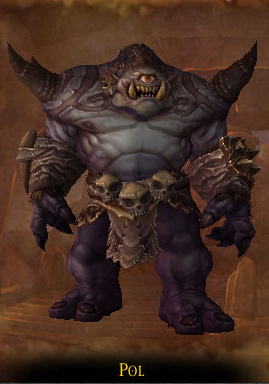
Twin Ogron is the 5th encounter in the Highmaul raid.
Fore a more detailed list of their abilities, please view the dungeon journal in-game, or click HERE to view it at WOWHEAD.
This encounter has 2 bosses (Pol and Phemos) with a shared health pool. Please ignore any comments in the videos that say they appear to be individual. It was revealed at Blizzcon that they have a shared health pool.
This fight is similar to previous encounters that once the Ogrons reach certain energy levels, they each have their respective abilities that they will use. At 33 energy, each will use a weapon attack. At 66 energy each will use a shout. At full 100 energy each will do a large raid-wide attack.
In addition, the further away they are tanked from each other, they will gain haste and therefore have a casting time decrease, making it harder to react to various abilities.
Boss Abilities
Pol
- Shield Bash - deals dmg to tank and interrupts spellcasting for 3 secs.
- Shield Charge (33 energy) - Charges furthest target away from him, dealing dmg and knocking back anyone in his path. Damage is increased the further the distance of his target. When he reaches his target, does 10 yard AoE knockback/dmg. Also leaves a bleed on the target for 18 secs.
- Interrupting Shout (66 energy) - Deals moderate aoe dmg and interrupts spellcasting for 6 seconds.
- Pulverize (100 energy) - Smashes the ground 3 times, causing the ceiling to collapse. The first pulverize will hit the location of ALL players and deal dmg to anyone within 3 yards. SPREAD. The 2nd pulverize will fall in random locations dealing dmg to anyone within 8 yards. The 3rd/last pulverize will fall in one location, dealing higher dmg to those closer to the impact point.
Phemos
- Double Slash - Deals dmg with both weapons to tank/current target.
- Whirlwind (33 energy) - Spins in a circle dealing phys dmg every 1/2 sec for 7-8 secs. Anyone hit by it will get Weakened Defenses which increases the dmg taken from Shield Bash by 10% (stacks).
- Enfeebling Roar (66 energy) - large roar increasing dmg taken by 300% for 300 seconds. both the % and duration divide evenly among all targets within 20 yards. Duration and % carry over on the next ER as well. In other words... if all 30 people (if in heroic) stack for this, everyone gets a 10% dmg taken increase for 10 seconds. However if only 5 people stack for it, then its a 60% dmg taken increase for 60 seconds, and if you get another roar in that time, then the seconds and % keeps adding up.
- Quake (100 energy) - Throws both weapons at a nearby location and begins pounding the ground dealing nature dmg to all players. The location of the weapons will also spawn Blaze. This acts as a fire pyre which will deal dmg to nearby players and send out fire waves in random directions. Touching either the fire pyre OR the fire waves will apply a stacking fire DoT.
Warming Up - Both the Ogron wait 10 seconds before using their abilities. UNSURE if this is meant for the start of the encounter to allow the raid to get in position, of if there is a 10 sec wait once they reach their energy points for ability use.
Summary
This fight is going to be about positioning mostly and just keeping an eye on the Ogrons enery level and deal with the abilities as they come. Keep them spread apart from each other, but you don't want them spread too far so they dont get too big of a haste buff, etc. Either set up a designated person to run far away from the raid, or make sure the opposite tank is the furthest away to take the dmg/knockback from Shield Charge. When Phemos does his Whirlwind, be sure the Pol tank does NOT get hit by this so they don't take increased dmg from Shield Bash. Other than that, just stay stacked for 66 energy to split the dmg/debuff/duration of the shout and don't cast while they shout so you dont get locked out. At 100 energy, spread to best deal with the collapsing ceiling and to dodge fire lines.
Mythic Differences
The only real difference is that most of their abilities gets an arcane infusement, and Phemos appears to get a new ability altogether.
Pol - His Shield Bash deals an extra 50% dmg as arcane. His Shield Charge causes 3 arcane shadows to mirror the effect of the Charge but deals arcane dmg.
Phemos - His Double Slash leaves a stacking arcane DoT. His Whirlwind now sucks in nearby players. Has a new ability called Arcane Volatility, unsure if its energy based, but will place a "mark" on a random player and will explod after 6 secs dealing dmg to players within 8 yards.
01 - Kargath Bladefist
Mehguy — Sun, 08/24/2014 - 14:36
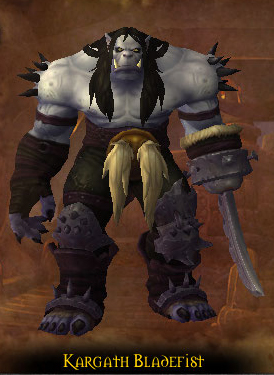
Kargath Bladefist is the 1st Warlord you encounter, and also the first encounter in Highmaul.
For a detailed view of his abilities, please view the dungeon journal in-game, or click HERE to view it at WOWHEAD.
Kargath's fight is in an arena, there are "spectators"/adds in the stands, and also there are 4 pits with tigers in them. All come into play during the fight.
The Arena Floor
Kargath has 4 primary abilities
- Impale - A stacking bleed tank debuff. Rotate tanks on 2 stacks.
- Blade Dance - A shadowy form of Kargath dashes out at random players for 10 secs and deals AoE dmg to anyone within 7 yards of his target. Stay spread at least 7 yards.
- Berserker Rush - Kargath will fixate on a target and chase them down doing constant frontal cleave dmg (which increases the longer he stays in this "mode"). Only way to stop him from doing this is to drag him into one of the many fire pillars that spawn during the fight, or kite him long enough to where his timer runs out.
- Chain Hurl - Kargath will jump to the middle of the room and knock everyone back. He will then choose the closest 5 targets, spin them around in chains and throw them into the stands to deal with adds.
- They are up there for 45 seconds
- They drop below 30% health
- They die (corpses get thrown down)
- You can also jump down on your own
- DB's - Throw poison puddles on the raid below. Stand Group - DB will do a frontal breath that stuns.
- IB's - Throw a fire dmg DoT on raiders below. Stand Group - when IB dies, it will leave a bomb that deals heavy dmg when it explodes, just stay away from where the bomb is.
- IG's - Do nothing to primary raid group. Stand Group - they just run around like turds and melee. Puts a movement speed reduction on stand group if hit.
On Mythic, there is something called "Favor" which is affected by "Roar of the Crowd". Increasing your Favor (by doing various things) increases the amount of damage dealing you can do during the fight.
- The longer the raid keeps Kargath in his Berserker Rush, the more favor is gained. Try kiting, and then BoP the target when he gets close to make it last.
- Killing the Iron Grunts while in the stands gains favor
- Tigers... - In Mythic the Tigers will cast "On the Hunt", where they will focus a player and chase after them in an attempt to kill them. Kiting them into a fire pillar and setting them on fire will gain favor.
- Heckle - A cast by all 3 types of mobs up in the stands. This will REDUCE your favor rating.
02 - The Butcher
Mehguy — Sun, 08/24/2014 - 14:36
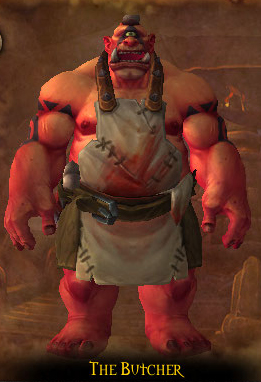
The Butcher is the 2nd encounter in the Highmaul raid.
This fight is considered to be very Patchwerk-esque, with primary focus on the tanks, and the rest of the raid has very minimal to do.
Fore a more detailed view of his abilities, please view the dungeon journal in-game, or click HERE to view it at WOWHEAD.
The Butcher has 7 abilities in total. And much like Patchwerk. When he hits 30%, he goes into Frenzy and increases 10% increased dmg and hits 30% faster.
- Heavy Handed - All standard auto-attacks trigger a duplicate attack on closest target (to tank) within 5 yards. In other words... Tanks need to stack.
- The Cleaver - Stacking bleed debuff on tanks.
- The Tenderizer - Tank switch mechanic. Debuffs player, causing them to take 50% increased dmg from the next Tenderizer attack. This attack CANNOT be avoided.
- Meat Hook - Pulls in his current high-threat target if out of range. Speculated that this is to prevent kiting of the boss.
- Cleave - Butcher targets the largest group of players in melee range and strikes them for high phys dmg. Dmg is split amongst all in the group. Gives the Gushing Wound stacking debuff
- Gushing Wound - Bleeds phys dmg for 15 secs. If players reach 5 stacks they instantly die. Death at 5 stacks CANNOT be mitigated or avoided.
- Bounding Cleave - When Butcher reaches 100 energy, he knocks all players back and into the air, then charges to the largest clump of players at ranged and applies Gushing Wound.
In Mythic, Night-Twisted Cadavers will spawn and walk towards the Butcher to try to seek revenge and slay him. When they reach The Butcher OR a nearby player, they will explode and leave a pool of Pale Vitriol behind that will last for the duration of the encounter.
- Paleobomb - Explosion. Deals massive dmg to all within 8 yards. Ignores Armor
- Pale Vitriol - "void/poison zone" that deals moderate dmg every second and causes those affected to take 100% more dmg from The Butchers Cleave attacks.


Recent comments
7 hours 17 min ago
4 weeks 1 day ago
7 weeks 1 day ago
7 weeks 2 days ago
9 weeks 1 day ago
9 weeks 1 day ago
9 weeks 1 day ago
10 weeks 2 days ago
11 weeks 3 days ago
13 weeks 17 hours ago