
Raid

03 - Norushen
Mehguy — Thu, 08/15/2013 - 12:54
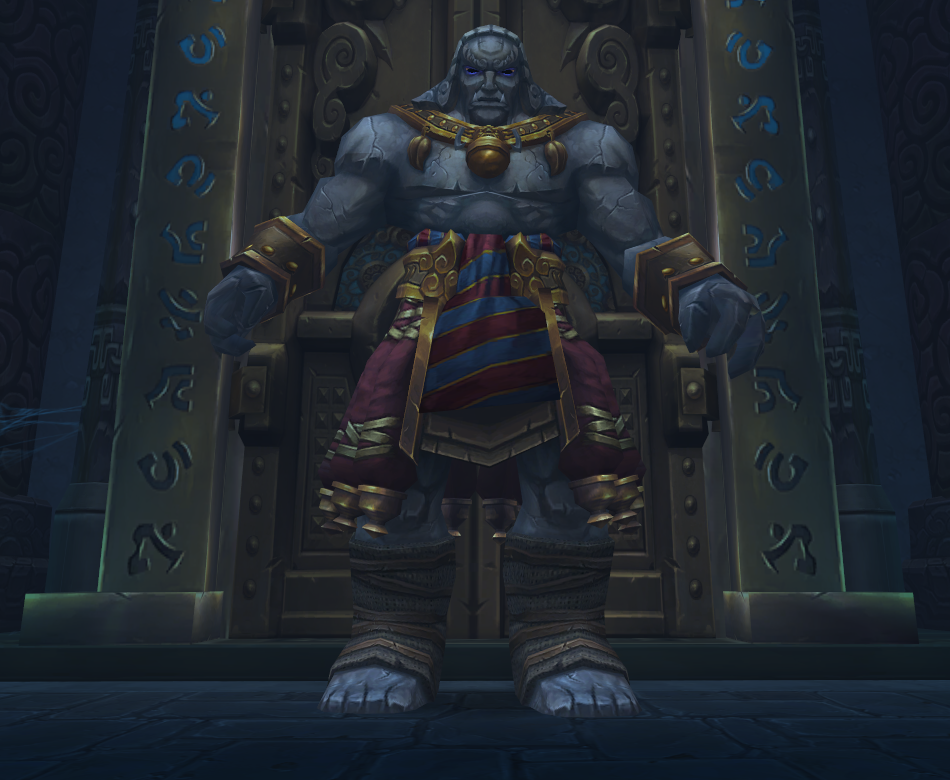 Norushen is the 3rd encounter in the Siege of Orgrimmar raid, and 3rd encounter in the Vale of Eternal Sorrows LFR.
For a detailed view of his abilities and loot table across LFR/Flex/10/25 please CLICK HERE
GENERAL STRATEGY/OVERVIEW
During this fight, you will not attack Norushen directly, rather, he is a friendly NPC and when you start the encounter, he will see you have corruption within you and seal you in a Quarantine Zone. He will pull some of that corruption from each player and form an Amalgam of Corruption. Essentially it just looks like a large Sha. This is what you must defeat to end the encounter.

During this encounter, players will have a Corruption Bar on their screens, at the start, players will start out with 75 stacks (out of 100) of Corruption. The more "Corrupt" a player is, the DPS will deal less damage, Healers will heal less, and Tanks will receive more damage. The overall goal of the fight is to completely Purify yourself of your corruption to be able to deal more dmg, heal more and take less damage. In order to become Purified, each player must go through an individual challenge.
NOTE: The reduced damage/healing/dmg received does not apply to the adds in the encounter, ONLY the Amalgam.
This encounter has a strict 7-minute enrage timer, if the Amalgam is not defeated by then, Norushen will cast Quarantine Measures, killing everyone in the room.
The Amalgams abilities are as follows.
- Unleashed Anger - slashes at his current target, deals ~320k phys damage
- Self Doubt - Tank debuff, increases the damage Unleashed Anger deals by 50% per stack, requires tank swapping.
- Blind Hatred - creates a line of corruption that will spin around the room in a 180-degree semi-circle. This can be ran/jumped through but will deal EXTREMELY HIGH dmg. Overall it will likely one shot you like Durumu's beam did. It doesnt move that fast and can be easily avoided.
- Icy Fear - Deals 60k frost AoE dmg to the raid every 3 sec. The damage increases as he loses health
- Frayed - When Amalgam reaches 50% health, and for every 10% health after, he will spawn an "Unleashed Manifestation of Corrption" add. (more below)
- Fusion - every "Expelled Corruption" he receives from smaller adds will increase the damage he deals by 8% for 15 seconds. Stacks. (more below).
REMOVING CORRUPTION / ADDS
At the start of the fight, on the left and right side of the room, there will be two spinning orbs called "Purifying Light". When a player clicks on these, they will be transported to a phased room that will contain adds, and a test that will vary based on your role in the fight. You must complete this test to be cleared of your Corruption.
- Tanks - You will be zoned into a Test of Confidence and have to face a "Titanic Corruption" and must survive for 1 minute. If you survive for 1 minute, you will be instantly ported out and cleansed of your corruption. The Titanic Corruption has some rather nasty abilities to deal with.
- Titanic Smash - deals 400k shadow dmg in a frontal cone. Can be avoided.
- Corruption - each successful melee swing gives a debuff stack of Corruption, dealing 8k dmg every sec per stack.
- Hurl Corruption - fires a ball of corrption at the tank, deals ~225-250k shadow dmg, mitigatable, possibly interruptable.
- Burst of Corruption - AoE that deals ~150k shadow dmg to all enemies, mitigatable.
- Piercing Corruption - deals 320k phys dmg to target, cannot be absorbed/mitigated, but can be avoided completely.
- Healers - You will be zoned into a Test of Reliance, where you must defeat a Greater Corruption. You will be aided by several NPCs who will already be fighting the boss. You will have to keep the NPCs alive to allow them to kill the Corruption, once it is dead, you will be ported out and cleansed of your corruption. Some guilds found it easier to just use DPS spells to help kill the Corruption faster as compared to healing the NPCs. May depend on your comfort level/class. The Corruption has a few abilities, primarily AoE, that affects all NPCs and yourself, but the primary ability you should worry about is
- Lingering Corruption - This deals 320k Shadow damage to the player/NPC if not cleansed within 10 seconds.
- DPS - You will be zoned into a Test of Serenity, you will be pitted against 5 mobs total (4 Essence of Corruption and 1 Manifestation of Corruption). To zone out of this encounter you must defeat these mobs and collected the Gold Orbs they drop. These gold orbs reduce your corruption stacks and once you remove all yout stacks, you will be ported out of the Test. Even if there is a mob remaining. The mobs abilities are as follows.
- Manifestation of Corruption - repeatedly casts Tear Reality - is a conal shadow damage ability that can be avoided/ranged.
- Essence of Corruption - Casts a ball of corrupted energy in a straight line, moves fairly quick, but can be avoided. Deals 80k shadow dmg if it strikes you.
On to the adds. Initially you will fight adds in your "Tests", BUT, once a DPS kills his/her adds in their "Test", that add will RESPAWN in the primary phase as an "Unleashed" form of themselves. And have some abilities to deal with. Remember, for each add a DPS kills, it will respawn and the rest of the raid must deal with it. Do NOT send 2 dps at once or you will get overwhelmed with adds.
- Unleashed Manifestation - must be tanked, does melee dmg and the following. These are also the adds that the Amalgam will spawn at 50/40/30/20/10% health.
- Burst of Anger - AoE that deals 40k shadow dmg to all players
- Residual Corruption - When defeated, will leave a void zone on the ground that will deal ~70k shadow damage to ALL players unless it is touched/absorbed by a player.
- Absorbing this corruption will give back the player 25 stacks of corruption. NOTE: if this mob dies on top of a group of players, all players standing in the corruption will receive the stacks. Kill away from the group and have a designated person absorb the corruption.
- Unleased Essence - stays stationary on the outter edge of the room. should be focused quickly.
- Expel Corruption - Shoots balls of corrupted energy at the Amalgam. This will deal ~80k shadow dmg to the first person it hits. If it does not hit anyone and reaches the Amalgam, it will increase its damage dealt by 8% for 15 secs (See the FUSION ability above). This stacks. Supposedly can be interrupted, and must be intecepted before it reaches the Amalgam.
The goals of the fight are to send 1 dps/1 healer, or 1 dps/1 tank into their tests simultaneously. With a 5 dps/3 heal/2 tank setup, this should balance out perfectly (for 10-man). And to try to maintain as low of a corruption stack as possible to defeat the encounter, and defeat the smaller adds ASAP to prevent the Amalgam from getting high dmg stacks and wiping the raid.
Ideally, the best way to probably counter the extra 25 stacks of Corruption from the Unleashed Manifestations early on in the fight, is to have the DPS focus the larger Manifestations first in their Test, then once it is dead and comes to the normal phase, the rest of the raid kills it immediately and have ONE person absorb it, getting their stacks from the base 75->100 and then have that player go complete their Test, there-by removing 100 stacks of Corruption instead of just their base 75.
The fight gets very hectic at the end for healers, so its best for them to not have any extra stacks of corruption at the end so they can get as much healing output as possible from the extra damage Amalgam has received from either "Expel Corruption" or from the stacking Frost damage "Icy Fear".
02 - The Fallen Protectors
Mehguy — Thu, 08/15/2013 - 12:54
 The Fallen Protectors is the 2nd encounter in the Siege of Orgrimmar raid, and the 2nd encounter in the Vale of Eternal Sorrows LFR.
For a detailed view of his abilities and loot table across LFR/Flex/10/25 please CLICK HERE
General Strategy/Overview
This encounter is a single-phase council style fight, similar to the Conclave of Wind encounter in Cataclysm. These bosses have their own individual health pool, and must be killed simultaneously/within 15 seconds of each other. They have a group aura called "Bond of the Golden Lotus" and if any boss reaches 1% health and any remaining boss(es) are still active, they will channel an ability that will restore 30% of their maximum health if completed. So again, all must die within 15 seconds of each other.
They all each have a shared ability called "Desperate Measure". When one of them reaches 66% and 33% health, that specific boss will become invulnerable/vanish and spawn 1-3 embodied spirits that need to be killed in order to force the boss to rejoin the fight.
Because of this, there doesnt appear to be any preferred order to kill the bosses as their abilities do not change throughout the fight, and since they all must die simultaneously, it is best to just progressively bring them all down one at a time. Bring one down to 66%, kill its spirit adds, then bring the next boss to 66%, kill spirit adds etc, and just keep progressively wittling them down.
Rook Stonetoe
Rook's is a Monk/Warrior type boss. Must be tanked. His primary abilities are as follows
- Vengeful Strikes (tank warning) - stuns his current target and deals ~140k phys dmg 2 times/sec for 3 seconds. (6 hits total)
- Corrupted Brew - Hurls a keg at random targets dealing ~100k shadow damage to anyone within 5 yards and slows them by 65% for 15 sec
- Clash - targets a random player and forces them to charge him. Both the affected player and Rook will meet 1/2 way from where they were standing and he will immediately do "Corruption Kick"
- Corruption Kick - a spinning crane kick-style ability that deals ~95k phys dmg to targets within 10 yards every sec for 4 seconds, will also apply a DoT dealing 60k shadow dmg every 2 secs for 6 seconds.
- Desperate Measure - When Rook reaches 66%/33% health, he will go invulnerable/immobile and spawn 3 embodied spirit adds. Once all 3 adds are killed he will rejoin the fight.
- Embodied Sorrow (kill 1st) - casts "Inferno Strike", sending fire spell at a random target and splits damage between all targets within 8 yards
- Embodied Gloom (kill 2nd) - casts "Corruption Shock", sends a corrupted lighting shock at random locations, dealing ~120k nature dmg to anyone within 4 yards. IS INTERRUPTABLE!!
- Embodied Misery (kill 3rd, should be tanked) - casts "Defiled Ground", smashes the ground, dealing ~275k physical dmg to the current target and knocking them back (should be the tanked). This will also leave a damaged area on the ground, dealing ~80k shadow dmg every sec to anyone in it.
He Softfoot
He is a rogue style mob, and utilizes bleeds and poisons like any good rogue. Must be tanked. His abilities are as follows
- Garrote (healer warning) - essentially shadowsteps and places Garrote on a random player, deals 64k phys dmg every 2 seconds. This ability can ONLY be removed once he hits 66%/33% health and enters "Desperate Measure"
- Gouge (tank warning) - Stuns current target (tank), and will then fixate on a random target until taunted. If his Gouge target is facing AWAY from him, they will not be stunned, but just knocked back instead. Tanks should watch DBM timers and turn away when he is about to Gouge you.
- Master Poisoner - Will randomly apply poison to his weapons
- Noxious Poison - causes his melee attacks to spawn poison pools on the ground, dealing ~68k nature dmg every second to players standing in them. CAN be jumped over. Will disappear once he enters "Desperate Measures"
- Instant Poison - sucessful melee attacks deal ~60k additional nature dmg.
- Desperate Measure - Will Vanish away and spawn 1 Embodied spirit add at 66% and 33% health.
- Embodied Anguish
- Mark of Anguish - places this on a random player, causing him to focus that player and deals periodic shadow damage and roots the player in place. The player marked will receive an extra action button, allowing them to transfer the "Mark" to a different player within 30 yards. Should ideally be passed to a tank.
- Shadow Weakness - debuff applied when he strikes his focused "Mark" target, increasing shadow damage taken by the "Mark of Anguish". Each time the "Mark" is passed, the ENTIRE raid will gain 1 stack of this. Try to limit the passing of the "Mark" to prevent high stacks.
- Embodied Anguish
Sun Tenderheart
Sun is like a shadow priest, She remains stationary and is not required to be tanked. Her primary abilities are as follows
- Sha Sear - Causes an explosion of shadow dmg around her current target, deals increasing shadow dmg to the target every second and to all players within 5 yards of the affected player.
- Shadow Work: Bane - Places a DoT on multiple targets (2 on 10-man PTR) which deals ~80k shadow dmg every 3 seconds for 18 seconds. In addition, every time this ability deals damage, it will jump to an additional target, up to a total of 3 times/jumps. So if you have 2 people affected initially, both will jump after 3 seconds, making 4 affected total, etc. THIS CAN AND MUST BE DISPELLED.
- Calamity - Deals 30% of all players maximum health as Shadow dmg. This will also remove the "Shadow Word: Bane" from players who are still affected by it
- Desperate Measures - Sun will place a dark shield around her, making her immune at 66% and 33% health.
- Dark Meditation (healer warning) - During her DM, she will pulse moderate-high shadow damage to the entire raid until she comes out of DM. The damage is cut by 50% if players are standing in her dark shield with her.
- Manifest Emotions - She will spawn
- Embodied Despair and Embodied Desperation adds on either side of her while she is shielded. These adds constantly spawn miniature adds that run to attack you until the larger ones are killed. ALL adds (both the large Despair and Desperation, and their spawns) are shielded and will reflect damage back to the player that attacks them. The 2 large adds must be brought down quickly, but do not kill yourself doing so.
Thats it. A lot of abilities to cover, but overall should be a relatively uncomplicated fight.
Pick which boss you want to focus and just rotate through them. When one enters its DM, focus down the spirit adds that spawn to break them out of DM and keep rotating. The big thing is just remembering all of the abilities of the Bosses, their spirit adds, and how to counteract them.
01 - Immerseus
Mehguy — Thu, 08/15/2013 - 12:53
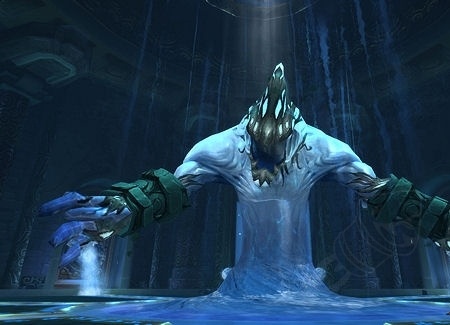
Immerseus is the first encounter in the Siege of Orgrimmar raid instance, and First encounter in the Vale of Eternal Sorrows LFR.
For a detailed view of his abilities and loot table across LFR/Flex/10/25 please CLICK HERE
General Strategy/Overview
Immerseus begins the fight with 100 Corruption, which is noted as a power/energy/rage style bar. The objective of the encounter is to cleanse him of his corruption all the way down to 0. Each time that Immerseus is reduced to 0 health, he will split into a mixture of dark Sha Puddles and watery Contaminated Puddles. The puddles will begin moving back to the center of the room. The DPS must destroy the Sha Puddles, and healers must heal the Contaminated Puddles to be able to purify them before they reach the center. Following each "Split", Immerseus will reform with reduced health and Corruption based on how well the raid performed during this period. This cycle will rinse and repeat throughout the fight until he is cleansed.
Phase 1 - Water Elemental
Primarily, tanks need to tank him so he does not directly face any raid member. His "Corrosive Blast" is a conal ability that deals high damage and gives a stacking debuff (lasting 45 secs) that increases shadow damage taken by 10% per stack. Requires trade tanking.
He will often cast "Sha Bolt", dealing low-moderate shadow damage to all raid members and leaves a small dark pool on the ground, move out of it to prevent extra damage, i.e. stay out of "fire". Only move as far as you have to, cause the pools to overlap to give yourself and the raid more freedom to move for his next ability.
His next ability is "Swirl" this will spawn several lighter blue pools and move along the floor fairly quickly, ensure you give yourself enough room from the "Sha bolt" pools to be able to dodge them safely. This will deal low shadow damage but knock you back. Could be detrimental if healers constantly get hit by this.
For Melee players, do not get too close to the boss or you will get hit with "Seeping Sha", this is noted by the large pool surrounding him. This will hit for moderate dmg and knock you back.
Phase 2 - SPLIT
Again, once he reaches 0 health, he "Splits". Any dark or watery pools that are still up from the "Sha Bolts" or the "Swirl" will immediately go to the middle of the room. LET THEM, these do nothing.
The primary pools you need to watch are the Sha Puddles and Contaminated Puddles. The Sha will be dark, the Contaminated will be more watery in color. For every Sha Puddle killed, and Contaminated Puddle cleansed, he will lose 1 percent of his remaining Corruption bar. When he re-forms, his health should be equal to the amount of corruption he has. So if he is at 77 stacks of corruption after a re-form, he will start at 77% health, etc.
Sha Puddles - he will form 1 Sha Puddle for every 4 units of corruption he has. So on the first split, since he has 100 corruption, he should spawn 25 Sha Puddles. That is based on Dungeon Journal entry, but from videos it doesnt "appear" to be that many, it also contradicts the next part of the journal entry as well by watching the video.
Once a Sha Puddle is destroyed, it will give "Sha Residue" to players within 10 yards, dealing 25% increased damage to other Sha Puddles. This STACKS!
Contaminated Puddle - he will form 1 Contaminated Puddle for every 4 units of corruption that have been previously removed. This is where the dungeon journal and video are contradictory. Based on the journal entry, on the first Split, there should be NO Contaminated Puddles to cleanse since he is at full corruption, but the video clearly shows Contaminated Puddles available to be cleansed. It may not be like that "live" and they may have only had them available for PTR testing purposes. Regardless, once these are healed/"cleansed" they will turn a dark blue color.
When a Contaminated Puddle is healed, it will progressively slow down in proportion to the amount of healing it has received until it is fully "cleansed". Once a Contaminated Puddle is cleansed, it will restore 25% of mana to allies within 10 yards and increase healing done by 75%, this STACKS!
Once either of the puddles reach the center of the room, Immerseus will pulse AoE dmg to the raid, based on the type of puddle that reaches him. If a Sha OR Contaminated Pool reaches him, he will pulse for around 100-110k shadow damage. Once a Purified Pool (yes, one that is fully healed) reaches the middle, it will only pulse for around 40-45k. So ideally you want to kill all of the Sha Puddles and heal as many of the Contaminated Pools as possible, so when they any remaining get re-absorbed you dont wipe to the AoE damage.
TLDR (go back and read it)
This fight is fairly straight-foreward and shouldnt take long to get past. Tank swap when appropriate, assuming 2 stacks. Stay relatively spread, and overlap your own Sha Bolt pools so you have room to move. When he splits, DPS the dark pools and HEAL the watery pools so you have less AoE to deal with on the re-absorb/re-form. Raidwide defensive CDs are likely best used later in the fight. There will likely be more Sha Puddles up dealing more damage in the beginning, but at the end, it will be harder on the healers as there will be a LOT more Contaminated Pools to heal, more than the healers can handle by themselves, so there MUST be hybrid healing on them at the end. Overall it will best be determined how your raid make-up is and where you feel it will benefit the most.

5.4 Just Around the Corner
Elapsed — Thu, 08/15/2013 - 00:04

Ok yeah that's a badass picture from WoWJuju for the next patch and I couldn't resist to have it top my blog for this! This is my notes on 5.4 and what you should know for Downfall and for Raiding!
Time
Time is a wonderful thing, especially when you know how much you have to work on shit before all the new stuff goes live. From a recent tweet by one of the blizz guys the pvp season will end on August 27th. Now with this came a ton of speculation of past patches. What I can say without a doubt is this, 5.4 will happen on or after the 27th of August. Some say that day, some say the next week, but either way that gives you a minimum time frame to consider what you will need to be prepared for 5.4!
Wrathion and my damned legendary cloak
For those of us fortunate enough with RNG luck we've been pushing the legendary quest line fairly smoothly and quickly, for those who are less fortunate it's been a grind of 1 "coin" a week, and I'm sorry. In 5.4 those beautiful ilvl 600 cloaks we got will get a new color and a proc added to them (just do a google search for Legendary cloak wow and I'm sure you can find what yours will do for your spec) But to get this lovely shade of orange you must do Wrathion a couple of favors (god this guy asks a lot of us!) This time around he wants Timeless coins and for us to defeat the celstial guardians of pandaria in group combat.
Sadly I can't get exact for you here but he will either want, 50, 100, 2500, or 5000 Timeless coins to continue. (wow head quest says 5000 but it was 2500 on PTR and a couple of data mines put it at either 50 or 100 so who the fuck really knows right now) Good thing you get like 200 from the first two quests on the isle, and you can get a ton from killing things and exploring.
Killing the celestials will take a group but it will be faction tagged as well, so as long as a group is killing one of them you should definately tag it and try to help them (or join forming groups etc etc) Each celestial can only be faught individually, below I have some notes from a commenter on what the abilities are like.
Yu'lon (Dragon)
Frontal fire breath with a stacking +5% fire damage taken
random fire zones spawned on the raid, these can overlap meaning that will kill the person standing them in ~2s
Sartharion style wave that covers the entire area with the exception of a single gap
Chi-Ji (Crane)
Fire tornados around the arena
Will place a yellow circle and begin to AoE blast, anyone not in the circle will die
spawn allot of little cranes that slowly move away from the boss doing a mini aoe blast to anyone in melee range
Xuen (Tiger)
Tank stacking(?) -10% armor debuff
He'll trow balls at the raid damaging anyone in the impact area (probably dodgable)
[Unavoidable lightning AoE on the raid]
Niuzao (Ox) (can't say I fully understood this one)
Strong Hellfire like AoE
Stacking buff to stamina (maybe just on tank spec people) which might indicate a gatekeeper like mecanic
Will run around wile doing it's Hellfire like AoE"
All in all it's reported that getting the upgrade takes 1-2 hours on the isle. Which leads to the 5th raid boss on the isle... Have 500 Valor ready for this cloak it may or may not keep your 2/2 upgrade but it WILL be upgradable
Ordos Fire God! (Requires legendary cloak!)
This is our new Nalak, But there's a twist! To fight him EVERYONE NEEDS THEIR LEGENDARY CLOAKS. It's a "gating" mechanism. So you need to do the above questing from wrathion to proceed. I'm not posting a strat here (partially because I've yet to look at one) But we can expect him to be difficult at the start until we work out our shit.
*EDIT* Aeolyn has commented that the legendary cloak is only required on one of your characters, there is an account flag that will allow you to cross to his zone.

First 4 Bosses of SoO
I'm not going to embed the videos but I will link here the first four bosses in preview form from IcyVeins. Over the next week we will be having the likes of Mehguy, Lumi, Jobs, Turth, and Myself compiling full blown strats for these bosses. Please watch these so you get a basic idea of what we face.
Addition: Mehguy has started compiling the SoO in The Downfall Raid Guides and the first 4 bosses will be up very shortly (as of writing this he's working on Sha of Pride)
Please remember these videos are simply early looks on the PTR and not represenative of how we will handle things. Keep an eye on the Tracker over the next week to see the strats go up as we get them!
Boss Mods!
Everytime we get ourselves a new Raid patch it takes a bit of time for DBM and BigWigs to catch up fully with the timing and mechanics of each fight. We only recently got smart marking on Horridon and Tortos and SoO will be no exception to that rule! So it is BEST TO HAVE ALPHA or BETA builds to get the latest in timer updates. Now there is always some risk that the addon wont work with both of those but we will be playing it by ear and if updates are needed Kaluu and I will be on the edge of our seats reading the patch notes regarding them. But on patch day if you are raiding, Get the latest to the minute version of DBM or BigWigs (I know a couple of you use the wigs) ALPHA BUILDS ARE UPDATED AS OFTEN AS TWICE AN HOUR SO BE SURE AND UPDATE JUST BEFORE RAID
DBM's Site (on the right you will see the quick download links both release and Alpha)
BigWigs Files (it will be organised by newest first, just get the top one unless otherwise instructed for stability)
Oh and a side note, I'm not looking to debate the pros and cons of getting a alpha build of one of these. For those who think they "know better" you go ahead and do what you see fit. But in the last 4 raid releases I've been a part of I've only had ONE build of DBM alpha not work right. They fixed it in 10 minutes and everything was Kosher. Please just keep your opinions to yourself regarding this.
EPGP (a.k.a. loot points)
As you may or may not know I've been decaying points by a % every week since we first cleared MSV. This maintains the order of people but keeps the numbers to a minimum. This will continue with SoO and has worked great!
But for SoO you are not going to bring all of your points with you. I'm going to reset points back down for all raiders to 10k EP and no GP. The reasoning is this, It's a new raid, new efforts will be put towards new gear and new bosses. We need a fresh start on points for that. Don't see this as us forgetting who has been there the whole time or forgetting who has put in the most work. This will actually make it so the lucky few who have gotten all the gear they needed early wont have an unfair advantage going into the new instance. I'm excited for this as should you be.
Flex Raiding
BIG RULES
Flex raid is not a replacement for Man Hug or PMS or Galaga. You can take your character to a flex and then to a normal/heroic raid in the same week as they don't share a lockout.
DO NOT BURN YOURSELF OUT! We need you in your main raids, if this much "organised" raiding is too much for you then for fuck sake don't do it. You can get your normal LFR gear and do just fine in Normal.
THE CURRENT RAID LEADER IS YOUR LEADER! Even though it's not your main raid doesn't mean you can fuck around like in LFR or tell people off. You follow what your raid leaders say and pay attention.
Over at /node/11085 I made a blog about the weekend Flex Raid I will host, if all goes well it will serve as a way for all of us to get loot without having to suffer through LFR. Mine will be truly flexible in who we can and will bring week to week and weather or not you can bring an alt. It all depends on who we get week to week. Since I've seen very little opposition or discussion re: the time and day of the raid. The probable raid time will be
Saturday 6-9 pm and then again possible Sunday should we be in need of another day (probably afternoon but we could put it to a vote.
Alternatively Turth is putting together an Objective Flex. The idea behind this is to keep the same people week to week and make the goal getting the Meta achievement. He's talked to many of us regarding it and it sounds like a great plan. His times are 6pm server until 10 server on I think Thursday Nights to avoid conflicts with main raids. This is a HARDCORE group! If you join and raid with them remember that hardcore groups will tell you what you did wrong and often don't give a damn about your feelings. Don't come crying to an officer if this happens. We will remind you, you've been warned!
And that's all that is important regarding raids in 5.4. Head over to MMO-Champ, Wowhead, Or IcyViens for more info regarding the patch and your class, or pet tournaments or w/e it is you like to do.
TL:DR None, read the fucking thing
Siege of Orgrimmar
Mehguy — Tue, 08/13/2013 - 12:54

Fellow Downfall guildmates! The Siege of Orgrimmar raid guides/strats are now complete!
Siege of Orgrimmar is the final raiding Tier (T16) of the Mists of Pandaria expansion.
In this thread, you should find links to the dungeon journals and loot tables, PTR vids, and generalized strat information in regards to each of the encounters.
Downfall members should utilize these guides to their full potential to progressing through this final Tier with success.
Please keep in mind that most of the information in these guides will be based off of PTR information obtained and will vary compared to how it goes when its live in regards to health/dmg numbers and possible modifications to how boss mechanics may work.
Strategy/How-To videos ARE current, and should be used accordingly in assisting in figuring out the strat for your group.
There are quick guides, and role-specific (Tank/Healer/DPS) guides posted for EACH encounter as well!
Guild Run Weekly Flexible Raid in 5.4
Elapsed — Thu, 08/01/2013 - 14:23
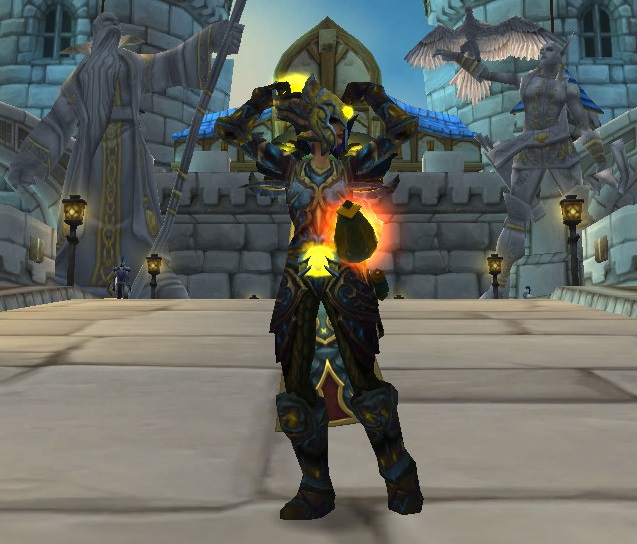
With 5.4 just around the corner (I hope no sooner than Sept personally) The question comes to will my LFR runs come back?
No! I hate LFR with a passion and hate that I've felt forced to run it just for gear opportunity.
Flex raids will be the new thing in 5.4 and I really feel we can replace our LFR weekly with a Flex Raid run. Not only can we get our gear, but we get to make it a guild run event that we fully control! No more will we deal with people that do not speak english or abide by our rules (i.e. Tortos kicking shells)
So I want to discuss when we will be running this flex raid of SoO. I would love to get it in on the weekend so that we can include a lot of people, Also I want to open this door to people who don't raid with the main raids, be more inclusive, that is what flex is for after all!
So I propose saturday afternoon or evening to run our Flex SoO. Only one night (unless we decide that a sunday run is needed but I hope it isn't) I want to consider EST and CST time zones for this so that we can include our increasing eastern and central guild-mates.
MAJOR POINT: THIS IS NOT A REPLACEMENT FOR 25 MAN HUG! This is a replacement for LFR runs so we can have a bit more fun and as I said above have more control over the raid environment.
What we need are 2 tanks who can reliably be there every week and some healers (not sure on that number yet but assuming 6 like normal if we get a full 25)
My proposal (incredibly subject to change and will be updated as more information arises)
Saturday 6-9pm Server time with a possibility for Sunday afternoon (we don't want that time to interfere with Raid Galaga)
TLDR: Just read the damned thing
H03 - Council of Elders
Mehguy — Sun, 05/19/2013 - 09:17
Heroic Council of Elders is regarded as a medium/moderate difficulty for the Heroic modes.
Each of the elders has one new abilitiy OR modification to their current abilities that changes how the fight is handled.
Gara'jals spirit also has a new ability that requires coordination with the raid to switch off a stacking debuff that increases damage taken.
Spirit of Gara'jal
- Soul Fragment - In 10-man Heroic, Every other time the Spirit of Gara'jal is forced out of the councillor, he leaves behind a soul fragment on a random player (in 25-man heroic this occurs EVERY time). Soul Fragments possess a random player dealing 35k shadow damage every 5 seconds, in addition, each time the Soul Fragment ticks/deals damage, you will get a stacking buff called "Shadowed Soul"
- Shadowed Soul - All damage taken increased by 2% per stack for the remainder of the encounter.
- You pass this debuff by targetting another player and using an extra action button to pass it to them.
Frost King Malakk
- Body Heat - Only happens when he is possessed. When a player is hit by another player's frostbite (ie people who stack on the afflicted player), they will "lose" Body Heat over 8 seconds. Once their Body Heat expires after that 8 seconds, they will no longer be able to contribute to reducing the number of Frostbite stacks the afflicted player has. Requires player with Frostbite to run between 2-3 groups of "soakers".
Kazra'jin
- Discharge - Only happens when he is possessed. REPLACES Overload ability. When he is possessed, instead of dealing back a % of players damage back at the individual player, he will now reflect 10% (10-man, 5% 25-man) of all damage dealt to ALL players. So if you are a mage and you get a nice 500k hit, he will reflect 50k dmg on the entire raid, not just you. Plan of attack is still the same, but more important that for him its a slow burn so you dont kill the raid.
Sul the Sandcrawler
- Treacherous Ground - Happens through all phases of the fight until he is dead. This is not a cast, or a spell, but an automatic occurance. If Quicksand pools are close enough together, and slightly overlap, they will merge into a slightly larger pool and take up more of the room. Increases in size for each pool of quicksand absorbed. In addition, if he gets empowered, the Living Sand add that rises from the larger pool will have 125% increased health and damage for each pool that was combined. Plan of attack is the same, nuke the crap out of Sul to get him dead before he is empowered.
High Priestess Mar'li
- Twisted Fate - Only uses when she is possessed. She will "rip" the souls from 2 random players (supposedly 1 melee and 1 ranged) and links the souls together, dealing 250k shadow dmg to all players every 3 sec. The damage dealt by TF is reduced the farter apart the spirits are. HOWEVER, once they spawn, they start moving closer. Advised for range to spread out to max range when she is possessed.
- In addition, after 1 soul is killed, remaining soul deals 100k shadow damage every 3 seconds until it is killed. Best to split dmg between the 2 to kill at the same time if possible.
This fight a lot of people have difficulties with. Its especially more difficult in 10-man than 25 as Kazra'jin only deals back 5% in 25-man compared to 10% in 10-man, as well as Twisted Fate still only affecting 2 people in both difficulties.
Tips
For dealing with Soul Fragment, advised for the first person affected to let it stack to 10, then pass it to another player who does not have any stacks. Keep rotating the soul fragment buff through players, passing it onto players who have low/no stacks of the debuff. The goal is to not allow players to exceed 20 stacks each. Just remember that this debuff goes out every other time that Gara'jals spirit moves between the bosses. So near the end there will be quite a few of these debuffs going out. But the recommended method used will hopefully help with overall damage on the bosses so there are as few of possesions as possible.
For Body Heat, it is recommended that there are 2-3 groups of soakers set to split damage of the person with frostbite. Since the Frostbite lasts 16 seconds, and body heat lasts 8 seconds, you SHOULD only need 2 groups to split the damage, BUT, if you do only use 2 groups you have to be PERFECT with the transition between groups. Once a group loses their Body Heat, the next tick HAS to be absorbed by the next group or that affect player takes a 300k hit, as well as any players who lost their body heat. Since it "has" to be so perfect, its recommended to use 3 groups of 2 people as soakers, best way I saw, which coincidentally was in the VOX guide, is to have 3 groups of 2 players form a triangle around the bosses, and DO NOT MOVE. Even for Kazra'jins Charge ability, DO NOT MOVE. It is more important to soak the damage from his charge (which isnt that bad) than to try to move out of the charge when the Frostbite player is on top of you causing them to take full ticks of it. The player affected by Frostbite needs to move between the 3 groups every 6-7 ticks so players do not run out of body heat and the Frostbite player never takes a full hit of the debuff.
- **MAJOR NOTE** For Frostbite. Once this is applied, you CANNOT remove it.. all you can do is mitigate the damage via Ice Block, BoP etc. HOWEVER!!!!!!! If you use one of these abilities PRIOR to being hit by Frostbite, you CAN prevent the debuff from being applied! This is tricky though, Frost King does not target who is going to be hit by Frostbite in the normal sense, it just randomly applies on a player, BUT just before it is applied, there should be a BLUE arrow that appears about 1.5 secs above the players head. So if a palidan, mage, or whoever can "bubble" themselves can get their immunity off before the Frostbite is applied to them, you can prevent having to deal with Frostbite ALTOGETHER!
For Discharge, just be very careful and dont kill each other since the reflected damage hits ALL players and not just yourself.
Treacherous Ground, for players that are not stacking in the traingle formation, you SHOULD be the only people being targetted with Quicksand for this to matter. Its not said in the dungeon journal or by blizz that this focuses only people at range, but VOX and others have noticed that during their kills that Quicksand has only been targettign people who are AT range, and has NOT been targetting ranged who stack in the melee groups. Ranged personnel should just ensure they spread out enough from quicksand pools to prevent them from combining as much as possible.
Twisted Fate, When she is possessed, stay spread as much as possible so the linked souls are as far apart as possible, when they spawn, dps turn and split dmg to them to kill simultaneously.
The pull should go exactly the same, keep Mar'li away from the raid so her healing spirit cant get to the other bosses. Form a triangle around Sul and Frost King at normal location (3 groups of 2). Player affected by Frostbite move between the 3 "triangle" groups so damage is minimal. If possible, players use their immunities to prevent Frostbite from being a factor, especially in the beginning when all 4 bosses are up. Ignore Kazra'jin's charge as the damage is minimal and is easier to deal with than higher stacks of Frostbite. NUKE the shit out of Sul, and since the raid is fairly stacked, Kazra'jin should be in melee a fair bit, so splash damage on him. When Mar'li gets affected, have a RANGED player interrupt her so she runs TO the melee group, this will prevent having to move both bosses to her and messing with group positioning. Focus/kill linked souls, when she is no longer possessed, tank interrupt and drag her back accross the room and re-group. Rinse and repeat for the rest.
For the most part, it is handled similarly to normal, just modified for the ability changes and requires more strategic positioning.
H02 - Horridon
Mehguy — Sun, 05/12/2013 - 08:32
For Heroic Horridon, there is really only ONE major difference between Normal and Heroic. For a review of normal mechanics, go here...
Adds have much more health and deal significant more damage. Need very strong AoE/Burst dps to kill them quickly before we get overwhelmed. In addition to their increased damage and health, Horridon will use his new ability which will buff them further.
The new mechanic is as follows
- Dire Call - emits a powerful roar, dealing 250k physical damage to the raid, increases the melee attack speed of the adds by 50%. Also summons a Direhorn Spirit.
- Direhorn Spirit - Summons a direhorn spirit (red in color) and fixates on a random player. ONLY THE FIXATED PLAYER CAN SEE THIS DIREHORN. They have over 420 mil health so killing them is simply not possible since only 1 player can see them. If you are hit by this spirit you will be 1-shot.
- Weak Link - the spirit link from the Direhorn to the player is "weak", any attack made against it will knock it back. So essentially the way to counter this Spirit is to ranged hit it and knock it back a ways so you have time to dps the adds/boss. Hunters and warlocks are great for this as they can just send their pets on the spirit for a while and knock it back a fair distance.
- DO NOT knock it back through a wall as it has been knocked back through walls and reappeared immediately in front of its target and insta-killed them.
- DO NOT use invisible, feign death, etc or anything that will cause you to completely drop aggro. This can cause the spirit to drop its fixate on the player, and will cause it to focus on a different player who cannot see/target it to knock it back.
- Weak Link - the spirit link from the Direhorn to the player is "weak", any attack made against it will knock it back. So essentially the way to counter this Spirit is to ranged hit it and knock it back a ways so you have time to dps the adds/boss. Hunters and warlocks are great for this as they can just send their pets on the spirit for a while and knock it back a fair distance.
- Direhorn Spirit - Summons a direhorn spirit (red in color) and fixates on a random player. ONLY THE FIXATED PLAYER CAN SEE THIS DIREHORN. They have over 420 mil health so killing them is simply not possible since only 1 player can see them. If you are hit by this spirit you will be 1-shot.
H01 - Jin'rokh the Breaker
Mehguy — Sun, 05/12/2013 - 08:11
To see/review full details on the normal mode mechanics, please go here...
Differences between normal and heroic are not that drastic.
- Thundering Throw - Deals more damage to tanks and players that stand within 8 yards of where the tank lands after being thrown.
- Fluidity - When players stand in water, they now take 100% increased nature damage (was 80% in normal)
- Static Burst - Tank swap mechanic. Still does the same thing, just more damage.
- Focused Lightning - Still does the same mechanics in regards to this orb that flies around, just hits MUCH harder and is less forgiving.
- Lightning Storm - BIG DIFFERENCES! - Still does an AoE effect, dealing 55k nature dmg every sec for 15 secs (was 70k in normal), however it now does the following to account for less overall AoE dmg.
- Lightning Strike - Lightning will strike random locations throughout the room for the duration of the storm. Players in them receive 400K nature dmg. These will looks similar to the annoying ass beams from doing Heroic Flame Leviathan in Ulduar. Stay the F out of them and you wont take damage.
- Diffusion - Once the lightning hits the ground, it will "diffuse" and send out orbs in lines from the point of impact, dealing 200k dmg to anyone they hit.
- Due to the new Storm mechanics, you cannot stack completely. You can still be clumped up in a general location, but stacking in one locations is BAD.
- Lightning Strike - Lightning will strike random locations throughout the room for the duration of the storm. Players in them receive 400K nature dmg. These will looks similar to the annoying ass beams from doing Heroic Flame Leviathan in Ulduar. Stay the F out of them and you wont take damage.
- Ionization (BRAND NEW ABILITY) - Boss will place a debuff on all players (NOT TANKS), and every minute after. If it is either dispelled or the duration expires, the player will explode, dealing 450k to the player and anyone within 8 yards of them. Recommended are as follows
- Affected players run out of the water at staggering times to be topped off on health and dispelled. Ensure they are out of water to prevent conduction to the raid.
- Players should be using individual defensive CDs to survive the damage from dispelling.
- Ice Block/Deterrence etc WILL work, but supposedly ONLY to prevent the buff from being taken. Watch DBM timers and use appropriate abilities prior to it being applied (as per fatboss). Otherwise if you try using it while in the water to remove the debuff it should act as a dispell and AoE the raid.
13 - Heroic Mode Guides
Mehguy — Sun, 05/12/2013 - 07:46
I'm not going to delve deeply into heroic mode guides. None of the fights are "drastically" different from normal, and majority of normal mode mechanics will still apply. I'm going to just focus on the main differences between Normal and Heroic and give tips on how to counter them, and post guides/videos of kills, etc.
- Heroic Jin'rokh the Breaker
- Heroic Horridon
- Heroic Council of Elders
- Heroic Tortos (FUUUUUUUUUUUUUUUUUUCK NO)
- Heroic Megaera
- Heroic Ji-Kun
- Heroic Durumu the Forgotten
- Heroic Primordius
- Heroic Dark Animus
- Heroic Iron Qon
- Heroic Twin Consorts
- Heroic Lei Shen
- Ra-den


Recent comments
7 hours 17 min ago
4 weeks 1 day ago
7 weeks 1 day ago
7 weeks 2 days ago
9 weeks 1 day ago
9 weeks 1 day ago
9 weeks 1 day ago
10 weeks 2 days ago
11 weeks 3 days ago
13 weeks 17 hours ago