
Raid

04 The Crucible - Warlord Blackhand
Mehguy — Sun, 08/24/2014 - 14:33
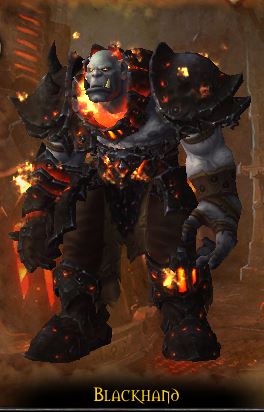
Warlord Blackhand is the final encounter in the Blackrock Foundry raid.
This encounter is a 3-phase fight, with transitions at 70% and 30% At first, there seems like a lot going on in the fight, but in general its very straightforward. It just requires more individual responsibility by all players, primarily in Phase 2, to handle the mechanics of the fight.
For a more detailed view of his abilities or loot, please view the in-game dungeon journal or click HERE to view at WoWHEAD.
Abilities/Overview
Phase 1
- Molten Slag (room mechanic) - The outside edge of the room begins to heat up causing the floor to become molten. This will gradually grow in size towards the middle of the room, eventually forcing you to the very middle of the room.
- Demolition - Throws his hammer at the ceiling, causing it to crash to the ground (noted by swirling brown circles), dealing mild phys dmg to players within 12 yards.
- Massive Demolition - this occurs during regular Demolition, this is just a larger orange circle that deals heavy damage to those nearby and leaves behind a pile of Debris (more on that below). Damage is decreased the farther you are from imact.
- Marked for Death - 2 random players will be marked and have a 30% run speed increase. After 5 seconds, the boss will use Impaling Throw on them. This ability will hit the first "object" it comes into contact with. Marked players need to LoS this behind the Debris piles from the Massive Demolitions. Doing this will also destroy the Debris pile.
- Impaling Throw - Deals moderate damage, ignores all armor and knocks the player back. Also places a 45 sec DoT on the player that ticks every 3 seconds for mild dmg. You can see the path of this from large arrows that appear under the bosses feet.
- Throw Slag Bombs - Throws bombs at random players (typically 3, might be more/less depending on raid size). These will activate after 3 seconds. If detonated, will deal moderate/heavy fire dmg to anyone within 10 yards, and leave a Slagged debuff, increasing dmg taken by 100% for 10 sec. The Molten Slag will also detonate these.
- Shattering Smash (tank mechanic) - deals massive phys dmg split amongst all players within 5 yards, knocks player back, removes all threat and stuns for 3 sec. In Phase 1, tank solo this with a CD, tank swap immediately so melee doesnt die.
- Marked for Death - Same as above, ditto for Impaling Throw. Marked players need to LoS this ability with the Siegemaker. If there is no Siegemaker up, then use personal or outside CD to mitigate the dmg.
- Throw Slag Bombs - Same as above. However, if the Siegemaker runs over these they will detonate. This needs to be done to help kill it. Be sure to be at least 10 yards from Bombs.
- Shattering Smash - Affects players within 6 yards (as opposed to 5yds in P1). Knocking those affected up to the balcony. NEED to have dps AND a healer in this for this phase. Pay attention to WHERE you stand in the circle on the ground for this ability to see where you will get thrown. The TLDR video below talks about this.
- Siegemaker - These will fixate on random players. The fixated player needs to kite the SM over bombs and be sure to stay in front of it or his Battering Ram will deal moderate dmg to you and knock you back. *RAID AWARENESS* DONT BE IN FRONT OF THIS THING! These also have Blackiron Plating, reducing all dmg taken by 90% per stack. Marked for Death players be sure to LoS the boss with the SM so the Impaling Throw can remove the stacks so the raid can DPS it and the mines can help kill it. If it is not killed fairly quickly, it will begin leaving fire patches all over the ground. Kill quickly.
- Iron Soldiers - These frequently come up on the balcony and spam cast Explosive Round on the raid, dealing mild dmg to anyone within 6 yards of impact. Players knocked up to the balcony by Shattering Smash need to run aroud the balcony interrupt Explosive Round AND kill as many as they can before they need to jump down because of low health.
- Overheated (room mechanic) - deals increasing fire dmg over time
- Marked for Death - same as above.
- Impaling Throw - This is now empowered, and will fly THROUGH everyone it its path AND knock you back. Targetted players need to run from group and everyone else dont be between the player and the boss, or behind the player.
- Attach Slag Bombs - Instead of Bombs dropping at targetted locations, they attach to random players. Affected players need to run Bombs off to the side and drop them out of the raid. When the bombs detonate, they will leave a Slag Hole/Crater that will deal heavy dmg to those inside it.
- Slag Eruption - The Slag Craters from the Bombs will erupt, leaving a large dmg-ing area around their location, dealing HEAVY dmg to anyone in them.
- Massive Shattering Smash - Deals MASSIVE fire dmg split to anyone within 6 yards and also leaves a moderate fire DoT that lasts for 10 seconds. ALL players should stack on the tank to split the dmg. This will be a LARGE knockback. This will leave a VERY LARGE Slag Crater in the area. If you are in this large Slag Crater you WILL die. Hence why everyone needs to be in the knockback. By the time you have 4 of these up, you will be out of room and will wipe.
03 Iron Assembly - 3 - The Iron Maidens
Mehguy — Sun, 08/24/2014 - 14:32
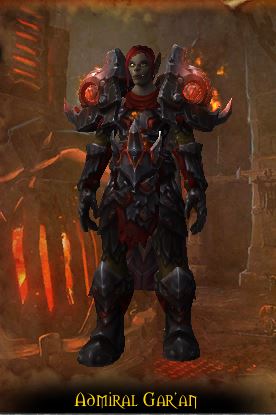
Iron Maidens is the final encounter in the Iron Assembly wing in BRF.
This is a 3-boss council fight. They do NOT share a health pool, and they must be brought down simultaneously to 20% before focusing down 1 at a time.
For a more detailed view of his abilities or loot, please view the in-game dungeon journal or click HERE to view at WoWHEAD.
Overview
As mentioned above, this is a council fight. The 3 bosses have separate health pools. They each have a rage bar that slowly builds up simultaneously and caps at 100 rage. They each gain new abilities at 30 rage and again at 100 rage. Their rage bar does NOT build up faster based on ability usage, nor by general health loss, its a set pace. The ONLY time that the rage bar increases is once ONE boss drops below 20% health, then they ALL go to max 100 rage. Their 100 rage abilities are pretty devestating, so nuking one down first is pretty much out of the question. You must bring them down evenly to 20%, or very close to, then focus the one that is most devestating to your group, then the next one, etc.
In addition to this, they also have a battleship that is off the side of the platform you fight them. Periodically throughout the fight, one of the bosses will leap over to the ship and start bombarding the main platform with bombs. While they are doing this, the boss will also be "warming up" the main gun. A designated group of players must jump over to the battleship via chains on the side of the platform, kill all the adds and mini-boss, then "blow up" the gun before it gets fully warmed up. If the gun gets warmed up before you can blow it up, it will wipe the raid on the main platform. The mini-boss/adds that spawn on the battleship will be dependant on which boss jumps to the battleship. 2 of them require 1 tank, 1 heal, then the remaining amount of players be DPS. 1 of the bosses does NOT require a tank, so 1 healer and the rest DPS.
Main Platform/Boss abilities
Iron Fury (buff) - Iron Maidens are 'bound together', whenever one reaches 20% health, they all go to 100 rage, gain their max rage abilities, and also increases their dmg dealt by 10% every 20 seconds.
Admiral Gar'an - A "gunner" style boss, does not melee, just fires at random targets, cannot be "tanked".
- Iron Shot - Fires a shot at random player, dealing moderate dmg
- Rapid Fire - Focuses on, and tracks a random player, fires barrage of explosive rounds at the targetted player and chases them as they move. Deals moderate/heavy dmg to all players within 5 yards of impact point. This ability can be kited, and players should do so around the outer edge of the room.
- Penetrating Shot (30 rage ability) - Lines up a shot to her target, dealing MASSIVE (potential one shot) phys dmg to the target after the 8 second cast. Players standing in the line split the damage. Think Hisek's Aimed Shot from SoO, but the damage does NOT splash over if you are standing on top of each other.
- Deploy Turret (100 rage ability) - Deploys a turrent that spins in a circle shooting fireballs in straight lines from the turret. If hit, will deal mild fire dmg every sec for 8 sec to anyone it hits. This effect stacks. This is considered the "easiest" 100 rage ability to deal with since the fire doesnt move all that fast and can be easily dodged. The turret is targetable and should be DoT'd up and killed by a few ranged.
- Blade Dash - Dashes through a player that is within 45 yards, and any player within 5 yards of her target, dealing moderate physical dmg to those she hits. In the videos (Fatboss talks about it) you see tornadoes that spawn in relation to this ability. They float around the room and stun you if you are hit by them. This part of the mechanic is only in MYTHIC. So do not be concerned with seeing that in the BETA vids
- Convulsive Shadows (30 rage ability) - Places a 5-stack debuff on a random player (stack # might be different on live). Deals mild shadow dmg per stack, but loses a stack every 2 secs. So if it deals 9k per stack, it will deal 45k dmg to start, then 36k, then 27k, etc, until the debuff expires after 10 secs. However if you dispel/cleanse this, the affected player only takes a 40k hit instead of the ticking dmg.
- Dark Hunt (100 rage ability) - Fixates on a player for 8 seconds, after the 8 seconds is over she will teleport to them and deal massive dmg to the player.
- Blood Ritual - Targets a player within 45 yards, dealing moderate/heavy dmg shadow dmg to all players in a cone in front of the boss. PAY ATTENTION to where the boss is facing when this goes off.
- Crystallized Blood - Deals massive dmg to the player closest to the boss within the cone. Needs to be the tank.
- Bloodsoaked Heartseeker (30 rage ability) - Throws a weapon that bounces between 3 marked players and deals physical damage up to ~300k+ (varying on difficulty). The further apart the 3 marked targets are, the less damage this will deal.
- Sanguine Strikes (100 rage ability) - This is why she needs to be nuked down first. A portion of her damage that she deals to her primary target (ie the tank) will be dealt to ALL raid members. The tank need to rotate cooldowns to mitigate as much damage as possible to the raid until this boss is dead.
- Uktar (mini-boss)
- Grapeshot Blast - randomly targets a player and shoots at them in a conal effect. Just spread around him and side step the blast if you are in its path.
- Battle Medic Rogg - healer add. INTERRUPT HIS Earthen Barrier and Protective Earth casts!
- Earthen Barrier - puts a shield on its target, absorbing ~250k+ damage (based on difficulty) MUST BE INTERRUPTED!
- Protective Earth - Drops a pool of protective earth, any mob that stands in it gains Earthen Barrier. MUST BE INTERRUPTED
- Chain Lightning - duh... deals moderate nature dmg and chains to nearby players. Can be interrupted but interrupts are better used on the other 2 abilities
- Gorak (mini-boss)
- Deadly Throw - throws a poisoned knife toward random player, dealing heavy/massive dmg to them and reduces movement speed by 80% for 5 seconds to the player it hits. Tanks should tand in the path of the attack to take this hit.
- Call for Reinforcements - Summons an Iron Eviscerator add.
- Iron Eviscerator - 2 of these will be with Gorak once you first arrive to the battleship.
- Fixate - Fixates on a random target and will only attack that target.
- Swiftness - Stacking buff that increases movement speed AND haste by 10% per stack. Increases the longer they are alive.
- Expose Armor - Reduces targets armor, dealing moderate physical dmg and increasing physical dmg taken by 10% for 15 sec.
- Uk'urogg (mini-boss) - This mini-boss does NOT summon any additional adds.
- Blood Corruption Aura - Buff that causes pools of Corrupted Blood to spawn under every player every 3-4 sec.
- Corrupted Blood - Pools of blood that deals moderate/heavy shadow dmg every 2 sec you stand in it.
- Blood Corruption Aura - Buff that causes pools of Corrupted Blood to spawn under every player every 3-4 sec.
03 Iron Assembly - 2 - Operator Thogar
Mehguy — Sun, 08/24/2014 - 14:32
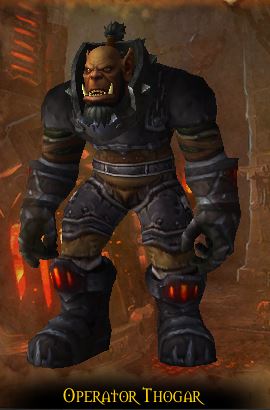
Operator Thogar is the 2nd encounter in the Iron Assembly wing of BRF.
This fight is fairly simplistic in terms of abilities, and is primarily an add fight, but the room/area mechanics of the fight are going to test your patience if you are bad at 'raid awareness'.
For a more detailed view of his abilities or loot, please view the in-game dungeon journal or click HERE to view at WoWHEAD.
Overview/Abilities
This fight takes place on a set of 4 train tracks. Trains will periodically either ride straight through the room, or stop and drop off adds (supposedly in a pattern). If you are run over by the train, either when it goes straight through, or even when it stops to drop off adds, you will die. DONT GET HIT BY THE TRAIN. When a train drops off adds, it will remain in the room until ALL the adds that were/are on that train are killed. Adds will take absolute priority over the boss when they are up.
Operator Thogar
- Enkindle - Sets the target on fire, applying a fire DoT, increasing dmg by additonal Enkindle by 35% for 25 sec. Stacks.
- Prototype Pulse Grenade - This grenade targets a random players location, pulling in those in the effect, dealing mild nature dmg every sec until either out of the animation or it despawns. The longer you are in the animation, the more you will be slowed. GTFO as soon as you see you are in it, this means stop casting and GTFO.
- Berated - Berates allies, increasing their dmg done by 10%, haste by 5%, movement speed by 10% and reduces casting time by 3%. This effect stacks.
- Iron Crack Shot - shoots at random targets, deals phys dmng. Also throws Grenades at random players, dealing fire dmg to those within 6 yards of the target.
- Iron Raider - does Serrated Slash, leaving a bleed on the target for 6 sec. Also throws Grenades.
- Grom'kar Firemender - should be focused down. Does Cauterizing Bolt, healing its target and its allies within 5 yards for 20% of their max health initially, then an additional 30% of max health over 10 sec.
- Grom'kar Man-at-Arms - should be focused after Firemender. Does heavy raid wide dmg. Casts Iron Bellow, raid-wide AoE phys dmg ability. Cannot be interrupted, just use CD's if appropriate. Also does Reckless Slash, charging a random target, dealing phys dmg to target and anyone within 7 yards.
- Iron Gunnery Sergeant - arrives on his own train in a turret. Fires Delayed Siege Bombs out of his turret, these are a series of bombs that will detonate over time, dealing moderate phys dmg and knocking back anyone within 4 yards upon impact of the target. Once these bombs detonate, they deal heavy fire dmg to anyone within 9 yards. Everyone should have this boss on focus, once you see who he is targetting, that person should run to the edge of the room and just drop the bombs he is shooting at you, then everyone stay away from where the bombs are dropped to avoid damage. Think "Spoils" encounter in SoO, except you dont drop the bombs off of yourself, you have to run out and the bombs will drop off of you once you are hit by them.
03 Iron Assembly - 1 - Beastlord Darmac
Mehguy — Sun, 08/24/2014 - 14:32
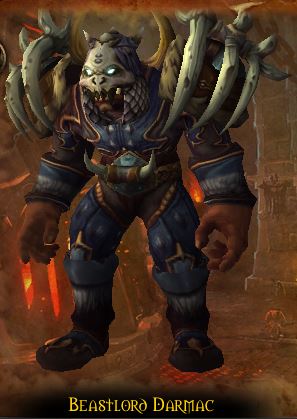
Beastlord Darmac is the 1st encounter in the Iron Assembly wing in BRF.
This is a multiphase fight, similar to Iron Qon in ToT in that he rides mounts with their own abilities, except he retains a buff and an ability from each mount he rides. Unlike Iron Qon, YOU determine what order he rides the mounts.
For a more detailed view of his abilities or loot, please view the in-game dungeon journal or click HERE to view at WoWHEAD.
Abilities/Overview
This fight starts out with just Beastlord Darmac. He only has 2 abilities to start out, then as the fight progresses, he will mount on a beast in the room where you will have to deal with the beasts mechanics. Once you kill the beast he is riding, he will gain a buff and an ability specific to that mount for the remainder of the fight. So once all 3 (4 in mythic) mounts are dead, he will have a lot of crap to deal with.
Beastlord Darmac
- Pin Down - Hurls a spear at a random player, dealing mild phys dmg to anyone within 25 yards of the impact. Enemies within 3 yards of the impact take more damage and are pinned to the ground. These spears can be DPS'd down and later in the fight, it will be necessary to do so
- Call of the Pack - Summons several Pack Beasts from one specific "cage/door" in the room periodically. Just need to be tanked and cleaved down.
- Beast Buffs/Abilities - granted to Beastlord Darmac AFTER you kill the specific mount he is riding.
- Cruelfang's Swiftness (buff)- This buff is gained after you kill Cruelfang (wolf) mount. This increases his attack speed and the attack speed of any Pack Beasts within 30 yards by 35%. Allows him to use Rend and Tear.
- Rend and Tear - Leaps to a target, causing anyone within 7 yards to get a mild phys dmg bleed. Also increases dmg taken from future Rend and Tear by 10% for 30 sec. Will also leap back to the tank and apply on them as well.
- Spirit of the Rylak (buff) - Pin Down and Pack Beasts become imbued with fire.
- Superheated Shrapnel - Deals moderate fire dmg on application and pulses mild fire dmg every 3 sec to anyone in the blast. Can be dispelled/cleansed.
- Flame Infusion - When Pack Beasts die, their bodies become a patch a fire, deals mild fire dmg every sec you stand in it.
- Seekeing Embers - Pin Down spears are on fire, throwing fire at random players dealing mild fire dmg. MUST be DPS'd down to prevent extra fire dmg going out.
- Fury of the Elekk (buff) - Increases phys dmg done by 25%
- Tantrum - deals mild nature dmg every sec for 5 sec. Think Epicenter from Feng in MSV.
- Cruelfang's Swiftness (buff)- This buff is gained after you kill Cruelfang (wolf) mount. This increases his attack speed and the attack speed of any Pack Beasts within 30 yards by 35%. Allows him to use Rend and Tear.
- Cruelfang (wolf)
- Rend and Tear - Same as the its listed above for Beastlord.
- Savage Howl - deals mild AoE dmg to nearby enemies, also increases attack speed of nearby allies (Beast Pack) by 75%.
- Dreadwing (rylak)
- Inferno Breath - deals moderate fire dmg initially, then mild fire dmg every 3 sec to anyone in the breath. This is NOT directed at the tanks, he will face a random direction and will emote that he is "readying his breath", so pay attention for it and move when appropriate.
- Conflagrations - sets a player on fire, dealing mild/moderate fire dmg every 2 sec for 6 sec and makes them lose control. Anyone within 8 yards of the affected player suffer mild fire dmg.
- Searing Flames (tank mechanic) - Melee attacks deal fire dmg and gives Seared Flesh debuff which increases fire dmg taken by 20%.
- Ironcrusher (elekk)
- Tantrum - Same as its listed above for Beastlord.
- Stampede - Stompes the ground, dealing moderate phys dmg and knocks nearby players back. Then charges a random player and does the same thing at their location.
- Crush Armor (tank mechanic) - Deals dmg and reduces armor by 10% for 15 secs. Stacks.
02 The Black Forge - 3 - Kromog
Mehguy — Sun, 08/24/2014 - 14:31
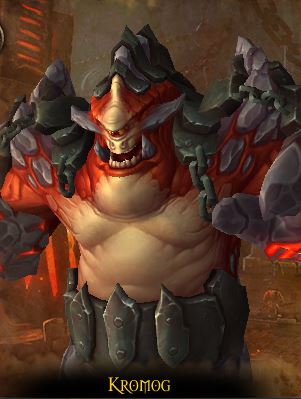
Kromog is the final encounter in The Black Forge wing in BRF.
For a more detailed view of his abilities or loot, please view the in-game dungeon journal or click HERE to view at WoWHEAD.
This encounter is a single phase encounter, with all this abilities pretty much on a timer. Managing your range from the boss to dodge mechanics and properly DPS-ing extra crap during his primary ability of Rune of Grasping Earth/Thundering Blows is key.
Abilities/Overview
Warped Armor - Reduces movement speed by 15% and increases phys dmg taken by 20%. Stacks up to 5. Tank swap mechanic.
Stone Breath - Mild nature dmg breath, deals dmg every second for the duration. Also casts on the raid if there are no targets in melee.
Fists of Stone - deals heavy phys dmg to the tank. The dmg is split evenly between players (up to 2) within 15 yards. In other words, tank and OT stack.
Slam - Long cast ability, slams fists on the ground, deals "massive" phys dmg to the raid. Amount of dmg decreases the further away you are from boss.
Rippling Smash - Cascading eruption that deals heavy nature dmg to those it hits. Targets ranged only, stay at/close to max range to dodge this.
Rune of Crushing Earth - Large red rune will spawn under random ranged player, and 2 large hands will spawn on either side of it. Either over time or when a player "trips" the rune, the hands will slam together dealing heavy dmg and stunning for 5 seconds. In Beta, the hands only triggered when there were 2 of these Runes/Hands up and they both triggered at the same time.
Reverberations - Any time his fists slam the ground, or certain abilities are triggered, yellow sound reverberations will spawn from him towards the back of the room, dealing moderate dmg to those they come into contact with. Think MUCH smaller rings from Atramedes from BRD. Advised to dodge these. However, they can be soaked if a player has an immunity, etc. But should be easier to dodge.
Shattered Earth - mild nature dmg dealt to 4 random players. Just deal with it.
Rune of Grasping Earth - Yellow runes will spawn from the middle to the back of the room. Standing in these runes will allow hands to grab the players. This will deal very light nature dmg every sec, but will increase in dmg over time, but you will also be completely immune from all Physical dmg and will be rooted to the ground. It is necessary to stand in these to counter Thundering Blows. You need to slowly dps your way out of these and ONLY break them once Thundering Blows is over.
Thundering Blows - For the duration of RoGE, Kromog will repeatedly slam the ground, knocking anyone who isnt grabbed by a hand far up into the air, dealing moderate/heavy dmg to them every sec. This is a wipe mechanic. As if you dont die from the damage while you are up in the air, you will die from the fall damage.
Summary
Tanks stack, face boss either left or right, melee stack on opposite side. Tank swap when appropriate, probably 3-4 stacks of Warped Armor. melee MIGHT need to run out for Slam due to their proximity to the boss. Ranged stay grouped (loosely) at/near max range to dodge Rippling Smash and also to be able to move out of Rune of Crushing Earth and dodge RS. Everyone do your best to dodge Reverberations. When yellow runes spawn for Rune of Grasphing Earth, everyone stand in a rune (1 per person), let tanks get in those closest to boss. Slowly kill your and others Hands they are trapped in, healers should help dps this too early on as the nature dmg shouldnt be too severe at the start. ONLY break out of these hands RIGHT when Thundering Blows ends. Rinse-repeat.
TLDR/Saedo's Cliffs Notes
Most of this is just avoid the damage, watch the vid to recognize the stuff.
One twist is the Rune of Grasping Earth, get in those, 1 player each, they do some nature damage to you, but make you immune to physical damage. That lets you avoid the Thundering Blows, massive damage that throws you up into the air. But, you also have to kill the hands to release you afterward, and help release the tanks and healers asap.
02 The Black Forge - 2 - Flamebender Ka'graz
Mehguy — Sun, 08/24/2014 - 14:31
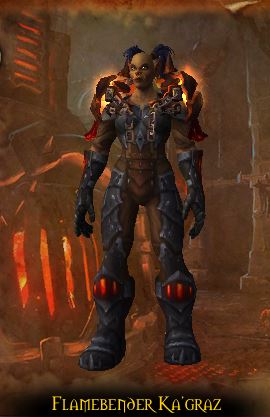
Flamebender Ka'graz is the second encounter in The Black Forge wing in BRF.
For a more detailed view of his abilities or loot, please view the in-game dungeon journal or click HERE to view at WoWHEAD.
This fight is a single phase encounter that repeats once the boss has reached 100 energy, etc.
Primary focus for this fight is just staying out of Fire (go figure), dodging mechanics and killing Wolf adds simultaneously. Overall the fight is somewhat easy to 'navigate' in terms of mechanics and what to do, but it is said to be very unforgiving if you continuously let yourself fail to them.
Fight Overview/Abilities
Flamebender Ka'graz starts out with an add called Aknor Steelbringer by her side. He has very little health and only has 2 abilities to start. Devestating Slam is just a frontal conal style mechanic that deals heavy phys dmg to ppl 15 yards in front of him. Tank face him away from raid. He also has Drop the Hammer where he just heroic leaps out to a random target, deals moderate phys dmg to anyone within 10 yards of the impact and knocking them back. He is seen as more of a nuisance than anything. Just nuke down at the start unless going for the achievement to get him as a follower.
Flamebender Ka'graz only has 2 abilities to Start.
- Lava Slash - deals mild/moderate dmg to all targets within 7 yards of the impact spot and leaves behind fire. This is essentially (as per Fatboss) chain lightning that leaves fire on the ground. Also, anyone within 6 yards of the targeted player will spawn an additional fire line towards them. You can see this in the Fatboss vid linked below. Stay spread ~7-8 yards for the fight until you need to stack for her 25 energy and 100 energy mechanics.
- Summon Enchanted Armaments - She will spawn weapons randomly around the room that do a 6 yard AoE dmg every 3 sconds until they despawn.
- Molten Torrent (25 energy) - Targets a random player with a meteor that impacts after 6 seconds dealing MASSIVE fire damage that is split amongts all players within 8 yards. Sack appropriate # of players with targeted player to split dmg.
- Summon Cinder Wolves (50 energy) - She will summon 2 wolves. One will always be small and fixate random players and 1 will be empowered and must be tanked.
- Fixate - The smaller wolf will fixate a random player and chase them. If they reach their target they will just do light/moderate melee dmg.
- Fiery Link - The wolves are linked by a fire chain (think Diablo 3). Anyone that comes into contact with the fire chain will take a stacking fire DoT called Singe. This DoT can be cleansed.
- Overheated - As said, one will always be empowered. Once one has used up all its heat energy, they will switch which is empowered. ie. the big one becomes little, the little becomes big. This occurs every ~20 secs. At this point the tanks want to swap who was tanking the big wolf because the big wolf does Charring Breath.
- Charring Breath - deals mild/moderate fire dmg to all players in a cone in front of the wolf. This will leave a stacking debuff on affected players increasing the damage of the next Breath by 200%. As said above, when the wolves switch empowerments, the tanks need to swap who was tanking the big wolf due to the debuff.
- Rekindle - When 1 wolf dies, it will cast this and if the other dog doesnt die before it goes off, will regain 100% of its health (as per live dungeon journal)
- Blazing Radiance (75 energy) - Targets a random player, inflicts mild fire dmg every 2 secs to the player and everyone with 10 yards. If you get this debuff, just GTFO out of the group but stay within range of healers until it goes away.
- Firestorm (100 energy) - Once she reaches this, she will stop casing all her other abilities until this is over. She will channel mild fire dmg every 0.5 sec for 12 seconds. HOWEVER if there are any Cinder Wolves still up, they will EACH do the same thing. If there are still wolves up at this point, it is a wipe. During this she will also do the following...
- Magma Monsoon - Motes of lava join together into larger molten orbs that rain down every 2 sec for 30 seconds, dealing moderate fire dmg to all enemies within 3 yards of the impact.
- Flamefury - Consumes all energy and empowers her weapon to give a tank debuff for 50 seconds. Tanks taunt off 1/2 way through duration to split the Rising Flames debuff.
- Rising Flames - deals a stacking fire DoT lasting 8 seconds.
Start off, kill Aknor, range spread out to avoid stacking the Drop the Hammer damage. Unless you want the follower, in that case, 3rd tank, away from raid.
With Ka'graz, first thing will be fire lines (Lava Slash), they'll hit their target and explode, but if it damages other targets, they get additional fire lines.
Then summons spinning weapons, it's just a void zone to stay away from the entire fight.
At 30 energy, there's a meteor type ability (Molten Torrent), run into melee to split the damage.
At 50 energy, 2 wolves spawn, one will be tankable, one will fixate on someone, they alternate too. They also have a beam between them, anyone crossing it gets a DoT. Both wolves also must die within 8 seconds of each other. And both wolves must die before Ka'graz reaches 100 energy.
At 75 energy, random ranged will get damaging debuff to all within 12 yards (Blazing Radiance), so stay away from people.
At 100 energy, Ka'graz and the wolves will channel aoe damage Firestorm, afterwards, lobs lava at the range.
02 The Black Forge - 1 - Hans'gar and Franzok
Mehguy — Sun, 08/24/2014 - 14:31

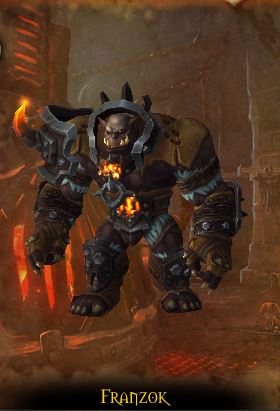
Hans'gar and Franzok is the first encounter of The Black Forge wing in BRF.
For a more detailed view of his abilities or loot, please view the in-game dungeon journal or click HERE to view at WoWHEAD.
This fight is an single-phase encounter. These bosses have a shared health pool, and can utilize their abilities to tag-team the tanks. Primary focus on this encounter is their use of the conveyor belts and dodge the primary damage from the belts. They also gain rage as they take damage, which allows them to increase the frequency of their ability usage.
Conveyor Belts
Searing Plates - This occurs when Hans'gar does his Pumped Up ability. These plates roll across the belts from one side of the room to the other, dealing heavy fire dmg every 1 sec you are on the plate. Just dodge them as they roll across.
Scorching Burns - Occasionally at the beginning/end of the belts, the walls will ignite on fire, dealng mild/moderate damage to those it touches. This is to prevent players from just stacking against the wall when the belt is going and sidstepping the Plates or Presses (from Pulverized).
Pulverized - This occurs when Franzok does his Pumped Up ability. Stamping presses come down from the roof, smashing onto the belts in the identified/lit up squares. Deals heavy phys dmg. These appear in various patterns, so once you see the first few stamps go off during that pulverize, you can memorize which plates will get stamped for the duration of that Pulverized 'phase'. Some are set patterns that go around the room, others are a set pattern that just goes down along the belt from side to side. Watch the attached video and it explains it. Very simple. *NOTE* - give these Presses a little grace room (3 yards) as the damage tends to hit outside of the marked area.
Boss abilities
These bosses share 3 primary abilities, and Franzok has 2 additional abilities that he will use.
Hans'gar & Franzok
-Body Slam - Leaps towards an enemy - prefers ranged, possibly the furthest person, then will run back to the tank. As their rage bar increases, they will start jumping to multiple targets. The targeted player(s), all players within 12 yards AND the tank with threat on that boss will receive Shattered Vertebrae which increases phys dmg taken by 30% for a set amount of time (old beta had the debuff lasting 40 seconds, where recent PTR had it lasting 8 sec). Targeted person should be marked by a large circle around them, so there should be time to get away from them. Each time the boss lands from Body Slam or also from jumping down after activating a Conveyor Belt he will cast Aftershock, which is just minor raid wide dmg every 2 seconds for 4 sec.
-Crippling Suplex - Whenever either Hans'gar or Franzok leave the room to activate the Conveyor Belts, the one that leaves the arena will pick up his tank, and throw it to the other boss and smash the 2 tanks together. Dealing physical damage to both tanks equal to the MAXIMUM health of the picked up player. Tanks use personal CDs for this, or external if personals are on CD.
-Pumped Up - The lower the health pools, the more their rage bar will increase. As they gain rage, they will deal more melee dmg, increase the # of hammers thrown by Skullcracker, reduce casting time of Disrupting Shout and increase the number of jumps performed during Body Slam.
Franzok only
-Disrupting Roar - interrupts all spellcasting within 100 yards (think Twin Ogron)
-Skullcracker - Throws a hammer to a nearby enemy (favoring melee), dealing moderate phys dmg to them.
Summary
Overall the fight isnt too "complex", the dungeon journal doesnt give a great explanation of abilities really IMO.
Each tank takes a boss, there shouldnt be any tank swapping. Whenever a tank gets picked up for Crippling Suplex use a personal CD to mitigate damage to each other. Thats the extent of the tanks job. When either of the bosses do Body Slam just be sure to either have people aware to run away from the targeted player or have the targeted player run away from others. Healers be aware of those who were affected by the Body Slam as they will take a little more damage from Aftershock due to the Shattered Vertebrae debuff. Also stop-casting when Disrupting Roar goes out. Nothing you can really do about Skullcracker except heal though, maybe use a minor personal CD. Pay attention to which belt is spawning based on which boss goes up so you know to run around either the Searing Plates as they roll across the room, or dodge where the Presses are going to come down. Try to memorize the patterns.
TLDR/Saedo's Cliffs Notes
First boss of The Black Forge (2nd wing).
Essentially, the fight is 2 bosses, and through the stages, one of them jumps away, activates a conveyer belt mechanic, we fight one boss for a while during that, then he returns, we damage both bosses at the same time again, then other boss jumps away activating his conveyor belt mechanic, then later jumps back into the fight, repeat.
First conveyer belts bring the flaming pop tarts, don't be hit by them.
The boss jumping back to raid also means aoe damage, don't be near the guy with the arrow on his head.
Second conveyer belt ability is the dance of not being stamped by the machinery.
Live Vid
PTR Vid - Start vid at 10:34
01 Slag Works - 3 - The Blast Furnace
Mehguy — Sun, 08/24/2014 - 14:30
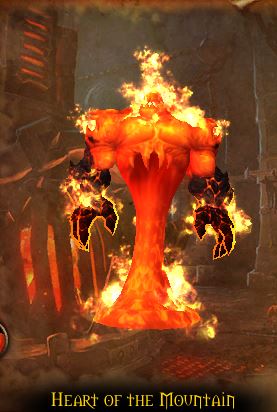
The Blast Furnace is the final boss encounter in the Slag Works in BRF.
This is a 3 phase encounter. The first 2 phases are primarily dealing with adds, and the last phase you deal with the "boss" itself.
I will go over each Phase briefly as there are a ton of adds and will NOT delve deeply into each of them.
One ability to note that lasts through the entirety of the fight is Blast. The furnace will periodically burst mild/moderate raid-wide fire damage. This damage increases via the Heat meter. The higer level of the Heat the higer the damage of Blast. After you reach Phase 2, the Heat meter will stop growing, and will slowly decrease, which will cause the damge from the pulses to gradually decrease.
Phase 1 - Sabotage
There are Heat Regulators on each side of the Furnace, you must disable these to move to the next phase.
There is a mini-boss this phase called Foreman Feldspar that needs to be nuked down immediately at the start of the phase. He deals aoe fire dmg to the raid and spawns fire shit under randon players. Interrupt his Pyroclasm ability to negate extra fire damage being thrown at random players.
There are 3 other adds this phase that you will deal with primarily.
Bellows Operator - these just periodically increase the heat meter of the Furnace.
Security Guard - These need to be tanked, and randomly pop up Defense shields that makes any mob within the shield immune to damage. When they pop this up, just move any other mobs outside the shield.
Furnace Engineer - These are the primary kill targets. They throw out Electrocution which is a "chain lightning" ability that spreads up to 2 targets within 5 yards of the initial target, so stay loosely spread. They will also try to Repair the damage youve dealt to the furnace, this is INTERRUPTABLE! They will also throw Bombs on random players. Players affected with this will blow up after 15 seconds and deal dmg to anyone around them. Players affected with this need to run to the furnace doors and explode on them to deal damage to the Furnace. Once this add dies, he will drop a sack of bombs that will explode after a set amount of time. Players need to CLICK on the sack, it will give them the Bomb debuff, same as the ability above, run to the Furnace door and blow it up.
Phase 2 - The Heart Exposed (occurs after Furnace Doors are destroyed)
The boss leaves the Furnace, the Heat meter will start to gradually go down. More adds spawn.
Security Guard - same as above
Primal Elementalist - 4 of these adds will channel an ability on the boss, freezing him in place and making him immune. However, they ALSO have an immunity shield and will take no damage. In order to break their shield, you need to kill another add, the Slag Elemental, on top of them. This will remove their shield so they can be damaged for a limited amount of time. NUKE the Elementalist before the shield pops back up on them. DO NOT USE HERO on them.
Slag Elemental - They will Fixate on a random player and will remain fixated on them until either the player is dead or it dies. Once it dies, it will explode for ~100k fire damge to all enemies within 8 yards and go Dormant. It will regain 20 energy for each Blast the furnace pulses out. Once it reaches 100 energy it will re-activate. Kill this mob on the Primal Elementalist to break their shields. They also cast Burn which deals mild damage to current target. Its a long cast and fairly negligible, but interrupt none-the-less.
Firecaller - These adds are a HIGH priority. Interrupd=t their Cauterize Wounds ability, as this will heal the target for 10% of its max health. Very bad if it goes on an Elementalist or the Slag Elemental. Lava Burst - deals ~55k fire damage to a random target and is fairly negligible. Better to interrupt CW compared to this. Main reason to nuke this mob down is Erupt, where it will spawn lava to spawn underneath a dormant Slag Elemental and re-activate it immediately. You want to avoid having multiple Slag Elementals up at the same time. Also puts out Volatile Fire debuff, this explodes after 12 seconds dealing ~75k fire dmg to players within 8 yards. If you get the debuff, run out.
Phase 3 - Freedom (occurs once all 4 Primal Elementalists are killed)
At this part of the fight, all that is left is the boss, and any adds that might still be alive.
The boss has 3 primary mechanics in addition to the Blast damage coming from the furnace. 2 of which are tank based, and the 3rd is just a large slag of lava on the floor.
Heat - Stacking ability that leaves a Fire DoT on the tank. The damage that Heat deals increases by the number of stacks of Tempered the tank has.
Tempered - to break it down simply, an additional stacking debuff that increases the damage that you can take from heat. This stack can NEVER be higher than the number of stacks of Heat the tank has. Taunt off on low stacks of Heat to prevent this from getting too high/crazy of damage.
Melt - Heats the floor under random players turning it into a LARGE zone of lava, dealing dmg every sec. DON'T STAND IN FIRE!. The room will gradually fill up with these, leading to soft-enrage.
TLDR/Saedo's Cliffs Notes
First phase, adds. Tank adds, kill adds, don't stand in front of adds, don't stand in fire of adds, grab bomb or get debuffed as a bomb (via Engineers), become the bomb, run to a Heat Regulator (2 of them 1 on each side), blow up the Heat Regulator. Interrupt adds that try to repair/heal the Heat Regulators. Divide raid in 2 to be responsible for each one.
Second phase, 4 primal elementists must be killed but they have a shield. Shields brought down by Slag Elemental dying and exploding near them, they random fixate on players, must kite and kill near Primal Elementists, then blow it up (melee don't be near that). Also, raid aoe damage and other adds to deal with. Firecallsers sends out random debuff makes you explode, so run away if you have it, interrupt healers. Security Guards can protect their allies, so kill them, also apparently MC'able and can kill/debuff elementals if need be.
Third phase, kill the Heart of the Mountain, some massive raid wide aoe going on here. Tank swap mechanic too. Fire patches on the ground to not be in. Pop Hero and go.
01 Slag Works - 2 - Oregorger
Mehguy — Sun, 08/24/2014 - 14:30
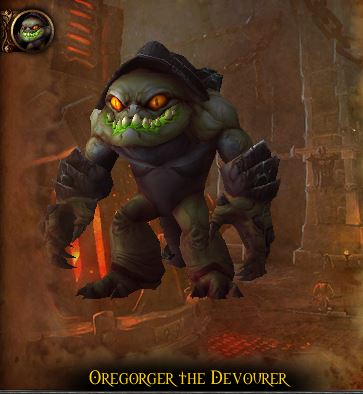
Oregorger is the 2nd boss in the Slag Works (1st wing) of BRF.
This fight is fairly unique as its probably one of the only fights where you are supposed to face the boss TOWARDS the raid for marjority of the encounter.
Oregorger is a repeating 'phase' encounter like Gruul, but its not time based, its "blackrock energy" based. He has a "blackrock ore" energy bar that slowly depletes as he uses his abilities. Once he reaches 0 energy, he will roll around the room to try to collect/eat more ore to fill up his bar again. Your goal is to keep him in phase 1 as long as possible and get him out of phase 2 (his 'rolling' phase) as quickly as possible.
For a more detailed view of his abilities or loot, please view the in-game dungeon journal or click HERE to view at WoWHEAD.
Abilities
Phase 1 - Satiated Slaughter
Acid Torrent - Fires a cone of acid at ranged targets, dealing HEAVY phys damage to the person closest to the boss within that cone (aka the Tank) and increases the damage that person takes by the next AT for 20 seconds. All other targets in the cone take "heavy" damage, but that damage is reduced based on the closest (tank) targets total damage mitigation. IE, the tank will take the heaviest hit on this, his mitigation will make the ranged players take reduced damage from the ability. If the tank is not in the cone for this, ranged will take the full hit.
Retched Blackrock - Vomits pools of Blackrock Ore ooze at you (should always be ranged players), deals nature dmg every 1.5 sec. "dont stand in fire"
Explosive Shard - Throws a Shard, typically at melee, dealing mild/moderate dmg and knocking back players in the area. Detonates after 3 seconds, dealing additional fire damage and stunning nearby enemies. Explosive/fire dmg can be ranged, unsure of range limit.
Blackrock Barrage - INTERRUPTABLE AND NEEDS TO BE INTERRUPTED AS MUCH AS POSSIBLE! Throws blackrock spines at the raid, dealing mild/moderate raid-wide damage.
Acid Maw - Nature damage DoT, deals dmg every 2 sec for 8 secs.
Phase 2 - Feeding Frenzy
Rolling Fury - Rolls around, dealing heavy phys dmg and knocks down anyone he hits.
Earthshaking Collision - Deals mild/moderate raid-wide damage WHEN he is rolling. This dmg increases due to Hunger Drive
Hunger Drive - The longer the boss remains in Feeding Frenzy, he gains stacks of this. Increases dmg of Earthshaking Collision by 5% per stack, stacks up to 100.
Summary
P1 - Melee stacks behind the boss and moves from the back of the boss to the side of the boss each time Explosive Shard goes out to prevent additional fire/exposive damage. Ranged players stay stacked at max range, and move to the edge of Retched Blackrock pools to keep them overlapped and save space. Off-tank should stack with/near Melee so they dont take uneccessary Acid Torrent damage or the debuff. Primary Tank faces the boss towards the ranged group so he takes the major hit of the AC, using personal mitigation to lessen the damage the ranged group takes. Tank swap when appropriate. INTERRUPT ROTATION FOR Blackrock Barrage! This is crucial, interrupting BB will keep him in P1 much longer as he wont be burning through his blackrock energy as fast, and will save healer mana by reducing raid-wide damage.
P2 - The boss will start rolling around the room and crashing into random walls. There will several crates of Ore around the room that the boss will roll through. You need to spread around the room when he enters this phase and break open the crates so the ore is available for him to eat to replenish his bar, otherwise he wont eat it. Pay attention to which way he is rolling around so he doesnt roll through you. Once he crashes into a wall, he will only roll 2 directions (left or right *note that he CAN roll around corners*), he will never roll backwards. So if you are concerned about being hit once your crates are broken, just be sure to be "behind" him or in the area he just rolled from. The longer he is in this phase, the more his rolling AoE damage will ramp up over time. Quickly break the boxes open as fast as possible to get him out of this phase and back into P1.
Rinse and repeat.
TLDR/Saedo's Cliffs Notes
Short version, tanks have to be the closest players, and they'll do their classic tank swap dance. Avoid puddles (mostly ranged), avoid exploding shards (mostly melee), and interrupt the Blackrock Barrage (raid wide damage) as much as possible.
That's phase 1, until he runs out of "mana"/energy, his main abilities consume it. Phase 2 he rolls around damaging players, avoid that. But the goal is to start attacking crates to reveal the ore inside for him to gorge on to refill his "mana"/energy to restart Phase 1. Try to get out of this phase ASAP.
LIVE vid
PTR Vid - Start this vid at the 5-min mark.
01 Slag Works - 1 - Gruul
Mehguy — Sun, 08/24/2014 - 14:30
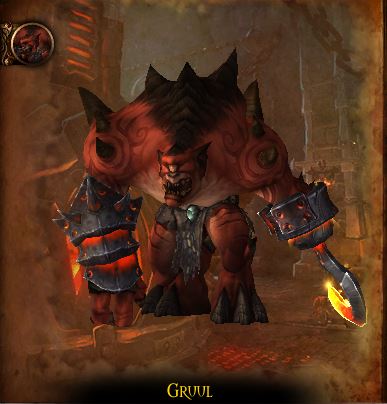
Gruul is the first boss encounter in the Slag Works (1st wing) of BRF.
This fight is very similar to the BC encounter vice a few new abilities. Its not a 'phase' fight per se, but it does go back and forth between 2 'phases' until dead.
For a more detailed view of his abilities or loot, please view the in-game dungeon journal or click HERE to view at WoWHEAD.
Abilities
Inferno Slice - Frontal slash attack that deals heavy damage on the current tank. Stacking debuff that increases damage taken. Also applies MASSIVE fire dmg split amongst players hit, giving a debuff that increases dmg taken from IS by 20% per stack and also leaves a light/moderate fire DoT on all hit. Tanks need to stack with set group of players to split the fire damage.
Cave In - Ceiling collapses over players. Deals light/moderate phys dmg every sec you stand in it. Noted by circles of crumbling ceiling.. should be no more than 3 up at any given time.
Overwhelming Blows - Heavy phys dmg to enemies within 10 yards. Stacks, increasing dmg taken from OB by 10% per stack.
Petrifying Slam - Same thing as BC encounter. Knocks players in random direction, and starts petrifying players. Once players receive 6(as per BETA) stacks of petrification they Shatter - dealing mild/moderate nature dmg to anyone with 8 yards.
Overhead Smash - Slams ground in a random direction, dealing heavy nature dmg. Noted by line of crumbling ground when casting.
Destructive Rampage - Becomes blinded by rage, increasing haste by 50% and repeatedly slams the ground. During this phase he will ignore all threat targets and face random directions and spam-cast Overhead Smash.
Note that the abilities listed here are from the LIVE Dungeon Journal. If you watched the FATBOSS BETA vid, the fight has changed fairly drastically. Cave In occurrs throughout the fight, there should be no more than 3 cavei-ins occuring at any given time, and the 2nd "phase" does not have large cave-ins to dodge any longer. He simply deals heavy AoE dmg to the raid and spams Overhead Smash in random directions.
"Phase 1" - lasts approx 1 min 50 seconds
Tank Gruul in the middle-ish of the room, facing away from the raid. Ideally the Off-tank should be directly behind the boss, and have the raid split into 2 groups, one on each side/foot of Gruul. Main Tank will deal with Gruul for 60 seconds(ish) to deal with the tank debuffs, and pay attention to Gruuls Rage Bar and/or DBM timers. When he nears 100 energy he will use Inferno Slice, the MT needs to run to 1 of the 2 stacked grounds to split the fire damage. Alternate groups when doing this so one ranged group doesnt take 2 in a row. This MIGHT be different than BETA, so you MIGHT have to have one group take 2 of the IS in a row, depending on the duration of the 20% debuff. Pay attention to when he casts Overhead Smash and spread for it, then quickly regroup. When he does Petrifying Slam, do your best to spread at least 8 yards so you dont Shatter on someone else. STAY OUT OF FIRE (aka Cave In).
"Phase 2" - lasts approx 30 seconds
Gruul will move to the center of the room and go into Destructive Rampage, and spam Overhead Smash so be sure to move/spread when appropriate.
TLDR/Saedo's Cliffs Notes
Short version, 2 stacked groups, boss does Inferno Slice, fire damage that splits amog all it hits. But also, Overwhelming Blows, a smash the tank and all around him damage attack. All on the tanks to only move into a group during Inferno Slice, and away from a group during Overwhelming Blows.
Next up, Petrifying Slam, just like back in Burning Crusade, get knocked back, spread out and don't kill other people.
Then there's a phase where he just cause cave ins and raid wide damage. And it repeats back and forth between above abilities and this.


Recent comments
7 hours 17 min ago
4 weeks 1 day ago
7 weeks 1 day ago
7 weeks 2 days ago
9 weeks 1 day ago
9 weeks 1 day ago
9 weeks 1 day ago
10 weeks 2 days ago
11 weeks 3 days ago
13 weeks 17 hours ago