
Raid

12 - Lei Shen
Mehguy — Tue, 04/16/2013 - 08:39
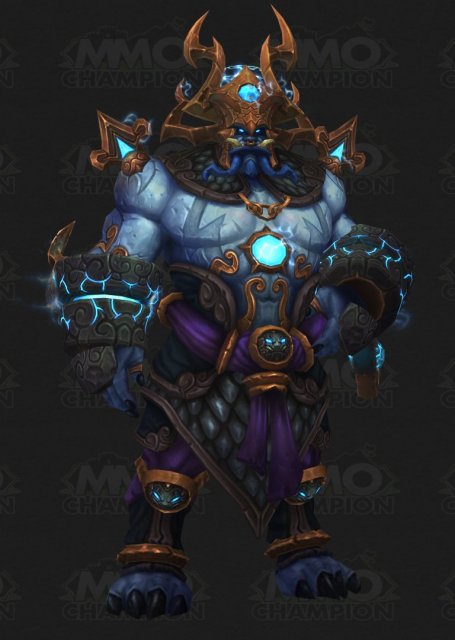
Lei Shen is the final (normal) encounter in Throne of Thunder
He has 329mil health (10-man) and 990mil health (25-man)
Fight recommendations for 10-man are
- 2 Tanks
- 3 Healers
- 5 DPS
This fight is multi-phase and is somewhat complex, in the fact that the room is split into 4 quarters, each quarter gives Lei Shen various abilities.
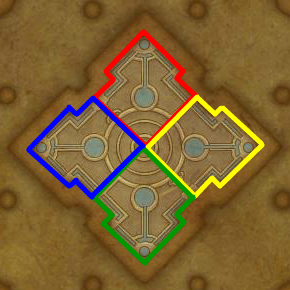
North(red), East(yellow), South(green), West(blue).
During the course of the fight, you will have to drag the boss to the outer corners of the room, at which point he will begin charging Lightning Conduit pillars and gain new abilities. These pillars have 3 levels each, and each level takes 100 energy to reach the next level. With each level that the pillars reach, the abilities that Lei Shen can use from them become more powerful by either targeting more players at once, used more frequently, deal more damage.
North (red) Conduit - Static Shock
- Lei Shen will target a random player (supposedly tanks CANNOT be targetted) with this ability. It will place a 8 yard diameter circle around the target. After 8 seconds will split damage to all players within that 8-yard circle. Raid needs to collapse and stack on tanks/melee.
- For each level the conduit increases, the amount of players targeted by Static Shock increases by 1.
East (yellow) Conduit - Diffusion Chain
- Lei Shen will hit a player with a lightning nature attack which will chain to nearby players and will increase in damage with each jump it makes. In addition, for each player it hits (including the initial target), a "Diffused Lightning" add will spawn. It only melees for a fair amount, and is more annoying than anything, but should still be focused/kill by nearby players. Raid needs to spread 10+ yards apart to prevent lightning chaining and multiple adds spawning at once.
- For each level the conduit increases, the adds that spawn grow more powerful.
South (green) Conduit - Overcharge
- Lei Shen will "Overcharge" a player. That player will grow in size and be rooted in place. After 6 seconds that player will explode creating a expanding ring that grows in size to cover 1/2 the platform stunning those hit by it and dealing moderate/significant damage. HOWEVER, there is a safe-zone on the player affected, so the Raid needs to stack on players affected to prevent damage/stunning.
- For each level the conduit increases, the number of players targeted by Overcharge increases by 1.
West (blue) Conduit - Bouncing Bolt
- Lei Shen creates Bouncing Bolts that target random locations on the ground. These are the blue swirly circles that you see in videos/LFR. These deal moderate damage which is split amongst all players within 6 yards of the impact. If these bolts are not absorbed by players, a "Unharnessed Power" add forms. These are similar to the adds spawned by Diffusion Chain, but are more powerful. ALL Bolts should be absorbed.
- For each level the conduit increases, the number of bolts that Lei Shen summons will increase.
Dumbed Down Version of Pillar abilities
North and South pillars, raid needs to be spread, then stack on players that are selected/affected by the abilities.
East Pillar, spread 10+ yards apart to prevent ability chaining. Nearby players focus add when it spawns.
West Pillar, raid stay spread to cover more ground, when swirly blue circles spawn, should have 2(10-man) or more players stack in them to split damage and prevent add from spawning.
There are "easy" methods that raids recommend, but again, like any raid, each method may be easier or harder for a different group, etc. The trick is to find which is best for you as the fight progresses.
Stage One: Thunderstruck! (lasts until 65%)
Lei Shen
- Discharged Energy - If Lei Shen is not close enough to one of the 4 pillars, he will "discharge" electricity dealing AoE damage to all players every 0.5 sec. Ensure when not moving from one quadrant to another that he is always within range of a pillar.
- Decapitate (Tank concern) - Lei Shen hits the tank, dealing ~350-450k physical damage and increases physical dmg taken by 50% for 30 secs. The damage inflicted by this ability is increased the further the primary target is away from the boss.
- Thunderstruck - Lei Shen throws his axe at a target player/location. Dealing 1+million dmg to anyone in the animation. Outside of the animation, the damage decreases the further you are away from it. Similar to Tortos Rockfalls.
- Crashing Thunder - Calls down thunder on random player, and deals dmg to anyone within 6 yards. Deals 100k+ nature dmg every 1 sec for 45 secs.
Intermission: Supercharge Conduits (occurs at 65% and lasts 45 secs)
- Lei Shen teleports to the middle of the room and becomes invulnerable. He will activate ALL 4 pillars, supercharging them, increasing their levels by 1 AND use their abilities for this phase.
- Raid needs to spread evenly to all 4 quadrants to deal with the abilities.
- For 10-man, the following is recommended
- 2 Tanks
- 1 Healer, 2 DPS
- 1 Healer, 2 DPS
- 1 Healer, 1 DPS (rogue or similar class that can mitigate dmg, or off-heal)
- For 10-man, the following is recommended
- At the end of this phase, the pillar with the highest energy will become exhausted, electrifying that quadrant, dealing damage to any players within it, and preventing Lei Shen from using its abilities.
Stage Two: Lightning Will End You! (lasts until 30%)
Lei Shen - Lei Shen will use a spear instead of his axe and abilities that HE does will alter. Pillar abilties will be the same but more powerful as they were leveled up during the intermission phase.
- Discharged Energy - same as above
- Fusion Slash (Tank Concern) - Replaces Decapitate, slashes the tank, deals HIGH nature damage, knocks them back and increases dmg taken from future Fusion Slashes for 1 min. Requires tank swapping and facing the boss along the edge of the platform so they dont get knocked off.
- Summon Ball Lightning - Suummons balls of lightning at player locations, dealing ~100k dmg to all players withing 6 yards. RAID MUST BE SPREAD WHEN THIS IS CAST.
- After the initial spawn, the balls will periodically rush towards
other players dealing ~70k nature dmg to them. Once the initial
spawn/AoE dmg occurs, raid must quickly stack so balls arent jumping
everywhere and cleave/splash/AoE the balls down, then spread back out.
- After the initial spawn, the balls will periodically rush towards
- Lightning Whip - forms a dark conal cloud from his body at a random location, after a few
seconds will hit that location with a whip, dealing 750k+ nature dmg to
all players at that location. completley avoidable.- Lightning Bolt - The lightning lines on the ground deal
40k nature dmg every 0.25 secs to anyone in them. HOWEVER, if you need
to move, you CAN jump over each individual "bolt"/line and avoid the
damage.
- Lightning Bolt - The lightning lines on the ground deal
Intermission: Supercharge Conduits (30%, lasts 45 seconds)
This is the same as before, except you have one less quadrant to have to cover since it is "exahusted".
For 10-man recommendation is
- 2 Tanks, 1 healer
- 3 DPS, 1 healer
- 2 DPS (one who can help off-heal), 1 healer
Ensure to absorb all bouncing bolts to prevent add spawning, and stack appropriately for Overcharge and Static Shock.
Stage Three: Master of Thunder and Lightning
Heroism and nuke boss.
Lei Shen - Equips both his axe and polearm
- Overwhelming Power - Casts at the beginning of the last phase. Destroys and absorbs the energy from the remaining conduits, preventing their abilities from being used. Overwhelming Power also causes the bosses melee attacks to deal nature dmg every 1 second for 8 seconds.
- Violent Gale Winds - Opens a random wall in his chamber, causing winds to deal pushback (think Get Away from Lei Shi), dealing 15k nature dmg every 1 sec. This will stack and preventing stacks is UN-avoidable. The stacks will gradually make it harder to run against the wind and increase the damage taken by the wind.
Since Lei Shen has both his Axe AND Polearm, he will use all his previous boss abilities from the first 2 Stages
- Thunderstruck - deals 1mil+ nature dmg to players in the animation, decreases in dmg the further away you are from animation. Pay attention to your location and the quickest way to run away during Gale Winds
- Ball Lightning - Again, stay spread for initial cast, then stack as best as possible to cleave/spash/AoE them down, then spread back out.
- Lightning Whip - Pay attention to dark cloud and get out, avoid that area as Gale Winds will likely push you into the lines.
The main strategy behind the fight, is to figure out which pillar is going to be the most damaging to your raid DURING the intermission phases as you have lesser people in the area to help each other deal with them.
Most raids recommend the East platform first for the Diffusion Chain ability. It is recommended to get that pillar to overload first after the first intermission. That way it wont be heavily overcharged when the next intermission comes and you have high powered adds beating your ass.
Recommendation should be as follows.
1- Stage One, start on east pillar, get the charge on the pillar to 90 and move boss quickly to south pillar, get stacks to 80, then continue clockwise to the west, then to north. DO NOT let the stacks on the other pillars get above the 90 that are on the east quadrant.
2- 1st intermission, properly split groups and survive. You WILL have adds during the first intermission due to Diffusion Chain, but as long as the east pillar gets overloaded, then you SHOULDN'T have adds for the remainder of the fight if executed properly.
3- Start of Stage Two, start on south pillar and get to 85-90, move west 85-90, and just stay on north until you get 30% and transition. One of the pillars is GOING to get overloaded on this part regardless, and supposedly the north is the least threatening ability to get higher levels for the 2nd intermission phase. Stay spread for bouncing ball initial cast, then stack after they spawn and AoE them down, spread back out. Avoid lighting whip area. Tanks face the boss towards the platform so you dont get knocked off edge.
4- 2nd intermission, split groups appropriately into remaining 3 quadrants, stack and spread when appropriate, absorb ALL bolts on ground so no adds spawn.
5- Stage Three tank boss in the "middle" of the 2 remaining sections to allow for most movement and pushback for the winds. Blow Heroism and nuke boss fast. Stay spread for the bouncing balls to prevent initial AoE splash dmg on raid, then stack to AoE them down. Stay spread and avoid the Thunderstruck area, avoid Lightning Whip. DO NOT get pushed off edge by gale wind. Should save healer/raid CDs for later in the last phase.
Please reference the following videos for encounter details.
11 - Twin Consorts
Mehguy — Tue, 04/16/2013 - 08:30
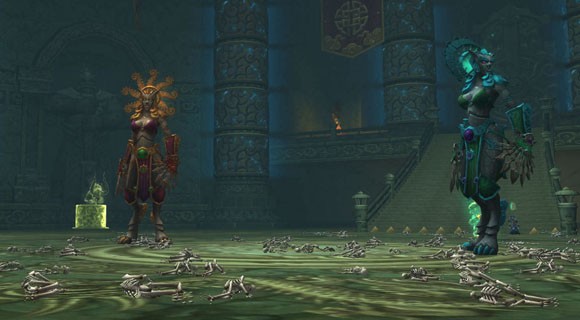
Twin Consorts is the 11th and next to last encounter in the Throne of Thunder Raid.
This fight has a SHITLOAD of stuff going on. I felt that typing out this fight would make it more confusing, so I would suggest just watching the following videos. I know people love the Fatboss "British bastards" but they do a very good job explaining the fight from phase to phase.
10 - Iron Qon
Mehguy — Fri, 03/15/2013 - 12:31
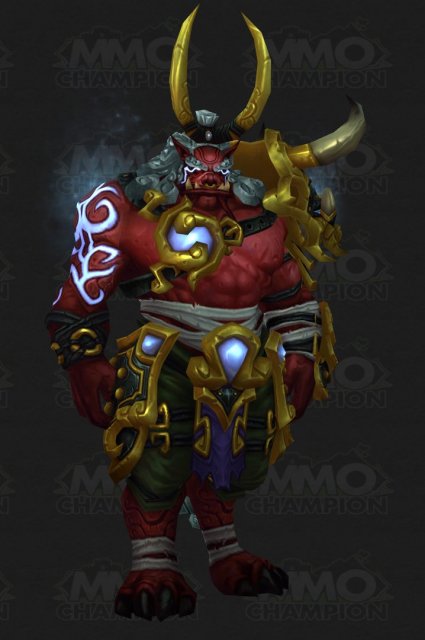
Iron Qon is the 10th encounter in the Throne of Thunder Raid isntance.
This fight will require
- 2 Tanks
- 2-3 Healers
- 5-6 DPS RANGE PREFERRED!
- Impale - Stacking melee attack and applies a bleed to the tank, dealing 40k dmg every 2 secs per stack. Requires tank swapping.
- Throw Spear - Throws a spear at a random player, dealing 100k physical damage upon impact.
- This spear will be modified throughout the encounter by an "Ignite Spear" ability. This ability will vary depending on which type of Quillen he is riding.
- There should always be at least 1 spear up through the Quillen phases. When he throws a 2nd spear, the first will disappear after a short time. You will never have more than 2 spears up at a time.
- Ro'shak, the Molten Flare (Red, Fire) - First Phase - Ro'shak has an energy bar that builds 5 energy every second. He uses energy to use his abilities, but if he reaches 100 energy, he unleashes a raid wide AoE that wipes the raid.
- Molten Inferno - Emits a Molten Flame, deals 80k fire damage to all players. Costs 10 energy
- Unleashed Flame - Incinerates the largest cluster of enemies he can find, dealing 700k(10-man)/2.1mil(25-man) fire damage split to players stacked within 10 yards. Costs 30 energy.
- In 10-man, it takes 3 players stacked for him to use this, 25-man takes 5
- Scorched - Players affected by Unleashed Flame receive this
debuff, increasing Fire Damage taken by 20% for 30 seconds. NOTE** You will want to rotate 3 different groups spreading/stacking in a set order to receive this debuff. A melee grp and 2 ranged grps. The numer of stacks you want each group will vary by 10/25 man difficulty and how you feel about the number of stacks that you take. In 25-man vids it appeared they rotated spreading/stacking every 2 stacks of the debuff.
- Molten Overload - Wipe mechanic, If Ro'shak reaches full energy he will overload and cast Molten Inferno every 1 second until he is out of energy. The cost of each cast is still 10 energy, BUT the damage output is increased by 50 percent.
- Ignite Spear: Burning Cinders - Ro'shak will ignite Iron Qons spear to form lava lines (IE Lord Ryolith) from the spear. Deals 25k fire damage initially and 15k fire damage every 1 sec to players remaining in them.
- Quet'zal, the Stormcaller (White/Silver, Lightning) - No energy bar, simple mana bar and uses electric based attacks
- Arcing Lightning - Zaps a random player, stunning them and absorbing all healing effects, also causes them to shock nearby allies for 30k nature damage. Only way to remove the stun effect, is to click on them (IE Amber Shaper, except with no debuff preventing additional clicks). If a player dies while under the stun effect, the Arcing Lighting will jump to another player. Spread out.
- Windstorm - Pulls all players to the middle of the room and will summon a storm of tornadoes (very similar to Alysrazor tornadoes). While in this storm players will receive 50k nature damage every 2 seconds until they are able to run out of the storm. Also while in the storm, all dmg, healing and absorption effects are reduced by 80%. Best way to counter this is to set up a warlock portal in the middle of the room and the entrance and have the healers and 2 bad runners utilize it to get out fast.
- Once the storm is over, there are some tornadoes that will remain in the fight that float around the room randomly.
- Rushing Winds - If stuck in tornadoes during the storm OR through remainder of the fight, you will receive ~138k nature damage every 5.2 secs until you are removed from the tornado.
- Strike Spear: Storm Cloud - Lightning strikes the spear and rolling cloud lines extend from the spear, deals 200k nature damage to those affected. This will stack. Once a player receive 3 stacks they will be stunned for 20 sec.
- Dam'ren, The Frozen Sage (Blue, Frost) - No energy bar, use frost damage and reflects damage back to players.
- Frozen Resilience - Protected by a shield of ice which reflects 10% of damage back at the caster.
- Dead Zone - will put 2 shields on himself (2 sides of his body). These shields cause all damage from those directions to miss.
- Freeze - Freezes a random player, after 1-5 seconds will shatter them, dealing 150k frost damage to the raid.
- Freeze Spear: Frozen Blood - Freezes ground outward from the spear. Deals 100k frost damage and slows movement, melee attacks and casting speed by 25% while in the affected areas. Stacks while standing in the blood.
- Iron Qon's Last Stand
- Fist Smash - no longer has a spear, instead smashes the ground ground, dealing 25k phsyical damage to the raid every 0.75 sec for 7.5 sec.
- Rising Anger - Stacking buff, increases damage dealt by 10% per stack
- Ignite Cyclone - Randomly ignites a cyclone, dealing 20k fire damage every 2 secs to the raid
- Freeze Cyclone - Freezes a cyclone, causing any players hit by cyclone to become frozen in ice and take 5% of the max health every 2 sec.
09 - Dark Animus
Mehguy — Mon, 03/04/2013 - 20:07
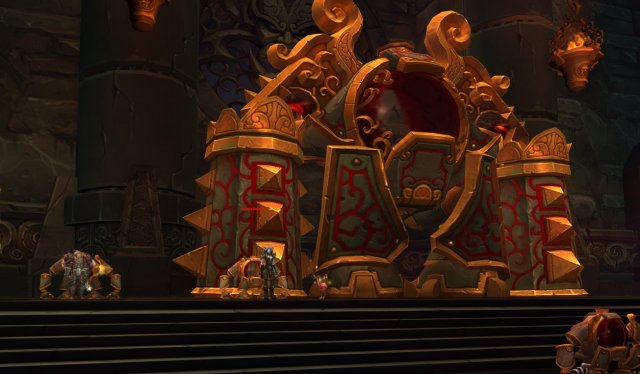
***Reminder that these are based off of PTR 10-man testing info and all information regarding boss health, dmg output, debuffs, percentages, etc are subject to change when they go live!***
Dark Animus is the 9th encounter in the Throne of Thunder raid instance and depending how you go about the mechanics of the fight, can be the most complicated of them, next to Magaera.
This fight is largely an add fight, and its main mechanic deals with controling their energy called "Anima" in a manner in which the boss (Dark Animus) does not reach full 100 Anima, or he will wipe the raid.
This fight should require
- 2 tanks
- 3 healers
- 5 dps
The health of the adds and boss should be close to the following
- Dark Animus - 174 mil
- Massive Anima Golem - 35 mil
- Large Anima Golem - 11.8 mil
- Anima Golem - 3.3 mil
- 25 Anima Golems
- 8 Large Anima Golem
- 2 Massive Anima Golem
- 1 Dark Animus (boss)
- Anima Golems - 4 Anima
- Large Anima Golems - 8 Anima
- Massive Anima Golem - 36 Anima
- Dark Animus - 100
- Acceleration Link - Small golems will link together when they are close, increaseing attack speed by 1000% and movement speed by 100%
- Crimson Wake - Anima clouds (red colored) will explode up from the ground and focus a random player and chase them for 30 seconds. Must be kited, deals 190-210k fire dmg per hit.
- Matter Swap - Applied to tank (or current target). When dispelled, this ability will cause the tank and the player who is furthest away to trade places. While they trade places, it will cause damage equal to the player with the most health (between the 2), and will split it. For example, if the tank has 600k health and the other player selected has 350k, each player will take 300k damage, regardless of whether the tank is at full health or not. Be aware of tank and raid health before dispelling. In addition, the longer you take to dispell the ability, the more damage the ally player will suffer.
- Explosive Slam - Slams the ground, dealing ~315k fire damage to all enemies within 12 yards. Any players hit will take increased damage to future Explosive Slams for 25 seconds.
- Activation Sequence - The Dark Animus must run trough its activation sequence before it will attack or use abilities. Takes 1 minute
- Siphon Anima - Supposedly occurs every 30 seconds. Will drain 1-4 Anima from each golem that is "active". Including those that were severely damaged and do not act. **The amount of Anima drained mentioned in video is 1 anima, the tooltip says 2, and WoWhead dungeon journal says 4. Actual amount not certain). The spell will also NEVER drain the last point of Anima from any golem that is still actively engaged in the fight. This is key to the encounter. As long as there is 1 active golem up in the fight, the boss will never reach 100 Anima in order to wipe the raid.
- Touch of the Animus - periodically corrupts a random player, dealing 60k fire damage every 5 sec for the remainder of the encounter. CANNOT be dispelled/removed.
- Anima Ring - 10 Anima ability. Upon reaching 10 Anima, the boss will begin summoning orbs that surround the tank, gradually collapsing on them. Any player that touches them will consume the orb, increasing the damage they take from melee swings by 50%. Effect stacks, forcing Tank Swap. (In heroic, absorbing an orb also deals fire damage)
- Anima Font - 25 Anima ability. Gains the ability to further corrupt any player affected by "Touch of the Animus". Causing them to spew Anima bolts at nearby locations every 1 sec. Players hit by these bolts suffer fire damage.
- Empower Golem - 50 Anima ability. Once he reaches 50 Anima, he can target any golem that is still active and heal it by 10% of its health, and increasing the damage it deals by 100% for the rest of the encounter.
- Empower and Animate - If there are NO active Golems in the encounter, he will target one that is powered down/defeated. Rezzing it and increasing the damage it deals by 100% for the rest of the fight.
- Interrupting Jolt - 75 Anima ability. AoE ability that deals 195-205k nature damage to the raid and interrupts all spellcasts.
- Full Power - 100 Anima ability. A 5 second initial cast and has a 5 minute channeling that cannot be interrupted. Casts anima bolts at random targets. Deals 475-525k fire damage to all enemies within 5 yards of the point of impact. Wipe mechanic.
- The goal of the fight is to try to determine which adds are best to leave up while you are fighting the boss, so he doesnt reach full Anima. And also when to activate the boss to begin killing him. Theoretically, once you have dump as much Anima as you can into the damaged ones, you could just take the next small Golem and activate the boss and go that way without dealing with the other larger Golems. But, after so long, they will all activate anyways, so you would have to have crazy DPS to kill the boss in time before you all of the Golems become active.
- Dump Anima into damaged Golems (10-man), then progressively work your way up through the more difficult Golems, until you have 1 Massive Golem with max 36 Anima along with the boss. This method should give you the longest up-time on the boss as (depending on how much Anima he siphons) will have a lot to siphon from the Massive Golem.. The backdraw to this method is, the buff he will place on the big add increasing its damage by 100%
- Dump Anima into damaged Golems (10-man) and then immediately activate the Massive Golems back to back. That way you eliminate the larger threat of the Golem Adds. Then once you have wittled down enough smaller Golems, you can activate the boss with 2-3 Large Golems and will only have to worry about the Boss' abilities along with red "Crimson Wake" clouds chasing people. Seems like the most feasible to me.
- The main disadvantage the 25-man has, is that ALL of the Golems are active, they dont have the luxury of having "damaged" adds. The only thing I can suggest, is modified strats from strat 1 and 2 10-man.
- Strat 1 - Similar to 10-man, but this would leave a large number of adds up at a time. You could dump 2 small Golems immediately into a Large Golem, activating it. Then kill the Large Golem next to another large Golem, which SHOULD cause it to dump all 8 of its Anima into it and activate. And just go around the room like this, activating each Large Golem by killing one. (1 to 1 ratio essentially), then once you have the last Large Golem active, kill it and a bunch of little adds next to the Massive Golem and have it max its stacks out at 36, or at least close to 36. Then kill that one next to the other Massive golem, so with luck, it will activate and have most, if not all, its stacks. Then finish maxing its stacks and then activate the boss so it will hopefully start with 4 stacks. This method will allow you to keep quite a few small adds up, 1 Massive Golem with a bunch of Anima, and also the boss with very minimal Anima so the # of abilities he can use at the start is minimal until the fight progresses.
- It may take a bit of practice, but dump 1 small Golem into each of the 8 Large Golems. This will bring your number of smaller adds from 25- down to 17. At this point, you can dump 2 more small Golems into the Massive Golems and wipe them out. Remember once you have the Massive golems up, and hopefully with only the initial 4 stacks of Anima from the transfer, you can kill them next to the Large Golems, causing a few of them to go from 4 stacks to 8 and becoming active. Then you can work on eliminating the small Golems, causing the Large to go active, and then the Boss. This way you also eliminate the Massive Golem threat, and should have the Boss up with a reasonable amount of Anima, but should only have to deal with red "Crimson Wake" clouds, similar to the 10-man. But due to the amount of adds up total, this means that one tank will have the boss while the other tank could/should have anywhere from 2-5 Large Golems beating on him. And once the boss increases their damage by 100% each, could be wipe-tastic.
Again... overall goal is to try to figure out what combo of adds you leave up is best in order to defeat the encounter without wiping to increased Golem damage from "Empower Golem" or accidentally killing all the Golems and allowing the boss to get 100 Anima and wiping the raid.
08 - Primordius
Mehguy — Fri, 02/22/2013 - 22:40
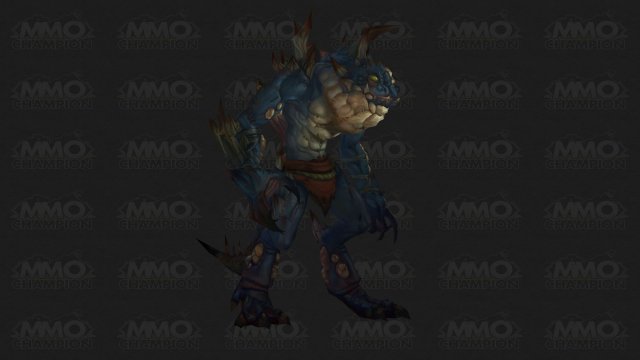
***Reminder that these are based off of PTR 10-man testing info and all information regarding boss health, dmg output, debuffs, percentages, etc are subject to change when they go live!***
Primordius is the 8th encounter in the raid.
He as ~349mil health (10-man).
This fight will require
- 2 Tanks
- 3 Heals
- 5 DPS
This fight has some Yor'sahj characteristics to it, in the sense that the he has a pool of abilities, and only selects random ones throughout the fight as he "evolves". Unlike Yor'sahj and being able to control those by killing appropriate slimes, you cannot control which "Mutation" abilities this boss will gain.
The overall main mechanic to the fight is the Evolution/Mutate mechanic. This will affect both the boss AND the raid. First I will list his abilties and how his evolution mechanic/abilties work. Then I will list how it affects the raiders.
The bosses abilities are as follows
- Primordial Strike - He claws at his current target, dealing ~650-750k physical damage to all players in a 7-yard cone in front of him.
- Malformed Blood - Tank debuff/buff ability. Deals 10k nature damage every 3 seconds, and causes the afflicted player's attack to "Congeal Blood". This ability stacks, forces tank swap. Lasts 1 minute.
- Congeal Blood - Deals 20k additional nature damage to "Living Fluids" and "Viscous Horrors"(Heroic Only) adds.
- Evolution - Primordius' main mechanic. He has a energy/rage style bar that slowly builds over time. When it reaches 60 he will "Evolve". In addition when Living Fluids and Mutagenic Pools touch him, he will gain an additional ~3 energy/rage, causing him to evolve faster. Evolution increases all damage he deals by 10% per stack and will grant him a new "Mutation" ability. He will start the encounter with a full 60 energy/rage, so he will have 1 ability to start with, then gain up to a max of 3 (4 in heroic). Once he has 3 mutated abilities and evolves further, he will lose an ability and gain a different.
- Ventral Sacs - Sacs located around Primordius' frill will periodically erupt, dealing 20k nature damage to all players every 1 sec.
- Gas Bladder - Allows Primordius to spray "Caustic Gas", dealing 4.05mil damage, split amongst all players within an 18 yard cone
- Acidic Spines - Fires Acidic Spines every 5 sec, inflicting 150k nature damage to all players within 5 yards of the target. Spread out 5 yards.
- Pathogen Glands - Sprays a Volatile Pathogen at a player, inflicting 60k nature damage to a player every 1 second and summons a "Living Fluid" add. You can see who is affected by this via a red beam channeled on them for the duration of the effect. Player will need to run away from the boss to allow more time to kill adds that spawn during this ability so he doesnt evolve faster.
- Metabolic Boost - Allows Primordius to use his abilities more often and increases his attack speed by 50%
- Erupting Pustules - Pustules erupt every 5 sec, showers the area with corrosive blood that deals 275-325k nature damage to anyone within 2.5 yards of the impact.
Around his room are pools of blood/liquid. These will spawn 2 types of adds, "Living Fluid" and "Viscious Horror"(Heroic only). I am not 100% certain whether these adds will spawn through the whole fight, if it is time based, or if there are only so many adds that spawn. Most vids I have seen, don't last long enough to tell because people are stupid and die. One video showed adds completely stopped spawning after 2 1/2 minutes, another one where a grp of 6 people actually killed him had adds spawn the entire fight, but it was only a 3 min 20 sec fight. And they exploited a mage bug on him.
- Living Fluid - These adds will have 394k health. They should only spawn during the initial "Phase" of the encounter and after that, only when Primordius' uses his "Pathogen Glands" ability. Again, that is uncertain.
- Mutagenic Pool - When the adds are dies, it leaves behind a Mutagenic Pool that can be absorbed by Primordius OR players to give them their "mutation buffs". There are 2 types of these "Mutagenic Pools" that are not mentioned in the tooltips/wowhead dungeon journal.
- Normal pools will spawn, they will be smaller red pools that remain stationary.
- Violent pools will spawn, these will be red and supposedly have a slight purple tint to them. They will be more... "active" looking, and will slowly move themselves towards the boss. They also supposedly deal more damage than the normal pools, so it was recommended that tanks/healers pick them up, but I never saw a drastic difference in vids and saw pretty much anybody just picking up the pools.
- Mutate Primordius - See above in Primordius' "Evolve" Section. When pools or adds reach him etc.
- Mutate Player - When a player steps in a Pool, they will absorb it, receiving 185-215k nature damage and causing a "mutation". This is where it gets kind of tricky. The mutations will affect you in 4 different aspects, both positively AND negatively. You should always be getting the "positive" buff first, BUT for each stack you get of a specific "positive" buff, you have get an increasing 10% chance to receive the "negative" buff effect. The aspects these "mutations" affect are "All Stats", "Mastery", "Haste" and "Critical Strike". **IMPORTANT NOTE: If you dispell a player who has mutations, they lose ALL buffs AND debuffs gained from mutation effects**. These mutations last 2 minutes each. So if you lose all your stacks of crit, and have like 3 bad stacks of crit, youll want to dispel, etc.
- Helpful Mutation: Thick Bones - Increase all stats by 10%. Can stack up to 10 times.
- Harmful Mutation: Fragile Bones - Decrease all stats by 10%. Can stack up to 10 times.
- Helpful Mutation: Clear Mind - Increase Mastery by 10%. Can stack up to 10 times.
- Harmful Mutation: Clouded Mind - Decrease Master by 10%. Can stack up to 10 times.
- Helpful Mutation: Improved Synapses - Increase Haste by 10%. Can stack up to 10 times.
- Harmful Mutation: Dulled Synapses - Decrease Haste by 10%. Can stack up to 10 times.
- Helpful Mutation: Keen Eyesight - Increase Crit Strike by 10%. Can stack up to 10 times.
- Harmful Mutation: Impaired Eyesight - Decrease Crit Strike by 10%. Can stack up to 10 times.
- Mutagenic Pool - When the adds are dies, it leaves behind a Mutagenic Pool that can be absorbed by Primordius OR players to give them their "mutation buffs". There are 2 types of these "Mutagenic Pools" that are not mentioned in the tooltips/wowhead dungeon journal.
- Viscous Horror (Heroic Only) - A heavily mutated add
- Black Blood - Spreads its mutated blood to current target, dealing 20k nature damage every 3 sec. Coats the player in "Black Blood". Lasts 1 minute and stacks.
- Black Blood - When player is affected, deals 20k additional nature damage to the boss.
- Deadly Mutagen (wipe mecahnic)- If a Viscous Horror gets close to Primordius, he will explode, dealind 925k-1.08mil damage to the raid.
- Black Blood - Spreads its mutated blood to current target, dealing 20k nature damage every 3 sec. Coats the player in "Black Blood". Lasts 1 minute and stacks.
One aspect of the fight that I have seen mentioned, but cannot find tooltips regarding is a "Transformation" mechanic.
- Apparently, Primordius only receives 50% of actual damage dealt by non-transformed players. In order to bypass this, players need to "Transform" into Sauroks. They can do this by receiving an overall 10 stacks of "Mutations" from picking up the pools after killing "Living Fluids".
It appears this fight is a race. The goal should be to pull the boss to the middle of the room, allowing equal time for all adds to reach the boss. Most vids Ive seen have the boss tanked by a wall between pools. Seems ineffective to me, but that may be due to counteracting the "Gas Bladder" mutation on the boss. You will want to kill adds quickly and have raiders gain as many mutations and stacks as possible, while being respectful of the damage it will deal to you by picking up the mutations. The type of mutation you will receive is random, and like I said, you should always be getting the "helpful mutations" first, but the more stacks you get of a mutation, the greater chance you will start getting stacks of the "harmful" mutation, negating the "helpful" stacks. Once you get 10 overall mutation stacks to be transformed into a Saurok and hopefully a good amount of stacks of the stat you want, just nuke down the boss while hopefully still being able to control adds so he doesnt evolve too quickly. And if the "helpful mutations" start falling off due to time, dispell to remove bad effects and try to get stacks back up if there are any pools available.
This video is the one I mentioned where the adds stopped spawning. It was about 2:15 into the pull (2:30 in the vid) that the last add spawned, and the fight was 6+ mins. They ended up not getting the kill. But this is the longest video I found, so I tend to think the adds stop spawning at a later point. However, there are some 3-3:30 min vids where adds are spawning non-stop. So not sure which aspect of it to go with. But this vid shows the best way to handle the fight overall it seems.
07 - Durumu the Forgotten
Mehguy — Wed, 02/20/2013 - 19:44
***Reminder that these are based off of PTR 10-man testing info and all
information regarding boss health, dmg output, debuffs, percentages, etc
are subject to change when they go live!***
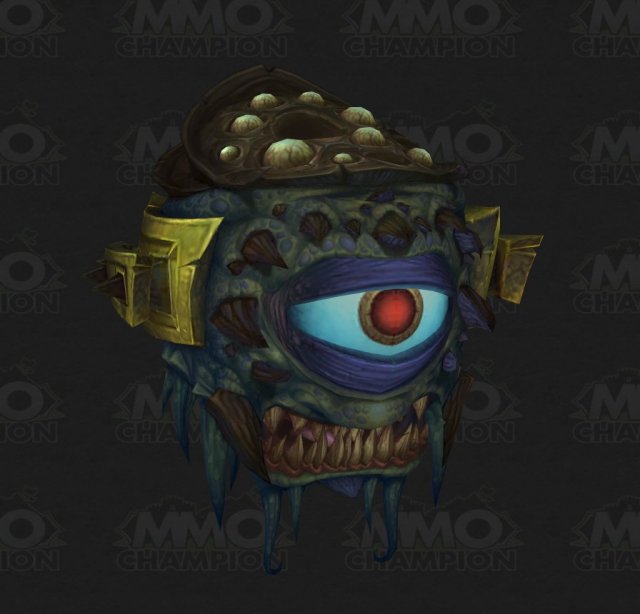
Durumu the Forgotten is the 7th encounter of the raid and resembles a giant eyeball squid with teeth.
He has approximately 262 mil health (10-man) and will require
- 2 Tanks
- 3 Healers
- 5 DPS
This fight is again, about killing adds, but also mostly about ensuring the raid is set up into groups and splitting damage during, what is called, the "Color Blind" phase, which appears to be the main mechanic in the fight.
He remains stationary in the middle of the room and has an assortment of abilities and summons random assortments of "Eyes" that have their own unique characteristics.
- Hard Stare - focuses on his current target and deals 135-165% weapon damage as physical damage. The target will also receive 2 debuffs.
- Serious Wound - receives 10% less healing per stack (forces tank swap)
- Arterial Cut - bleed effect that deals 40k damage per second until they are healed up to full health
- Gaze - If no players are in melee range, he will cast a raid-wide AoE dealing 50% weapon dmg each cast
- Disintegration Beam - He will focus his gaze as a beam directly in front of him. Any players who touch the beam are killed instantly. During this ability, he will also slowly turn either left or right. He will also summon 2 "eyes" during this phase.
- Roving Eye - This is what people on PTR were wiping to the most. Appears overtuned. Durumu will summon this eye and it will create a maze of "Eye Sores" across his platform.
- Eye Sore - these will inflict 125k arcane damage every second to players in them.
- Stern Eye - These are part of the Roving Eye maze pattern around the edge of the room. These eyes will gaze at Durumu and will focus on players that are inside the "inverted" 30degree cone that is in front of the eye pointing back towards the boss. The 2 players (5 in 25-man) closest to the eye that are within this cone will be hit with additional arcane damage. (I never saw this ability fully on PTR vids as raids were dying very quickly during "Disintegration Beam" and "Roving Eye")
- Roving Eye - This is what people on PTR were wiping to the most. Appears overtuned. Durumu will summon this eye and it will create a maze of "Eye Sores" across his platform.
- Walls of Ice - (this may be heroic only as I did not see this during PTR vids) Durumu will summon 3 walls of ice that will block players movements as they try to move around the room. They have a shared health pool and all will shatter once one wall has been damaged sufficiently.
- Colorblind - During this "phase", Durumu will summon a Red, Blue and Yellow eye. These eyes will focus on 3 random players. Once the beam cast completes, the eyes will then focus a conal ability on the 3 players selected and will deal significant damage. This damage is mitigated by having more players stand in the cones, splitting the damage amongst each other, the longer that players are in the cone (minus the ones focused), the more damage they will take. These cones will also illuminate 2 different types of invisible adds (3 types in heroic) in the room once the cone goes over the top of them. The RED adds are key to getting out of the fight. Once they spawn, they will remain stationary wherever they are. They should only have 1.3 mil health each, so they arent that big of a deal as long as you find them and kill them quick.
- Burning Eye (red) - There will be 3 of these adds EVERY Colorblind phase, and all 3 of these adds HAVE to be killed in order to get out of the phase. These eyes are ONLY visible once a RED cone has gone over the top of them, and if the cone goes past them, they disappear, so the focused person will have to ensure the cone stays on the "Burning Eye" add. You can see where these adds initially spawn by a circular red animation on the floor. They have 2 abilities
- Caustic Spike - Will cast this while the mob is visible in the red cone. It will deal 80k dmg to its target
- Crimson Bloom - If the mob was revealed and the cone moves away causing it to go invisible again, it will cast this, dealing 92-108k fire dmg to all players until its killed.
- Cold Eye (blue) - Only 1 will spawn (initially). It will only be visible if the blue cone passes over the top of it. The key to this add is to NEVER reveal it. Supposedly a blue animation notes where it spawns. The reason you don't want to reveal it, is because once you do, it will start dealing damage. And if you don't kill it when the phase ends (after 3 red adds are dead), it will stay alive through the rest of the fight casting one of its AoE abilities repeatedly. So if you never reveal it, it will never cast anything. Another thing to be aware of, is if you do reveal it and kill it, another will spawn somewhere else on the platform, hence how only 1 will spawn "initially". So, if you do reveal this add by accident, you HAVE to kill it. Just do not reveal the one that respawns in its place. It has '3' abilities
- Icy Grasp - Deals Frost damage to all players while it is visible in the blue cone.
- Flash Freeze - If it goes back invisible, it will start exploding, dealing 92-108k frost damage to all players
- Biting Chill - Will respawn in another random location once defeated
- Blind Eye (yellow) (HEROIC ONLY) - unsure how many spawn. Only visible under yellow cone. Even though this eye only spawns on heroic, you will still have to deal with the yellow beam/cone dealing extra damage. This eye has 2 abilities
- Amber Retaliation - Will deal 26-54k nature damage for every 10% health that it loses
- Burst of Amber - If it goes invisible it will deal 92-108k nature damage to all players
- Burning Eye (red) - There will be 3 of these adds EVERY Colorblind phase, and all 3 of these adds HAVE to be killed in order to get out of the phase. These eyes are ONLY visible once a RED cone has gone over the top of them, and if the cone goes past them, they disappear, so the focused person will have to ensure the cone stays on the "Burning Eye" add. You can see where these adds initially spawn by a circular red animation on the floor. They have 2 abilities
- Mind's Eye - Will randomly summon this eye, has 1 ability
- Force of Will - Will focus on a random player. Players will be knocked back if they are caught in the gaze when the cast is finished
- Hungry Eye - This eye will cast a Life Drain on players
- Life Drain - This is a focusing beam that will stun the target for 15 seconds, draining life from the target and giving it to Durumu. The longer that player is affected by the Life Drain, the more life that will be healed. The way to counter this, is to have other players strafe through and interupt the beam, keeping healing to Durumu at a minimum.
- Evil Eye - (Possibly heroic ability) (Was not observed on PTR from what I could see). This will periodically cast "Dark Parasite" on players
- Dark Parasite - Debuff on the player inflicting shadow damage every second, the longer they have the debuff, the higher the damage will tick for. Can be dispelled, however, this will cause it to morph into a "Dark Plague" debuff.
- Dark Plague - The duration of this will last for however much time was left on the Dark Parasite debuff. Every 3 seconds that this morphed debuff is up, it will spawn a "Roving Eye"
- Roving Eye - these deal 50k shadow damage to their chosen host every 2 seconds. Any damage that the eye takes will be mirrored onto its host.
- Dark Plague - The duration of this will last for however much time was left on the Dark Parasite debuff. Every 3 seconds that this morphed debuff is up, it will spawn a "Roving Eye"
- Dark Parasite - Debuff on the player inflicting shadow damage every second, the longer they have the debuff, the higher the damage will tick for. Can be dispelled, however, this will cause it to morph into a "Dark Plague" debuff.
- Appraising Eye - This will cast a "Lingering Gaze" on players
- Lingering Gaze - This will shoot a shadow missle at 2 (5 in 25-man) players. When the missile lands, it will create a void zone, dealing 75 shadow damage every second to those in it. These will last throughout the fight. On PTR, it was noted that these have a 15 yard radius, so spread 15 yards.
That is all the abilities. This is going to be a very hectic fight, and needs to have great coordination. Hopefully will get a better understanding of the fight when it goes live and see if they lowered some of the damage, etc, as it appeared fairly overtuned.
06 - Ji-Kun
Mehguy — Tue, 02/19/2013 - 21:20
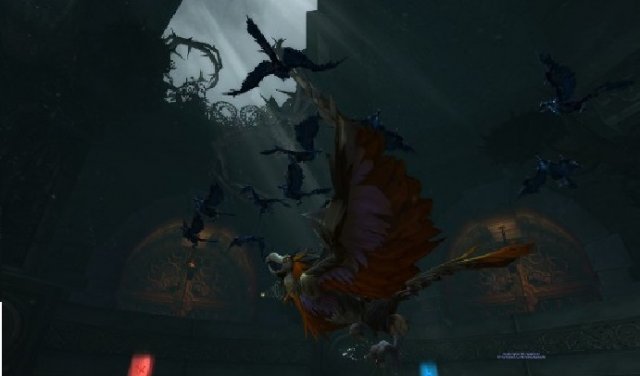
Badass Ji-Kun is the 6th encounter in the raid instance. This fight I consider to be Alysrazor 0.5, Lei Shi, and P3 of Lady Vashj all rolled into one... makes it sound hectic but its a fairly straight forward fight.
Ji-Kun has approximoximately 244mil health (10-man), 737 mil health (25-man)
This fight will require
- 2 Tanks
- 3 Healers
- 5 DPS
- You can possibly go 2 heals and 6 DPS once better gear is acquired.
Ji-Kun herself doesnt really have a lot of abilities. This is mostly an add control fight while progressively burning her down.
Her abilities consist of...
- Feed Young - will send 4-5 globs of food to a platform that has hatchlings on it. If there are no eggs/hatchings up when this is cast, it will leave "Feed Pools" on the main platform.
- Primal Nutriment - Players that are flying with the extra action ability can absorb these globs in flight and be granted a debuff, increasing damage/healing by 30% for 30 seconds. Each extra glob eaten will grant an additional 10%, up to a maximum of 200%. Doing so will give the "Slimed" debuff (see below)
- Feed Pool - leaves pools on the ground, inflicking ~100k nature dmg every sec that players stand in them. If a player stands in them for 3 seconds the pool will be absorbed. Causes the "Slimed" debuff.
- Slimed - After intercepting the globs in mid-air, or absorbing pools, the player will take 50k nature damage every 5 seconds for 15 secs. For each additional glob or pool absorbed will increase the damage taken by 10% for the remainder of the fight. Stacks.
- Talon Rake - inflicts 114-126% weapon dmg as physical damage and increases damage taken by future Talon Rakes by 50% for 1 minute. Forces tank swapping after 2 stacks. CAN take 3.
- Quills - a whirlwind type AoE where she will spin in a circle and shoot quills at the raid (as well as raiders who may be on smaller nest platforms), dealing 112.5-137.5k physical dmg every 1 second for 10 seconds.
- Down Draft - think "Get Away 2.0" from Lei Shi. Flaps her wings rapidly pushing players to the edge of the main platform. Does NOT affect players on hatchling platforms. Does not deal damage.
- Caw - 'Nuking' ability. Cries out at 2 random players (5 in 25-man) sending sound waves at a players location dealing 270-300k damage to anyone within 8 yards of the impact. Raid needs to spread. "Can" be dodged, but REALLY difficult.
Her room is a giant circular area, you will fight her on her main platform and she appears to remain stationary. There are several smaller nest platforms spread out around the main nest on a lower level and higher level, and there are several eggs on each of these platforms. All of the eggs on these platforms are "inactive" until they begin to hatch, you will know which nests are hatching by a beam of RED light shining on the nest. She will hatch eggs near the start of the fight and roughly every 40 seconds after. There will always be platforms hatching consecutively for each "hatch phase". Once the light shines on the nest, eggs will begin to hatch. The hatching process takes 10 seconds, after which, "Hatchling" adds will spawn and begin a life cycle that varies based on their transformation.
The "Stages of Life" (life cycle) goes as follows.
Lower Nests (health of eggs/adds is the same for 10/25-man)
- Young Egg of Ji-Kun (4 per nest in 10-man, 5 in 25-man)(1.26 mil health each)
- Hatchling (1.26 mil health. The egg and hatchling have a shared health pool, so if you get the egg to 200k health left, thats what the hatchling will spawn with.) If the Feed Young ability hits the hatchlings, they will eat the orange pools on the nest, then turn into Fledglings.
- Fledglings (1.26 mil health. Same shared health pool mechanic, if the Hatchling is at 300k health, the Fledgling will have 300k health)
- Lay Egg - The Fledgings, along with doing melee dmg, will lay large eggs. These large eggs will spawn "Juveniles"
- Juvenile (1.9 mil health)
- Fly above the main platform, casting "Cheep" at players on the main platform.
- Cheep - deals 200k physical dmg to players on the main platform
Upper Nests
- Mature Egg of Ji-Kun (2 in 10-man, 3 in 25-man)(1.9 mil health)
- Juvenile - Once the Mature egg hatches, it immediately spawns the Juvenile add that starts flying around hitting players on the main platform with "Cheep".
- Daedalian Wings - Grants 4 charges of the ability "Flight"
- Flight - allows players to fly for 10 seconds. has a 15-second CD.
- Lesson of Icarus - after acquiring a feather, gives a 1 minute(10-man)/2-minute(25-man) debuff preventing players from acquiring another feather to refresh stacks.
The Nests spawn in a specific pattern/order in 10 and a slightly different order in 25-man. There are a total of 6 different nests that spawn eggs (3 lower, 3 upper) in 10-man, and all 10 nests in 25-man. At various points in the fight, 2 nests will spawn at once, kind of giving the fight a soft enrage as you eventually get overhwelmed with adds. It is best to mark the edge of the main platform with world markers so the flight team knows the location of the nests, both above and below. You should only need to use 3 world markers in 10-man, and 5 in 25-man. The order of the nests go as follows.
10-man (6 active nests, Lower NE/S/SW - Upper NE/S/Middle)
- Lower NE nest
- Lower S nest
- Lower SW nest (flight team refresh feather stacks)
- Upper NE nest
- Upper S nest
- Middle nest (above boss)
- Lower NE nest
- Lower S nest
- 2 NESTS! - Lower SW nest/Upper NE nest (flight team ignore Upper NE nest, go to Lower SW nest and refresh feather stacks)
- Upper S nest
- Middle nest (above boss)
- Lower NE nest
- Lower S nest
- 2 NESTS! - Lower SW nest/Upper NE nest
ALSO NOTE: on the upper nests, the team should do like they did on the bottom nests, just go from nest to nest killing eggs. DO NOT drop down to DPS the boss, you will lose DPS time on the eggs if you do so by having to fly back up to the nests. ALSO, if done properly, the team should have NO feather charges left after killing the last upper nests. So they have to DROP DOWN from the middle upper nest back to the main platform. YOU WILL NOT DIE FROM FALL DAMAGE! The fall damage mechanic in this fight is gimped so you should only take like 100k or so dmg from falling, IF THAT! So, even if you accidentally fall/jump off an upper level nest back down to the main platform, DO NOT USE YOUR FEATHER! YOU WILL NOT DIE FROM FALL DAMAGE!
- I looked for a while for a definitive order to the nests, but I could never find a consistent agreement from people for the order on the nests except for the first 5, which like 10-man, start on the Lower NE and go clockwise.
- Lower NE
- Lower S
- Lower SW
- Lower NW
- Lower N/Upper NE (yes, your first 2-nest wave starts here, then periodically through the fight more 2-nest wave will occur)
- From what I was reading and watching on videos (ignore the tankspot video, they make it too complicated.) the best way to handle the nests in 25-man is to do the following
- Place 5 world markers on the main platform at the location of the lower nests.
- Have 5 groups of 4 (3dps, 1 healer), assigned to EACH world marker, and each group will be responsible for their respective Upper and Lower nest only when they become active/hatch etc. They should ALWAYS have feather stacks since ALL of their first nests are the lower nest, and they dont have to constantly use their flight stacks to go to a lot of nests, and by the time they have to go down to their lower nest again, their feather debuff should be long gone and their stacks can easily be refreshed.
- So, for example, responsibilities should go
- Group 1 (X) - Lower/Upper NE nests
- Group 2 (Square) - Lower/Upper S nests
- Group 3 (Star) - Lower/Upper SW nests
- Group 4 (Triangle) - Lower NW/Upper Middle nests
- Group 5 (Diamond) - Lower/Upper North nests
Tanks should also be absorbing the pools of goo early in the fight to help make sure there is adqueate room on the platform for movement later on. In 10-man, we each rotate absorbing pools when we are not tanking the boss. Only taking 4, maybe 5 pools per rotation. However, once we do that 3-4 times each and have the Slimed debuff up to 4, we stop as the damage is simply to high at that point. Tanks should use Def CDs to absorb their pools.
Heroism should be used around the 20-30% mark, depends on your raid comp/comfort with the fight.
In the following 25-man vid you can see they use 5 world markers and have groups assigned to their respective lower/upper nests.
05 - Megaera
Mehguy — Mon, 02/18/2013 - 22:13
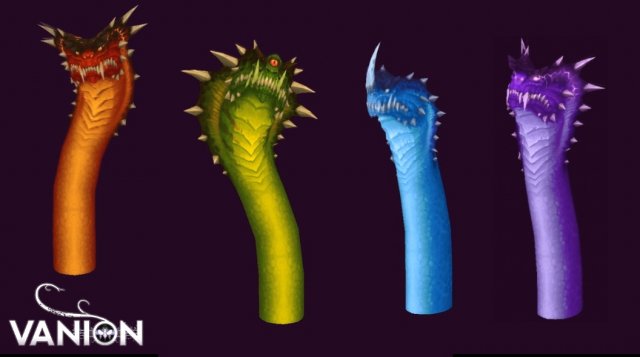
(Image courtesy of http://www.vanion.eu/news/3771/video-thron-des-donners-bosspreview-megaera/)
Megaera is the 5th encounter in the raid.
Megaera (according to WoW lore) is a corrupted Cloud serpent transformed into a hydra, hence the hydra style fight.
This fight requires
- 2 Tanks
- 3 Healers
- 5 DPS
Overall Megaera has 315mil health (10-man), 789mil health (25-man).
HOWEVER, you will never attack her body directly, you will have to "kill" her heads, which will in turn, deal damage to her body.
Each head has ~45mil health (10-man), 112mil health (25-man) meaning you will have to "kill" a total of 7 heads to complete the encounter.
This is a 1-phase encounter of rotating heads. There are 3 types of heads that you will encounter (4 in heroic). The are Flaming, Frozen, Venomous and Arcane (heroic only). And obviously, they all come with their own unique set of abilties, both when they are AT the platform to be attacked, AND when they are in the concealing fog and cannot be hit.
The fight will start off with Frozen and Venomous heads up in front, and Flaming head in back casting Cinders on the raid. Once you kill a head, it will retreat to the back, and the head in back will come to the front. It is the raids job to rotate heads appropriately to split out the amount of abilities that the heads in front AND in back deal so dmg is balanced and doesnt kill the raid by being overwhelmed. Note that for each head you kill there will be an additional head in the back of the same color dealing its extra ability. So for example, the more red heads you kill, the more red heads that will be in the back casting cinders through the fight.
- Flaming - When at the platform, it does a standard melee
attack. Its breath ability is called "Ignite Flesh". This ability
deals ~143-158k fire damage every second for 3 seconds. It will place a
debuff on affected players that deal additional 45k fire damage every
second for 45 seconds. This stacks, and will force tank swapping.- Cinders - used when in fog. Ignites a random plater,
dealing 125k fire damage to them and an additional 55k every second for
30 seconds, or until dispelled. Players affected by Cinders can
eliminate the "Icy Ground" effect from the Frozen heads (will discuss in
next part). When it is dispelled, it will drop a fire pool at the
point of dispel. This pool will inflict 125k fire damage to anyone in
it every second they are in it. These pools can be removed with one of
the Frozen head abilities.
- Cinders - used when in fog. Ignites a random plater,
- Frozen - Again, it has a standard melee attack. Its breath ability is called "Artic Freeze". It deals the same amount as the flame breath, but after receiving # stacks, the player will be frozen solid and stunned in place for 20 seconds. (currently unknown as to how many stacks will cause the "frozen" effect)
- Torrent of Ice - used when in fog. This is a beam ability (similar to Koralon) focuses a random player for 8 seconds and you have to kite it. This beam will deal ~47-52k damage at the initial point of impact, and will also leave a fog called "Icy Ground" along where it is kited (this is what players affected by Cinders will want to run through to get rid of). The "Icy Ground" deals ~47-52k damage every 0.5 seconds to any person is in it (unless affected by cinders), and reduces movement speed by 5% per stack. At 10 stacks the player becomes a frozen in place. When a player is focused by this ability, they will want to kite it over any Fire pools that are up as they will cause the pool to despawn once the ice beam hits it.
- Venomous - Again, standard melee attack. Its breath is called Rot Armor. This deals the same damage as the other breaths and causes the affected players to take an additional 10% damage from all sources per stack for 45 seconds. Again, forcing a tank swap.
- Acid Rain - Used when in fog. This ability will spit a globule of acid at a random player, dealing 350k nature damage to ALL players upon impact. The damage dealt by this decreases the further you are away from the point of impact.
- Arcane (Heroic) - See heroic guide
Rampage - Megaera uses this any time a head is killed. Its just a massive AoE shitstorm on the raid. After a head is killed, have the raid stack in one location and use Def CDs (more important later in the fight) and heal through it.
Hydra Frenzy - Whatever head is NOT killed once they begin rotating will reappear with this buff. This buffs brings its health back to full when it reappears and gives it a 20% haste increase. Causing all heads in melee to melee faster, and all heads of that color in the back to use their abilities faster.
Elemental Blood of Megaera - For each head that is killed, additional heads of that same color will receive a 15% increase the damage they deal.
Megaera's Rage (raid wipe mechanic) - Whenever there is nobody in melee to attack the heads, the heads will use "Megaera's Rage", and the heads will cast elemental bolts. These will deal ~240-255k elemental damage to all players within 5 yards of the impact locations.
This is going to be one of those fights with a lot of stuff going on and will take getting used to. Just have to keep rotating head kills so they dont get high stacks of the "Frenzy", and use the proper abilities to negate the Icy Ground and Cinder Pools.

Vote for your 25man Raid Name!
Atar — Mon, 02/18/2013 - 09:48



Recent comments
7 hours 17 min ago
4 weeks 1 day ago
7 weeks 1 day ago
7 weeks 2 days ago
9 weeks 1 day ago
9 weeks 1 day ago
9 weeks 1 day ago
10 weeks 2 days ago
11 weeks 3 days ago
13 weeks 17 hours ago