
06 - Ji-Kun

Mehguy — Tue, 02/19/2013 - 21:20
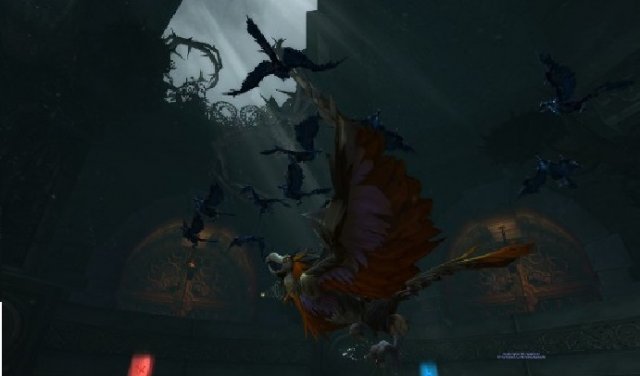
Badass Ji-Kun is the 6th encounter in the raid instance. This fight I consider to be Alysrazor 0.5, Lei Shi, and P3 of Lady Vashj all rolled into one... makes it sound hectic but its a fairly straight forward fight.
Ji-Kun has approximoximately 244mil health (10-man), 737 mil health (25-man)
This fight will require
- 2 Tanks
- 3 Healers
- 5 DPS
- You can possibly go 2 heals and 6 DPS once better gear is acquired.
Ji-Kun herself doesnt really have a lot of abilities. This is mostly an add control fight while progressively burning her down.
Her abilities consist of...
- Feed Young - will send 4-5 globs of food to a platform that has hatchlings on it. If there are no eggs/hatchings up when this is cast, it will leave "Feed Pools" on the main platform.
- Primal Nutriment - Players that are flying with the extra action ability can absorb these globs in flight and be granted a debuff, increasing damage/healing by 30% for 30 seconds. Each extra glob eaten will grant an additional 10%, up to a maximum of 200%. Doing so will give the "Slimed" debuff (see below)
- Feed Pool - leaves pools on the ground, inflicking ~100k nature dmg every sec that players stand in them. If a player stands in them for 3 seconds the pool will be absorbed. Causes the "Slimed" debuff.
- Slimed - After intercepting the globs in mid-air, or absorbing pools, the player will take 50k nature damage every 5 seconds for 15 secs. For each additional glob or pool absorbed will increase the damage taken by 10% for the remainder of the fight. Stacks.
- Talon Rake - inflicts 114-126% weapon dmg as physical damage and increases damage taken by future Talon Rakes by 50% for 1 minute. Forces tank swapping after 2 stacks. CAN take 3.
- Quills - a whirlwind type AoE where she will spin in a circle and shoot quills at the raid (as well as raiders who may be on smaller nest platforms), dealing 112.5-137.5k physical dmg every 1 second for 10 seconds.
- Down Draft - think "Get Away 2.0" from Lei Shi. Flaps her wings rapidly pushing players to the edge of the main platform. Does NOT affect players on hatchling platforms. Does not deal damage.
- Caw - 'Nuking' ability. Cries out at 2 random players (5 in 25-man) sending sound waves at a players location dealing 270-300k damage to anyone within 8 yards of the impact. Raid needs to spread. "Can" be dodged, but REALLY difficult.
Her room is a giant circular area, you will fight her on her main platform and she appears to remain stationary. There are several smaller nest platforms spread out around the main nest on a lower level and higher level, and there are several eggs on each of these platforms. All of the eggs on these platforms are "inactive" until they begin to hatch, you will know which nests are hatching by a beam of RED light shining on the nest. She will hatch eggs near the start of the fight and roughly every 40 seconds after. There will always be platforms hatching consecutively for each "hatch phase". Once the light shines on the nest, eggs will begin to hatch. The hatching process takes 10 seconds, after which, "Hatchling" adds will spawn and begin a life cycle that varies based on their transformation.
The "Stages of Life" (life cycle) goes as follows.
Lower Nests (health of eggs/adds is the same for 10/25-man)
- Young Egg of Ji-Kun (4 per nest in 10-man, 5 in 25-man)(1.26 mil health each)
- Hatchling (1.26 mil health. The egg and hatchling have a shared health pool, so if you get the egg to 200k health left, thats what the hatchling will spawn with.) If the Feed Young ability hits the hatchlings, they will eat the orange pools on the nest, then turn into Fledglings.
- Fledglings (1.26 mil health. Same shared health pool mechanic, if the Hatchling is at 300k health, the Fledgling will have 300k health)
- Lay Egg - The Fledgings, along with doing melee dmg, will lay large eggs. These large eggs will spawn "Juveniles"
- Juvenile (1.9 mil health)
- Fly above the main platform, casting "Cheep" at players on the main platform.
- Cheep - deals 200k physical dmg to players on the main platform
Upper Nests
- Mature Egg of Ji-Kun (2 in 10-man, 3 in 25-man)(1.9 mil health)
- Juvenile - Once the Mature egg hatches, it immediately spawns the Juvenile add that starts flying around hitting players on the main platform with "Cheep".
- Daedalian Wings - Grants 4 charges of the ability "Flight"
- Flight - allows players to fly for 10 seconds. has a 15-second CD.
- Lesson of Icarus - after acquiring a feather, gives a 1 minute(10-man)/2-minute(25-man) debuff preventing players from acquiring another feather to refresh stacks.
The Nests spawn in a specific pattern/order in 10 and a slightly different order in 25-man. There are a total of 6 different nests that spawn eggs (3 lower, 3 upper) in 10-man, and all 10 nests in 25-man. At various points in the fight, 2 nests will spawn at once, kind of giving the fight a soft enrage as you eventually get overhwelmed with adds. It is best to mark the edge of the main platform with world markers so the flight team knows the location of the nests, both above and below. You should only need to use 3 world markers in 10-man, and 5 in 25-man. The order of the nests go as follows.
10-man (6 active nests, Lower NE/S/SW - Upper NE/S/Middle)
- Lower NE nest
- Lower S nest
- Lower SW nest (flight team refresh feather stacks)
- Upper NE nest
- Upper S nest
- Middle nest (above boss)
- Lower NE nest
- Lower S nest
- 2 NESTS! - Lower SW nest/Upper NE nest (flight team ignore Upper NE nest, go to Lower SW nest and refresh feather stacks)
- Upper S nest
- Middle nest (above boss)
- Lower NE nest
- Lower S nest
- 2 NESTS! - Lower SW nest/Upper NE nest
ALSO NOTE: on the upper nests, the team should do like they did on the bottom nests, just go from nest to nest killing eggs. DO NOT drop down to DPS the boss, you will lose DPS time on the eggs if you do so by having to fly back up to the nests. ALSO, if done properly, the team should have NO feather charges left after killing the last upper nests. So they have to DROP DOWN from the middle upper nest back to the main platform. YOU WILL NOT DIE FROM FALL DAMAGE! The fall damage mechanic in this fight is gimped so you should only take like 100k or so dmg from falling, IF THAT! So, even if you accidentally fall/jump off an upper level nest back down to the main platform, DO NOT USE YOUR FEATHER! YOU WILL NOT DIE FROM FALL DAMAGE!
- I looked for a while for a definitive order to the nests, but I could never find a consistent agreement from people for the order on the nests except for the first 5, which like 10-man, start on the Lower NE and go clockwise.
- Lower NE
- Lower S
- Lower SW
- Lower NW
- Lower N/Upper NE (yes, your first 2-nest wave starts here, then periodically through the fight more 2-nest wave will occur)
- From what I was reading and watching on videos (ignore the tankspot video, they make it too complicated.) the best way to handle the nests in 25-man is to do the following
- Place 5 world markers on the main platform at the location of the lower nests.
- Have 5 groups of 4 (3dps, 1 healer), assigned to EACH world marker, and each group will be responsible for their respective Upper and Lower nest only when they become active/hatch etc. They should ALWAYS have feather stacks since ALL of their first nests are the lower nest, and they dont have to constantly use their flight stacks to go to a lot of nests, and by the time they have to go down to their lower nest again, their feather debuff should be long gone and their stacks can easily be refreshed.
- So, for example, responsibilities should go
- Group 1 (X) - Lower/Upper NE nests
- Group 2 (Square) - Lower/Upper S nests
- Group 3 (Star) - Lower/Upper SW nests
- Group 4 (Triangle) - Lower NW/Upper Middle nests
- Group 5 (Diamond) - Lower/Upper North nests
Tanks should also be absorbing the pools of goo early in the fight to help make sure there is adqueate room on the platform for movement later on. In 10-man, we each rotate absorbing pools when we are not tanking the boss. Only taking 4, maybe 5 pools per rotation. However, once we do that 3-4 times each and have the Slimed debuff up to 4, we stop as the damage is simply to high at that point. Tanks should use Def CDs to absorb their pools.
Heroism should be used around the 20-30% mark, depends on your raid comp/comfort with the fight.
In the following 25-man vid you can see they use 5 world markers and have groups assigned to their respective lower/upper nests.


Recent comments
7 hours 17 min ago
4 weeks 1 day ago
7 weeks 1 day ago
7 weeks 2 days ago
9 weeks 1 day ago
9 weeks 1 day ago
9 weeks 1 day ago
10 weeks 2 days ago
11 weeks 3 days ago
13 weeks 17 hours ago