
03 - Norushen

Mehguy — Thu, 08/15/2013 - 12:54
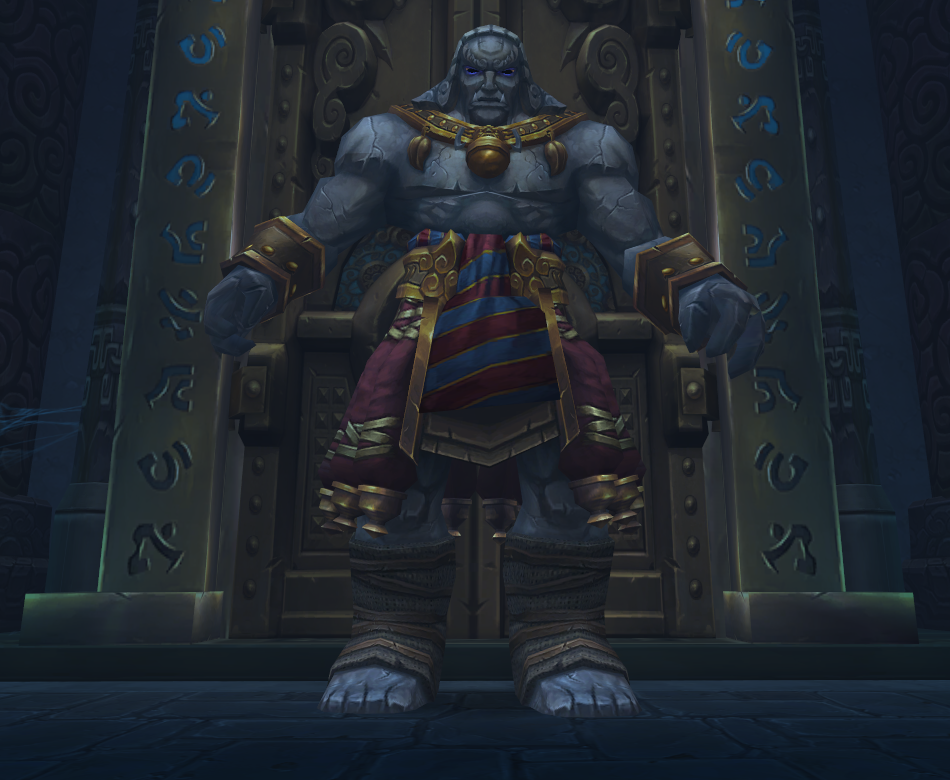 Norushen is the 3rd encounter in the Siege of Orgrimmar raid, and 3rd encounter in the Vale of Eternal Sorrows LFR.
For a detailed view of his abilities and loot table across LFR/Flex/10/25 please CLICK HERE
GENERAL STRATEGY/OVERVIEW
During this fight, you will not attack Norushen directly, rather, he is a friendly NPC and when you start the encounter, he will see you have corruption within you and seal you in a Quarantine Zone. He will pull some of that corruption from each player and form an Amalgam of Corruption. Essentially it just looks like a large Sha. This is what you must defeat to end the encounter.

During this encounter, players will have a Corruption Bar on their screens, at the start, players will start out with 75 stacks (out of 100) of Corruption. The more "Corrupt" a player is, the DPS will deal less damage, Healers will heal less, and Tanks will receive more damage. The overall goal of the fight is to completely Purify yourself of your corruption to be able to deal more dmg, heal more and take less damage. In order to become Purified, each player must go through an individual challenge.
NOTE: The reduced damage/healing/dmg received does not apply to the adds in the encounter, ONLY the Amalgam.
This encounter has a strict 7-minute enrage timer, if the Amalgam is not defeated by then, Norushen will cast Quarantine Measures, killing everyone in the room.
The Amalgams abilities are as follows.
- Unleashed Anger - slashes at his current target, deals ~320k phys damage
- Self Doubt - Tank debuff, increases the damage Unleashed Anger deals by 50% per stack, requires tank swapping.
- Blind Hatred - creates a line of corruption that will spin around the room in a 180-degree semi-circle. This can be ran/jumped through but will deal EXTREMELY HIGH dmg. Overall it will likely one shot you like Durumu's beam did. It doesnt move that fast and can be easily avoided.
- Icy Fear - Deals 60k frost AoE dmg to the raid every 3 sec. The damage increases as he loses health
- Frayed - When Amalgam reaches 50% health, and for every 10% health after, he will spawn an "Unleashed Manifestation of Corrption" add. (more below)
- Fusion - every "Expelled Corruption" he receives from smaller adds will increase the damage he deals by 8% for 15 seconds. Stacks. (more below).
REMOVING CORRUPTION / ADDS
At the start of the fight, on the left and right side of the room, there will be two spinning orbs called "Purifying Light". When a player clicks on these, they will be transported to a phased room that will contain adds, and a test that will vary based on your role in the fight. You must complete this test to be cleared of your Corruption.
- Tanks - You will be zoned into a Test of Confidence and have to face a "Titanic Corruption" and must survive for 1 minute. If you survive for 1 minute, you will be instantly ported out and cleansed of your corruption. The Titanic Corruption has some rather nasty abilities to deal with.
- Titanic Smash - deals 400k shadow dmg in a frontal cone. Can be avoided.
- Corruption - each successful melee swing gives a debuff stack of Corruption, dealing 8k dmg every sec per stack.
- Hurl Corruption - fires a ball of corrption at the tank, deals ~225-250k shadow dmg, mitigatable, possibly interruptable.
- Burst of Corruption - AoE that deals ~150k shadow dmg to all enemies, mitigatable.
- Piercing Corruption - deals 320k phys dmg to target, cannot be absorbed/mitigated, but can be avoided completely.
- Healers - You will be zoned into a Test of Reliance, where you must defeat a Greater Corruption. You will be aided by several NPCs who will already be fighting the boss. You will have to keep the NPCs alive to allow them to kill the Corruption, once it is dead, you will be ported out and cleansed of your corruption. Some guilds found it easier to just use DPS spells to help kill the Corruption faster as compared to healing the NPCs. May depend on your comfort level/class. The Corruption has a few abilities, primarily AoE, that affects all NPCs and yourself, but the primary ability you should worry about is
- Lingering Corruption - This deals 320k Shadow damage to the player/NPC if not cleansed within 10 seconds.
- DPS - You will be zoned into a Test of Serenity, you will be pitted against 5 mobs total (4 Essence of Corruption and 1 Manifestation of Corruption). To zone out of this encounter you must defeat these mobs and collected the Gold Orbs they drop. These gold orbs reduce your corruption stacks and once you remove all yout stacks, you will be ported out of the Test. Even if there is a mob remaining. The mobs abilities are as follows.
- Manifestation of Corruption - repeatedly casts Tear Reality - is a conal shadow damage ability that can be avoided/ranged.
- Essence of Corruption - Casts a ball of corrupted energy in a straight line, moves fairly quick, but can be avoided. Deals 80k shadow dmg if it strikes you.
On to the adds. Initially you will fight adds in your "Tests", BUT, once a DPS kills his/her adds in their "Test", that add will RESPAWN in the primary phase as an "Unleashed" form of themselves. And have some abilities to deal with. Remember, for each add a DPS kills, it will respawn and the rest of the raid must deal with it. Do NOT send 2 dps at once or you will get overwhelmed with adds.
- Unleashed Manifestation - must be tanked, does melee dmg and the following. These are also the adds that the Amalgam will spawn at 50/40/30/20/10% health.
- Burst of Anger - AoE that deals 40k shadow dmg to all players
- Residual Corruption - When defeated, will leave a void zone on the ground that will deal ~70k shadow damage to ALL players unless it is touched/absorbed by a player.
- Absorbing this corruption will give back the player 25 stacks of corruption. NOTE: if this mob dies on top of a group of players, all players standing in the corruption will receive the stacks. Kill away from the group and have a designated person absorb the corruption.
- Unleased Essence - stays stationary on the outter edge of the room. should be focused quickly.
- Expel Corruption - Shoots balls of corrupted energy at the Amalgam. This will deal ~80k shadow dmg to the first person it hits. If it does not hit anyone and reaches the Amalgam, it will increase its damage dealt by 8% for 15 secs (See the FUSION ability above). This stacks. Supposedly can be interrupted, and must be intecepted before it reaches the Amalgam.
The goals of the fight are to send 1 dps/1 healer, or 1 dps/1 tank into their tests simultaneously. With a 5 dps/3 heal/2 tank setup, this should balance out perfectly (for 10-man). And to try to maintain as low of a corruption stack as possible to defeat the encounter, and defeat the smaller adds ASAP to prevent the Amalgam from getting high dmg stacks and wiping the raid.
Ideally, the best way to probably counter the extra 25 stacks of Corruption from the Unleashed Manifestations early on in the fight, is to have the DPS focus the larger Manifestations first in their Test, then once it is dead and comes to the normal phase, the rest of the raid kills it immediately and have ONE person absorb it, getting their stacks from the base 75->100 and then have that player go complete their Test, there-by removing 100 stacks of Corruption instead of just their base 75.
The fight gets very hectic at the end for healers, so its best for them to not have any extra stacks of corruption at the end so they can get as much healing output as possible from the extra damage Amalgam has received from either "Expel Corruption" or from the stacking Frost damage "Icy Fear".


For holy Unbreakable spirit
Elapsed — Wed, 09/11/2013 - 01:34For holy Unbreakable spirit like Dragon recommended for ret, again with Holy Prism. Make sure you have some good raid frames that show boss health bars for when you get phased the friendlies that you have to heal will be shown there. Move out of shit in the phased area and instantly cleanse whomever gets the magic debuff. Very easy to heal them up and even get some denounce/holy shock action on the bad guy to get you out quicker to the group. having rotating eternal flames up on people is incredibly important here as the entire raid will be taking a ton of damage. On our first kill I did 57.55 million healing and Elekraqt (resto shammy) was close behind. A lot of healing comined with a longer fight makes this one a real testiment to your healing crew
Norushen tips
Mehguy — Thu, 09/12/2013 - 13:14This boss was a fairly decent dps check.. NOTE that the DBM timers say enrage is in 10 minutes, it is actually 7 minutes. We had a 7% wipe (I think... might have been 3%) the first night because we didnt push hard enough and though we had time.
If someone dies, immediately Brez them and get them up... if you lose someone and you cant get them up, you might as well wipe it until some gear is accumulated, its fairly tight at the start (giggity).
We marked the orb locations for the "individual challenges" that players have to do to remove their corruption.
The method that worked for us (10-man) was to have all 5 dps utilize the orb on the left, while the 3 healers/2 tanks utilized the one on the right. The order in which we sent people down was as follows.
We did the first orb with our top dps and our raid healer so we could deal with the damage, it can get crazy at times so max raid healing is helpful. When the big add (which we call big ugly) spawned, we had the off tank pick up the pool it leaves behind when killed, increasing his corruption from 75 to 100, then by that time the healer should be back for the OT to go down and do his event to remove all 100 stacks. Then a big add that comes up will be taken by the MT to increase his stacks, OR by any DPS or healer that has yet to do their "challenge". If either a DPS or a healer already went down and dropped their stacks, they should NOT pick up another pool from the big guys. Only those who have not gone down. Once its at that point where everyone is either at 100 stacks or has gone down for their challenge, we only let the tanks pick upt he pools. The dmg output on the tanks wasnt that bad, so we were fine with absorbing 4 stacks again and going back up to 75-100 corruption. The primary goal is to have the DPS and healing for it, so having either healers or DPS regain stacks after they have already dropped them is a waste.
Definitely focus the little adds on the outer edge of the room when they spawn in from the DPS challenges. And have the tank or a melee stand between the small add and the boss so any bolts it shoots at the boss will not buff his damage.
The Big adds do pulse some damage but its not too terrible, but when they die that pool pulses higher damage, so make sure whoever is absorbing the pools stands on top of where it dies so it pulses 1 time at most.
The beam "is/isnt" as deadly as durumu.. you CAN run through it but you will take HEAVY damage. Just run away from it like you did with Durumu and youll be fine... it moves slow anyways and only goes like 180 degrees instead of a full 360. It does NOT have a set spawn/start point, it will do it in random locations, but it did seem to focus on wherever there was a concentrated number of people at times.
Norushen: Ret Paladin Talents, Glyphs, Tips
Dragon — Tue, 08/20/2013 - 12:13Definitely seems like a mandatory fight for both Unbreakable Spirit, Mass Exorcism and Light's Hammer. From the looks of it you will want to leave Divine Protection unglyphed (so that it mitigates purely magic damage) and also selfless healer to help keep yourself up and toss out a raid heal if need be.
all comments above much appreciated
badpenny — Thu, 09/12/2013 - 13:43and very helpful. On flex we ran out of time on Tue and only got this one to 12%. I honestly think we don't have the gear yet for this boss for my raid, but luckily flex will help us on this deficiency over the next several weeks.