
02 The Black Forge - 1 - Hans'gar and Franzok

Mehguy — Sun, 08/24/2014 - 14:31

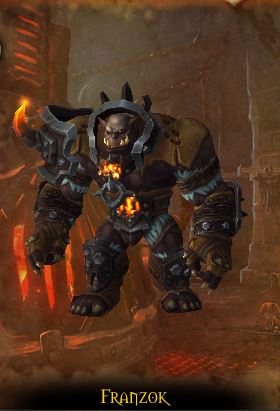
Hans'gar and Franzok is the first encounter of The Black Forge wing in BRF.
For a more detailed view of his abilities or loot, please view the in-game dungeon journal or click HERE to view at WoWHEAD.
This fight is an single-phase encounter. These bosses have a shared health pool, and can utilize their abilities to tag-team the tanks. Primary focus on this encounter is their use of the conveyor belts and dodge the primary damage from the belts. They also gain rage as they take damage, which allows them to increase the frequency of their ability usage.
Conveyor Belts
Searing Plates - This occurs when Hans'gar does his Pumped Up ability. These plates roll across the belts from one side of the room to the other, dealing heavy fire dmg every 1 sec you are on the plate. Just dodge them as they roll across.
Scorching Burns - Occasionally at the beginning/end of the belts, the walls will ignite on fire, dealng mild/moderate damage to those it touches. This is to prevent players from just stacking against the wall when the belt is going and sidstepping the Plates or Presses (from Pulverized).
Pulverized - This occurs when Franzok does his Pumped Up ability. Stamping presses come down from the roof, smashing onto the belts in the identified/lit up squares. Deals heavy phys dmg. These appear in various patterns, so once you see the first few stamps go off during that pulverize, you can memorize which plates will get stamped for the duration of that Pulverized 'phase'. Some are set patterns that go around the room, others are a set pattern that just goes down along the belt from side to side. Watch the attached video and it explains it. Very simple. *NOTE* - give these Presses a little grace room (3 yards) as the damage tends to hit outside of the marked area.
Boss abilities
These bosses share 3 primary abilities, and Franzok has 2 additional abilities that he will use.
Hans'gar & Franzok
-Body Slam - Leaps towards an enemy - prefers ranged, possibly the furthest person, then will run back to the tank. As their rage bar increases, they will start jumping to multiple targets. The targeted player(s), all players within 12 yards AND the tank with threat on that boss will receive Shattered Vertebrae which increases phys dmg taken by 30% for a set amount of time (old beta had the debuff lasting 40 seconds, where recent PTR had it lasting 8 sec). Targeted person should be marked by a large circle around them, so there should be time to get away from them. Each time the boss lands from Body Slam or also from jumping down after activating a Conveyor Belt he will cast Aftershock, which is just minor raid wide dmg every 2 seconds for 4 sec.
-Crippling Suplex - Whenever either Hans'gar or Franzok leave the room to activate the Conveyor Belts, the one that leaves the arena will pick up his tank, and throw it to the other boss and smash the 2 tanks together. Dealing physical damage to both tanks equal to the MAXIMUM health of the picked up player. Tanks use personal CDs for this, or external if personals are on CD.
-Pumped Up - The lower the health pools, the more their rage bar will increase. As they gain rage, they will deal more melee dmg, increase the # of hammers thrown by Skullcracker, reduce casting time of Disrupting Shout and increase the number of jumps performed during Body Slam.
Franzok only
-Disrupting Roar - interrupts all spellcasting within 100 yards (think Twin Ogron)
-Skullcracker - Throws a hammer to a nearby enemy (favoring melee), dealing moderate phys dmg to them.
Summary
Overall the fight isnt too "complex", the dungeon journal doesnt give a great explanation of abilities really IMO.
Each tank takes a boss, there shouldnt be any tank swapping. Whenever a tank gets picked up for Crippling Suplex use a personal CD to mitigate damage to each other. Thats the extent of the tanks job. When either of the bosses do Body Slam just be sure to either have people aware to run away from the targeted player or have the targeted player run away from others. Healers be aware of those who were affected by the Body Slam as they will take a little more damage from Aftershock due to the Shattered Vertebrae debuff. Also stop-casting when Disrupting Roar goes out. Nothing you can really do about Skullcracker except heal though, maybe use a minor personal CD. Pay attention to which belt is spawning based on which boss goes up so you know to run around either the Searing Plates as they roll across the room, or dodge where the Presses are going to come down. Try to memorize the patterns.
TLDR/Saedo's Cliffs Notes
First boss of The Black Forge (2nd wing).
Essentially, the fight is 2 bosses, and through the stages, one of them jumps away, activates a conveyer belt mechanic, we fight one boss for a while during that, then he returns, we damage both bosses at the same time again, then other boss jumps away activating his conveyor belt mechanic, then later jumps back into the fight, repeat.
First conveyer belts bring the flaming pop tarts, don't be hit by them.
The boss jumping back to raid also means aoe damage, don't be near the guy with the arrow on his head.
Second conveyer belt ability is the dance of not being stamped by the machinery.
Live Vid
PTR Vid - Start vid at 10:34


Recent comments
7 hours 17 min ago
4 weeks 1 day ago
7 weeks 1 day ago
7 weeks 2 days ago
9 weeks 1 day ago
9 weeks 1 day ago
9 weeks 1 day ago
10 weeks 2 days ago
11 weeks 3 days ago
13 weeks 17 hours ago