
01 Slag Works - 2 - Oregorger

Mehguy — Sun, 08/24/2014 - 14:30
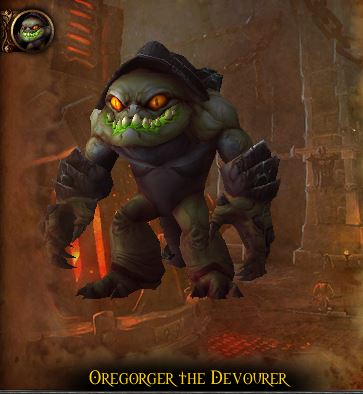
Oregorger is the 2nd boss in the Slag Works (1st wing) of BRF.
This fight is fairly unique as its probably one of the only fights where you are supposed to face the boss TOWARDS the raid for marjority of the encounter.
Oregorger is a repeating 'phase' encounter like Gruul, but its not time based, its "blackrock energy" based. He has a "blackrock ore" energy bar that slowly depletes as he uses his abilities. Once he reaches 0 energy, he will roll around the room to try to collect/eat more ore to fill up his bar again. Your goal is to keep him in phase 1 as long as possible and get him out of phase 2 (his 'rolling' phase) as quickly as possible.
For a more detailed view of his abilities or loot, please view the in-game dungeon journal or click HERE to view at WoWHEAD.
Abilities
Phase 1 - Satiated Slaughter
Acid Torrent - Fires a cone of acid at ranged targets, dealing HEAVY phys damage to the person closest to the boss within that cone (aka the Tank) and increases the damage that person takes by the next AT for 20 seconds. All other targets in the cone take "heavy" damage, but that damage is reduced based on the closest (tank) targets total damage mitigation. IE, the tank will take the heaviest hit on this, his mitigation will make the ranged players take reduced damage from the ability. If the tank is not in the cone for this, ranged will take the full hit.
Retched Blackrock - Vomits pools of Blackrock Ore ooze at you (should always be ranged players), deals nature dmg every 1.5 sec. "dont stand in fire"
Explosive Shard - Throws a Shard, typically at melee, dealing mild/moderate dmg and knocking back players in the area. Detonates after 3 seconds, dealing additional fire damage and stunning nearby enemies. Explosive/fire dmg can be ranged, unsure of range limit.
Blackrock Barrage - INTERRUPTABLE AND NEEDS TO BE INTERRUPTED AS MUCH AS POSSIBLE! Throws blackrock spines at the raid, dealing mild/moderate raid-wide damage.
Acid Maw - Nature damage DoT, deals dmg every 2 sec for 8 secs.
Phase 2 - Feeding Frenzy
Rolling Fury - Rolls around, dealing heavy phys dmg and knocks down anyone he hits.
Earthshaking Collision - Deals mild/moderate raid-wide damage WHEN he is rolling. This dmg increases due to Hunger Drive
Hunger Drive - The longer the boss remains in Feeding Frenzy, he gains stacks of this. Increases dmg of Earthshaking Collision by 5% per stack, stacks up to 100.
Summary
P1 - Melee stacks behind the boss and moves from the back of the boss to the side of the boss each time Explosive Shard goes out to prevent additional fire/exposive damage. Ranged players stay stacked at max range, and move to the edge of Retched Blackrock pools to keep them overlapped and save space. Off-tank should stack with/near Melee so they dont take uneccessary Acid Torrent damage or the debuff. Primary Tank faces the boss towards the ranged group so he takes the major hit of the AC, using personal mitigation to lessen the damage the ranged group takes. Tank swap when appropriate. INTERRUPT ROTATION FOR Blackrock Barrage! This is crucial, interrupting BB will keep him in P1 much longer as he wont be burning through his blackrock energy as fast, and will save healer mana by reducing raid-wide damage.
P2 - The boss will start rolling around the room and crashing into random walls. There will several crates of Ore around the room that the boss will roll through. You need to spread around the room when he enters this phase and break open the crates so the ore is available for him to eat to replenish his bar, otherwise he wont eat it. Pay attention to which way he is rolling around so he doesnt roll through you. Once he crashes into a wall, he will only roll 2 directions (left or right *note that he CAN roll around corners*), he will never roll backwards. So if you are concerned about being hit once your crates are broken, just be sure to be "behind" him or in the area he just rolled from. The longer he is in this phase, the more his rolling AoE damage will ramp up over time. Quickly break the boxes open as fast as possible to get him out of this phase and back into P1.
Rinse and repeat.
TLDR/Saedo's Cliffs Notes
Short version, tanks have to be the closest players, and they'll do their classic tank swap dance. Avoid puddles (mostly ranged), avoid exploding shards (mostly melee), and interrupt the Blackrock Barrage (raid wide damage) as much as possible.
That's phase 1, until he runs out of "mana"/energy, his main abilities consume it. Phase 2 he rolls around damaging players, avoid that. But the goal is to start attacking crates to reveal the ore inside for him to gorge on to refill his "mana"/energy to restart Phase 1. Try to get out of this phase ASAP.
LIVE vid
PTR Vid - Start this vid at the 5-min mark.


Recent comments
7 hours 17 min ago
4 weeks 1 day ago
7 weeks 1 day ago
7 weeks 2 days ago
9 weeks 1 day ago
9 weeks 1 day ago
9 weeks 1 day ago
10 weeks 2 days ago
11 weeks 3 days ago
13 weeks 17 hours ago